Enchanted to serve…dinner, cookies, cakes….

Author: Wench Sherry

Candy Shop Pizza

Candy Shop Pizza

Hi Lovies!  Boy, have I got a treat for you today!  And, I do mean treat, as in soft, chewy, chocolatey, peanut-buttery deliciousness.  I am going to share with you my world-famous Candy Shop Pizza recipe. Okay, okay, so maybe not world famous but it is pretty darn famous amongst my friends and family and they are my world.  So, yeah, Sherry’s-world-famous is a good description. I clipped the original version of this recipe from a magazine many moons ago. I still have the clipping but I have no idea what the magazine was so I cannot give any proper kudos.  I have tinkered with proportions and ingredients throughout the years and made it my own. This is kind of a cookie, kind of a dessert pizza, and kind of a candy all in one. We have used it as a substitute for birthday cake many times. It is one of my boys’ very favorite treats and, I gotta admit, it is also one of mine.  No matter where I take this dish I am asked for the recipe. I willingly share, with the added comment that you can personalize this dessert to your own liking so easily. The sky is definitely the limit with this one. I have a standard combination of ingredients that I use because we all love it so much but, seriously folks, you could make so many variations of this.

I have been itching to share this gem with you but waited until just the right time.  And, that time is now – after Halloween. Because, you see, this recipe is a wonderful way to get rid of your leftover Halloween candy, or any leftover candies.  Or, you can just go buy what you need to make it any dang time you want. That’s what I do. I mean, if I have to buy a fun size package or 6 of little candy bars to make one of my family’s favorites, I don’t mind at all.  Aaaannnddd, if there happens to be any of those little bars left that need to be used up, well then, I will certainly volunteer my services. Unless, they too nougaty or have coconut. Then, I won’t be munching on them. Funny thing, I hardly ever have those kinds of candy in the house.  Wonder why. Oh well, it’s a mystery.
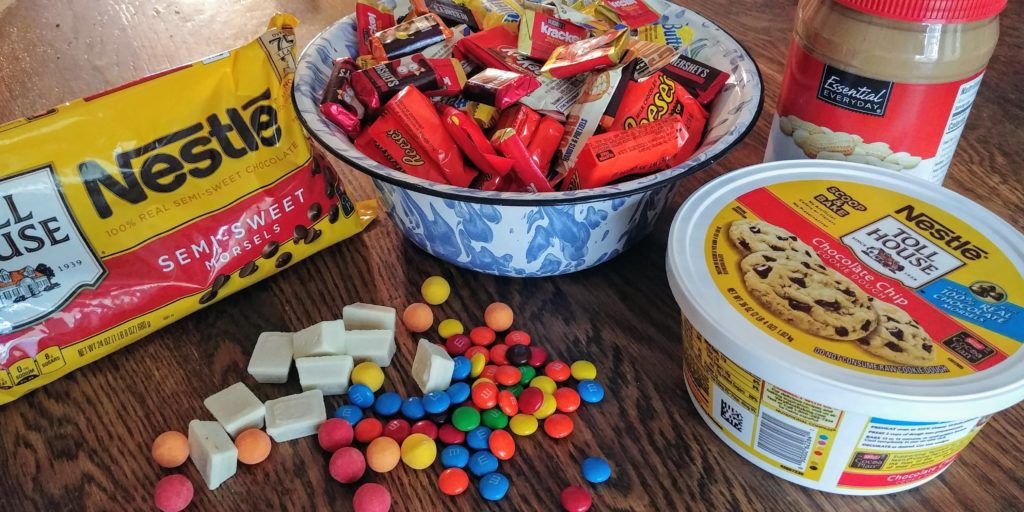
Candy Shop Pizza ingredients

So, this treat starts off with store-bought cookie dough.  I always use chocolate chip, but you could easily use any other flavor.  I do not recommend using your homemade cookie dough unless it is a cookie cake recipe or perhaps a rolled cookie recipe.  The store-bought dough is nice and dense and holds up well to the toppings without crumbling. You want for the finished product to be eaten as a piece of pizza.  Just pick it up and munch. No forks. What fun are forks? So, anyway, I use the store-bought Nestle Toll House cookie dough because it is my favorite. Now, for this post I am going to use the tub of cookie dough that fills a cookie sheet, but you can also get the roll for a regular pizza pan.  When I first made this treat, I always used a pizza pan, but these days I usually make it on a cookie sheet so that we can feed more people.  And, trust me, everyone will want to partake in this yumminess.

The “sauce” is made with a combination of melted semi-sweet chips and peanut butter. As I said, this recipe is really versatile.  You could use any flavor of chips that you like and switch out the peanut butter with some other nut butter or spread.  I have made a white version of this with sugar cookie crust and white chocolate chips mixed with the peanut butter.

The toppings are simply chopped candy.  Any kind of candy that you enjoy will work as long as it can be chopped or is already bite size.  I always attempt to have a variety of textures and flavors, although mostly chocolate because, well duh, I’m a chocoholic.  I do like to add some white chocolate candy as well and always M&M’s because I like for the pizza to be colorful and pretty.

Start off by preheating your oven to 375 degrees and lining your cookie sheet or pizza pan with parchment paper.  You can skip the parchment if you spray the pan with cooking spray. Chop your candy, except the M&M’s, into very small pieces.  Place all of these in a large bowl, add the M&M’s and mix a bit. The amount of candy is dependant on your taste. For a cookie sheet sized pizza I normally have about 6 cups of chopped candy.  And, if you are anything like me, you will need an extra cup to replace the candy pieces that you munch on during the chopping process. Don’t judge. Set this aside.
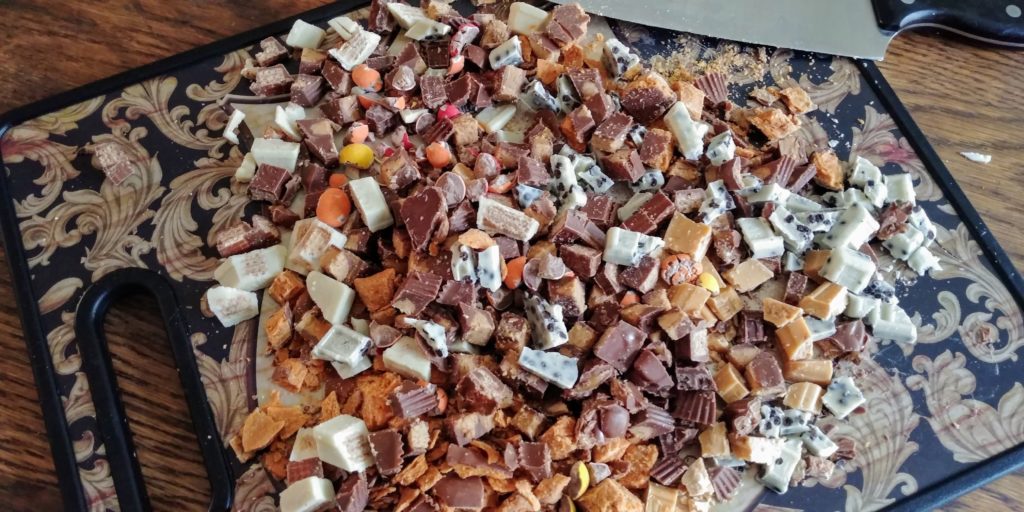

Candy Shop Pizza chopped candy

(more…)

Best Ever Baked Potato Soup

Best Ever Baked Potato Soup

Hi Everyone!  So, it went straight from summer to winter here in central Illinois in about a week’s time.  Seriously, it got cold. I know that Autumn will return but at the time of this writing it is chilly-willy.  I had the immediate urge to make soup. And, not just any soup, but one of our very favorite soups. This is absolutely Cody’s very favorite soup.  He has always been a baked potato fan and this soup incorporates all of the flavors of a loaded baked potato in a warm and cozy bowl of happiness. If I ever want to get him to come home for a visit, all I have to do is mention that I am making this soup.  He will be there, come heck or high water. And, I love having him at home so I am not above using this ploy to get some Cody-time. But Cody is not the only one who loves this soup. It is frequently requested at family gatherings and potlucks and holidays and Super Bowl parties.  This recipe makes a large pot of soup so there is plenty to share with guests and then have some for leftovers. It reheats well and so is ideal for a quick lunch.

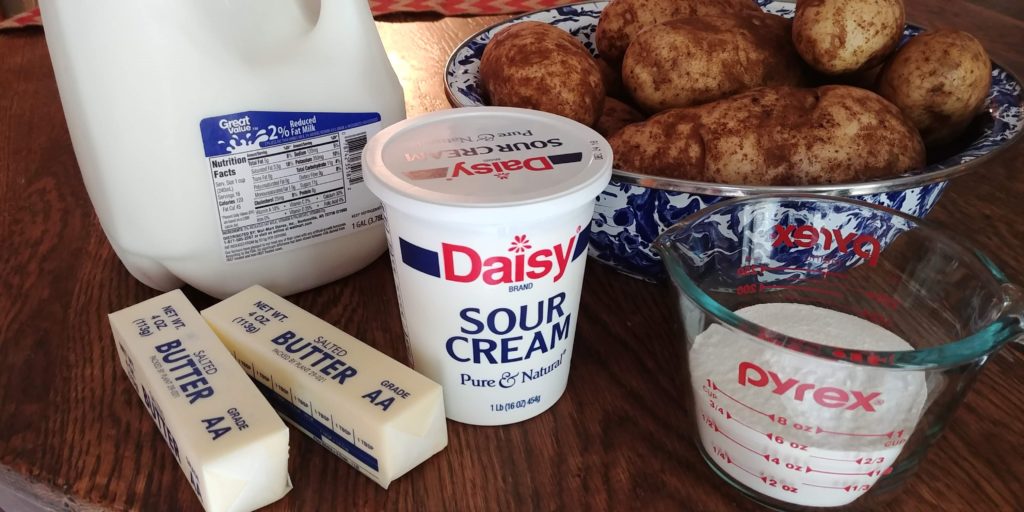
The ingredients for this soup are baking potatoes, butter, milk, flour, sour cream (full-fat) and salt and pepper to taste.  You also want to have some bacon that has been cooked to crisp and crumbled and some shredded cheese (your choice of cheese but cheddar works well) to sprinkle atop the completed soup when served.  That’s it. You could probably make this soup today with what you already have in your kitchen.

Best Ever Baked Potato Soup ingredients


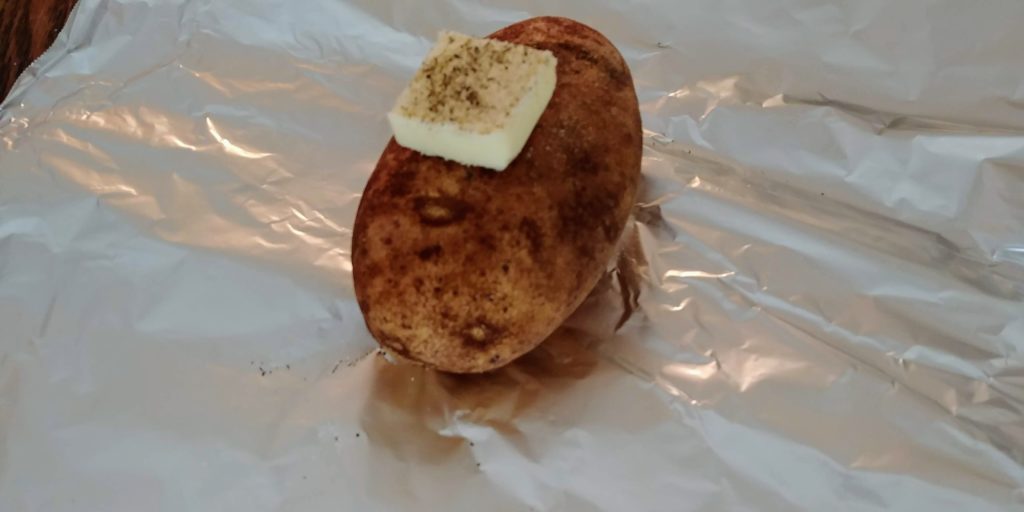
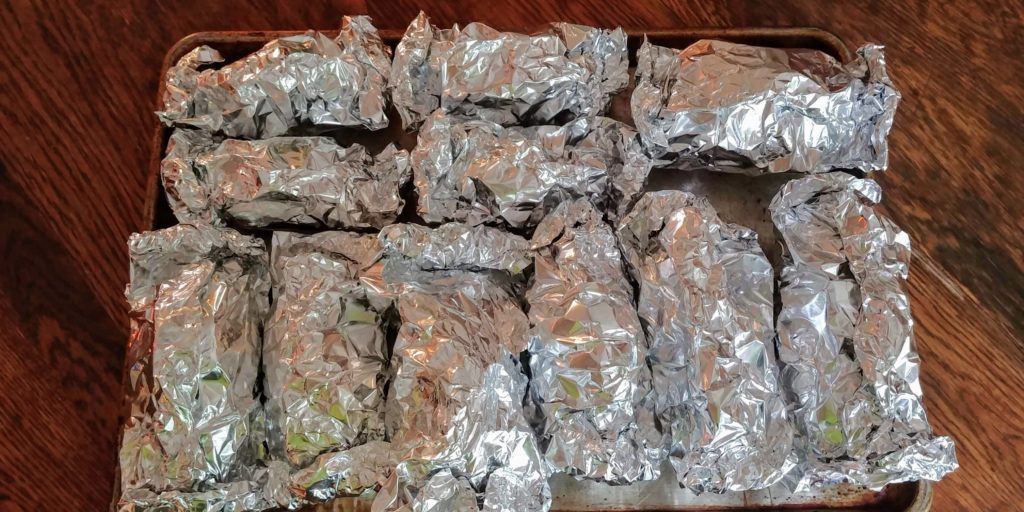
You will need several large baking potatoes.  The number depends on the size of your potatoes.  If you buy the jumbos then you can get by with fewer – say 8 rather than 12.  When I get done wrapping my taters and have them on the baking sheet, they are side by side and cover the whole sheet.  That is how I gauge if I have the correct amount. Now, I like to bake my taters in the oven in foil. You can use the microwave but I just think that oven-baked potatoes taste better and have a better texture.  I bake mine in foil because that is the way that Mom did it and I just prefer the flavor. But, you do whatever makes you happy. So, scrub the potatoes clean and then pat dry. Tear off pieces of foil big enough to wrap your potatoes completely.  Place one potato on each piece of foil, sprinkle with salt and pepper to taste and add a pat of butter. I usually cut my stick of butter so that each pat is ½ of a Tablespoon.

Best Ever Baked Potato Soup unwrapped potato


Wrap all of this up tightly and place on a rimmed baking sheet.  When you get all of these guys wrapped up, place them in the oven and bake until tender.  I normally bake mine for 45 minutes at 425 degrees. You can test this by piercing the potato with a fork to see if it slides in easily, all the way to the center.  Once the potatoes are tender, remove them from the oven and open the foil so that they can cool for a bit. You want for them to be cool enough to handle. No one wants to play Hot Potato when they are making dinner.  Set them aside to cool.

Best Ever Baked Potato Soup bunch of wrapped potatoes


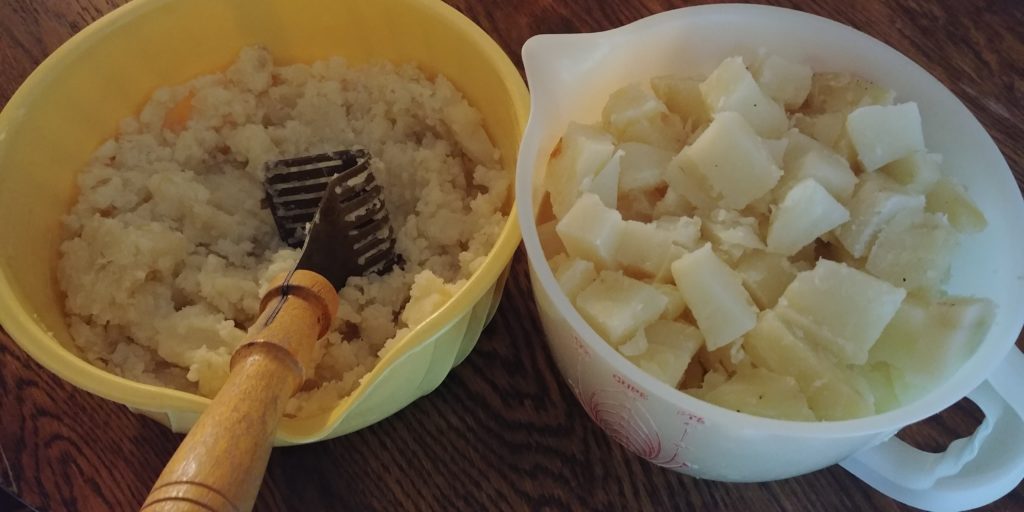
When the potatoes are cool enough to handle, remove the skin by using a knife to peel it away from the cooked flesh.  This is the part of the process that usually brings my family into the kitchen. We love to munch on the skins, especially that yummy part that comes from the bottom of the potato where the butter has caramelized a little and made the skin kind of chewy.  Delish! And potato peels have a lot of nutrients, I hear, so this is a good thing, right? Anyway, divide the peeled potato into two large bowls. Use a potato masher or something similar to mash up one bowl. The other bowl should be cubed into bite-size pieces.  Set these aside.

Best Ever Baked Potato Soup potatoes in bowls


In a large heavy-bottomed pot over medium heat, melt the butter and then add in the flour.  Stir this mixture constantly and cook for about 2 minutes until the roux has darkened in color.

Best Ever Baked Potato Soup roux


Slowly add the milk and use a whisk to mix well so that virtually no lumps of roux remain.  Cook this mixture for 10 minutes or until slightly thickened. Add in the mashed potatoes and rapidly stir with a whisk to break up the potato and blend well.  Add in the chunks of potato and stir. Stir frequently and watch that the soup does not scorch on the bottom. Cook this mixture until it is heated through and steamy.  Add in the sour cream and stir well. Allow the soup to heat all the way through again but don’t let it come to a simmer or boil. Add salt and pepper to taste. Remove from the heat and ladle into bowls.  Top with crisply cooked and crumbled bacon and shredded cheese if desired. You could also add chives or bits of green onion. This soup turns out thick and creamy with hearty chunks of potato and a delicate sour cream flavor.  It is a definite comfort food that your family will appreciate on a chilly day – or any day.

Best Ever Baked Potato Soup complete in bowl 1


Best Ever Baked Potato Soup

November 5, 2018
: 8 - 10 servings
: Easy

This soup is thick and creamy with hearty chunks of potato and a delicate sour cream flavor.

By:

Ingredients
  • 8 - 12 large baking potatoes (depends on the size of the potatoes)
  • 11 Tablespoons salted butter
  • 2/3 cup flour
  • 8 cups milk
  • 16 oz. full-fat sour cream
  • Crisply cooked and crumbled bacon for topping
  • Shredded cheese for topping
Directions
  • Step 1 Bake the potatoes by whatever method you prefer until done. Remove from the oven and set aside to cool.
  • Step 2 When cool, remove the skins from the potatoes and discard.
  • Step 3 Divide the potato flesh into 2 large bowls.
  • Step 4 Mash one bowl and cube the other into bite-size pieces.
  • Step 5 In a large heavy-bottomed pot, melt the butter.
  • Step 6 Add the flour and stir. Cook, stirring constantly, for 2 minutes or until the roux has darkened in color and thickened.
  • Step 7 Add the milk and stir with a whisk until the mixture is as smooth as possible.
  • Step 8 Cook over medium heat for 10 minutes.
  • Step 9 Whisk in the mashed potatoes.
  • Step 10 Add the cubed potatoes and stir until well blended.
  • Step 11 Stir in the sour cream.
  • Step 12 Heat until warmed through but do not let this come to a boil or simmer.
  • Step 13 Remove from the heat and ladle into bowls.
  • Step 14 Add crumbled crisp bacon and shredded cheese before serving.
Bottle of Pop Chops

Bottle of Pop Chops

Hi Everyone!  So, if you have followed my writings for a bit you may know that I absolutely love cookbooks.  I have quite a collection – though not as many as I would like to have. Sad but true. I could spend a fortune on them if I had a fortune to spend.  The space to keep them is also an issue. I have them stashed everywhere it seems. I wish that I had a big old library with a section just for cookbooks.  Well, one of my cookbooks is the Mayberry Cookbook.  Yep, you read that right.  I said Mayberry – as in The Andy Griffith Show and the home of Barney Fife.  I love, love, love that show. I’m pretty sure that I have every episode memorized.  I know that I can usually tell what episode is coming on by listening to the first 10 seconds.  Again, sad but true. I am definitely showing my age here…and my level of sophistication.

One of our favorite references from that show is saying we want to go uptown to get a bottle of pop.  Yeah, it’s corny but still makes us chuckle. We don’t even call soft drinks pop in my house. I don’t want to kick off any controversy or major debate, but it is soda here.  Except for this recipe, it is pop. One of my favorite recipes from the Mayberry Cookbook is Bottle of Pop Chops.  We have made them for years and never tire of them.  They are super easy to make. You can get them in the oven in about 10 minutes.  They do need to bake for an hour, but it is well worth the wait.

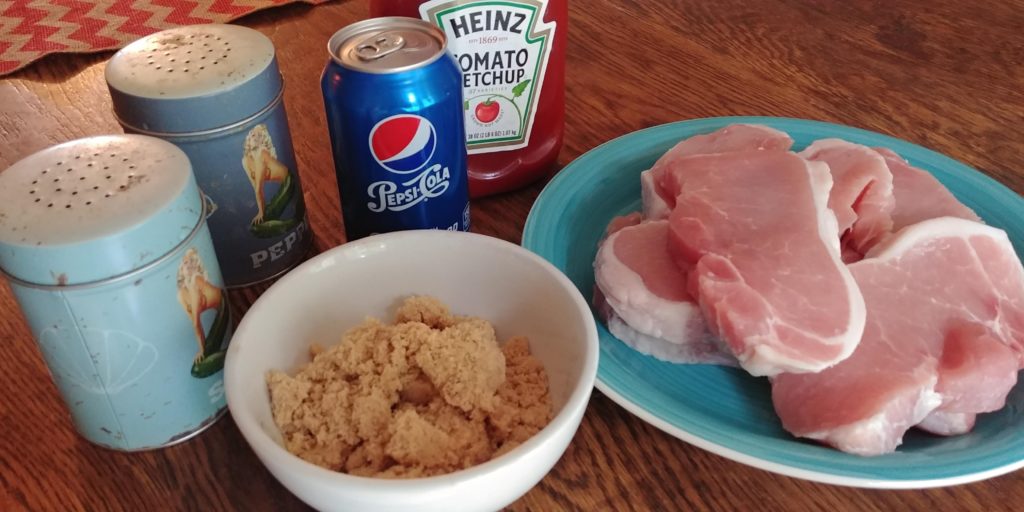
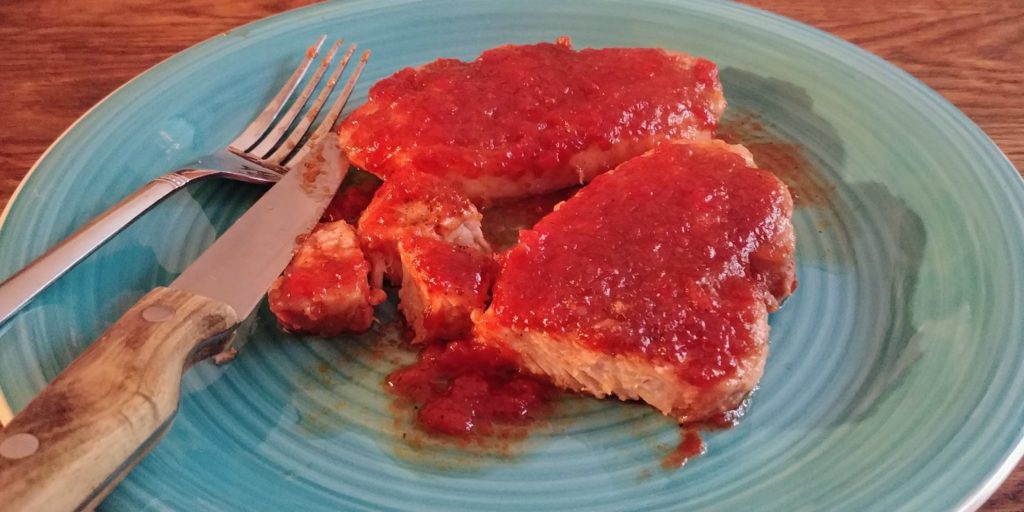
The sauce is made with just a few simple ingredients – including cola.  I like to use Pepsi, but Coke works just as well. Actually, any cola will do. Just don’t use diet. You won’t get the same sweetness to the sauce and I am always a little apprehensive of cooking with something that has an artificial sweetener.  You never know what the heat of the oven may do to it. This dish also uses boneless pork chops, ketchup, a little salt and pepper and brown sugar. If you find the pork chops on special this is also a very economical dish and it feeds several people easily.  These chops are tender and moist with a wonderfully sweet and yet tangy sauce.

Bottle of Pop Chops ingredients


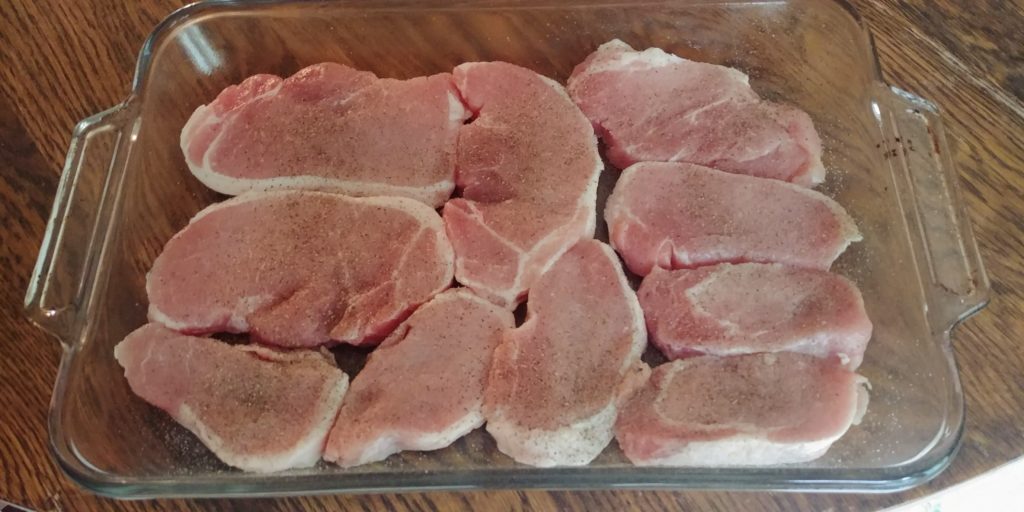
To start off, you will need to lightly spray a 9 X 13 baking dish with cooking spray and preheat the oven to 350 degrees.  Arrange your pork chops in the dish. I normally use 6 to 8 chops. It really depends on the size of the chops.  The package that I used this time had more than 8 but some were smaller, so I just fit them all in like a pork jigsaw puzzle.  Sprinkle the chops with a little salt and pepper. Set this aside.
 

Bottle of Pop Chops uncooked chops in pan


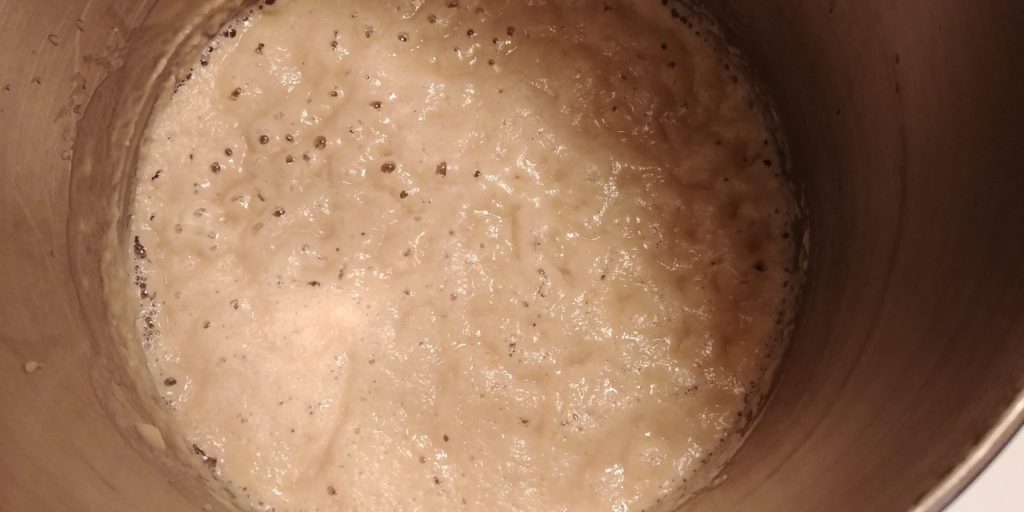
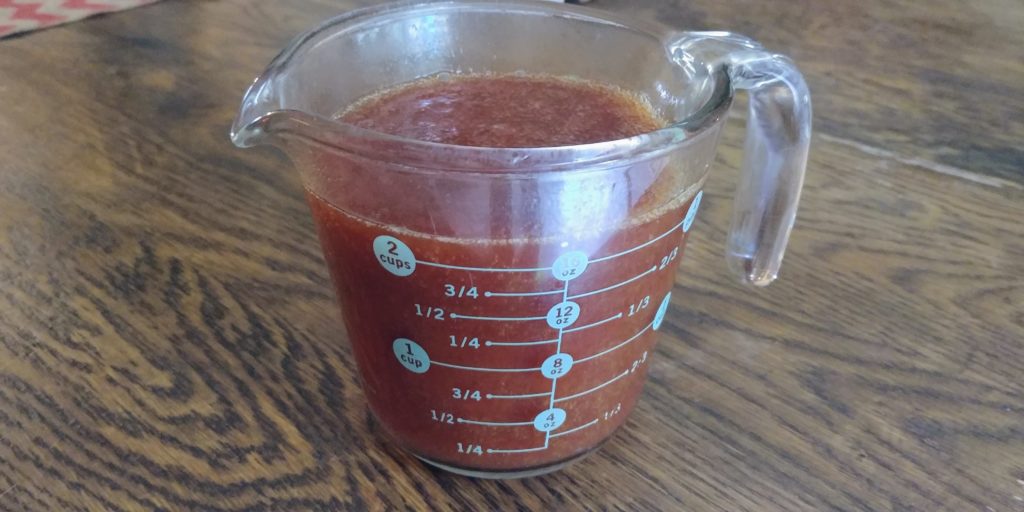
In a medium bowl or large measuring cup, mix together the ketchup and soda with a fork or a small whisk.  Stir together until well blended.  The soda makes the sauce fuzz up a bit so it looks like I have more than a cup of each ingredient here.  

Bottle of Pop Chops sauce

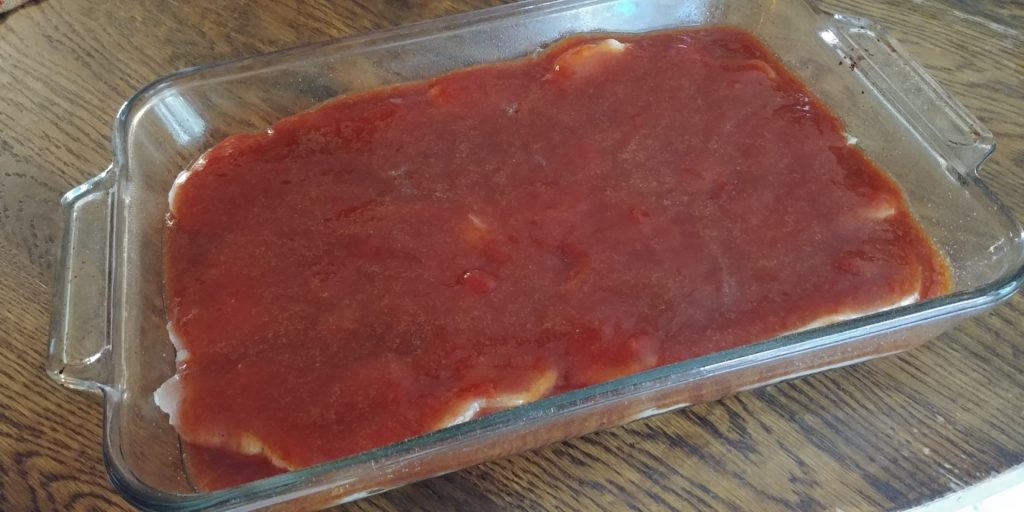
Pour this mixture over the pork chops as evenly as possible. Sprinkle the brown sugar over the sauce and chops. I used ½ cup this time. You can add more if you like.  It seems that the more you add the thicker your sauce gets.

Bottle of Pop Chops in pan before baking


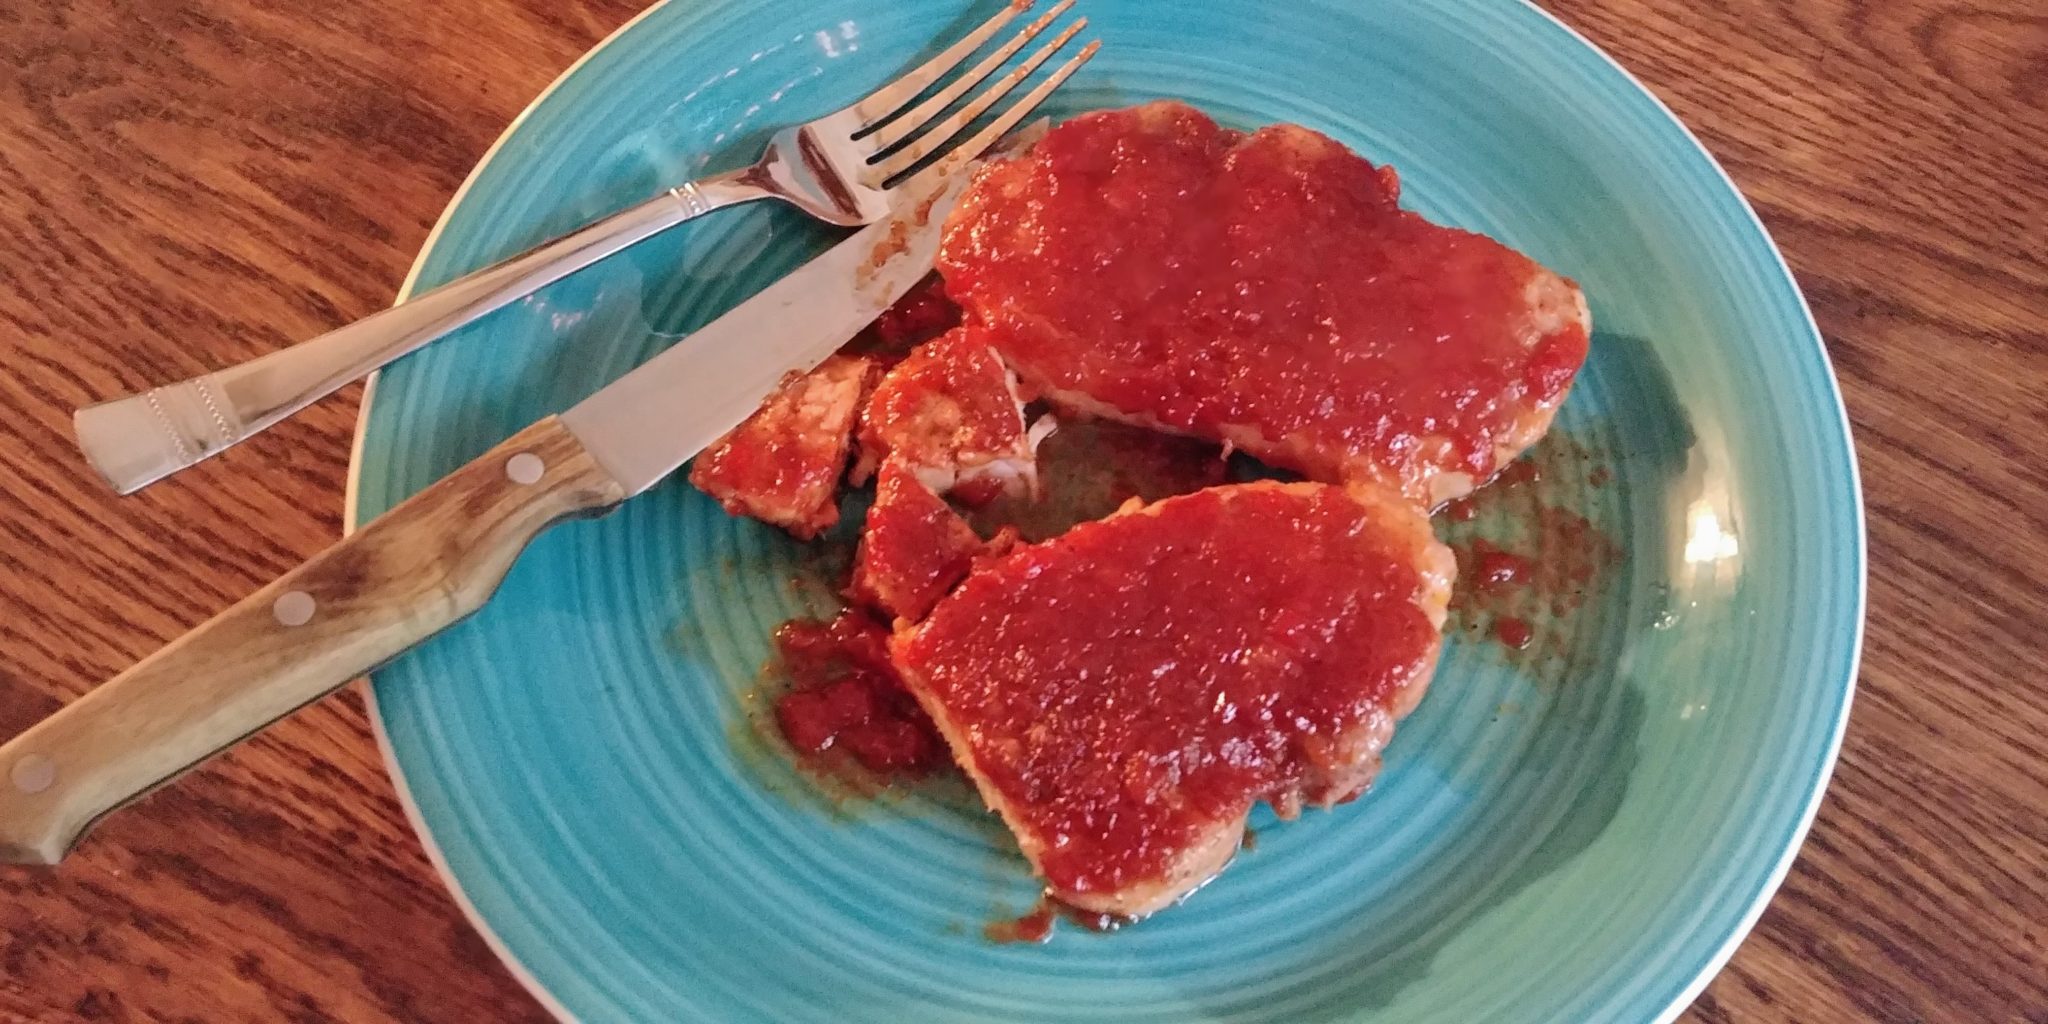
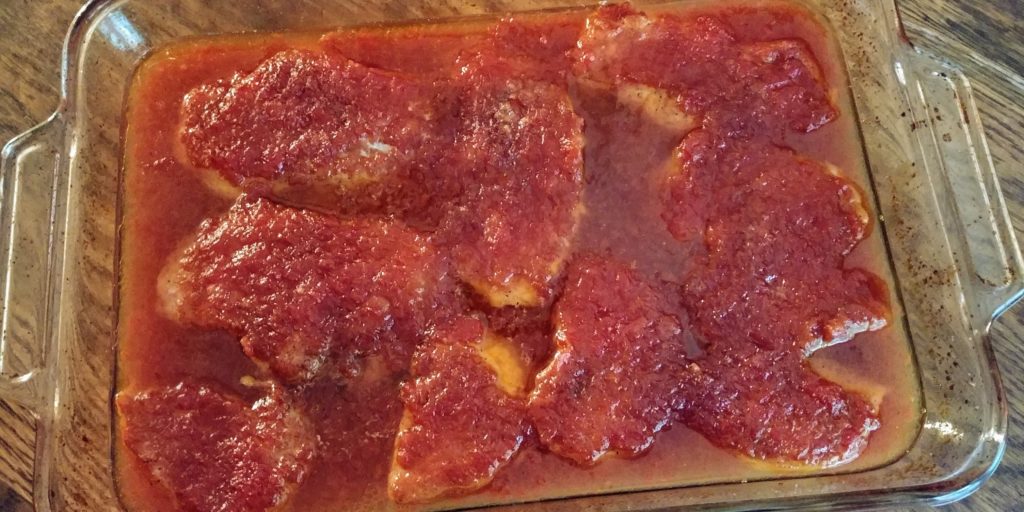
Put all of this in the oven and bake for 1 hour. Take them out and serve with a little of the sauce spooned over the top. Cue up an episode of Andy Griffith and revel in a simpler time when getting a soda at the gas station was an event worth savoring with friends.

Bottle of Pop Chops baked in pan


Bottle of Pop Chops complete on plate 1


Bottle of Pop Chops

October 30, 2018
: Easy

These chops are tender and moist with a wonderfully sweet and yet tangy sauce.

By:

Ingredients
  • 6 to 8 pork chops (boneless or bone-in)
  • 1 cup ketchup
  • 1 cup cola
  • salt and pepper to taste
  • 1/2 cup packed brown sugar (more if you prefer)
Directions
  • Step 1 Preheat the oven to 350 degrees.
  • Step 2 Lightly spray a 9 X 13 baking dish with cooking spray.
  • Step 3 Arrange the pork chops in the dish in a single layer and sprinkle with salt and pepper. Set aside.
  • Step 4 In a medium bowl or large measuring cup, whisk together the ketchup and cola until well blended.
  • Step 5 Pour the sauce over the pork chops evenly.
  • Step 6 Sprinkle with brown sugar evenly.
  • Step 7 Bake, uncovered, for 1 hour.
Italian Baked Potatoes

Italian Baked Potatoes

Hi Everyone!  So, it turned into Fall here – all the sudden.  One day it is hot and steamy and then the next day it is too cold for open windows.  The husband actually built a fire in the fireplace just one day after comfortably walking around with short sleeves and running the air conditioner.  What the heck? I’m not complaining, mind you, well, not really anyway. I was getting kind of tired of the hot weather and I do love many things about Fall.

I love the way cooking and baking changes in the cooler weather too.  I do bake all year long, but some things just taste better when there is a chill in the air.  Of course, anything with pumpkin tastes good – or squash. I love butternut squash. Hmmm…I may have to think up a squash recipe to share soon.  Good idea, Wench. So, anyway, I am much more apt to use the oven for main or side dishes during the Fall and Winter. Now, I have to admit that I am not great with side dishes.  I seem to have very little imagination when it comes to veggie and potato dishes. I love them but tend to get stuck in ruts very easily. I really should make a concerted effort to explore more side dish variations.  Pinterest searches, here I come.

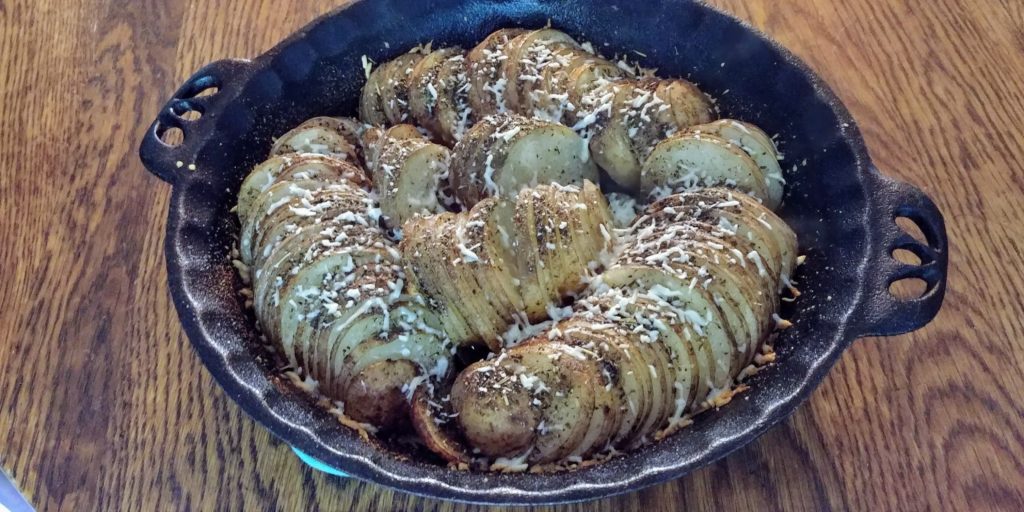
Not long ago, I did discover a potato dish that I really love, and it is so incredibly easy.  But, it looks kind of fancy-schmancy. So, you could serve this to guests and feel all proud of yourself as you bask in the glow of compliments.  This is a variation of the hasselback potatoes that you may have seen online and in recipe books in the past few years. You just don’t stuff anything between the slices and you do actually slice all the way through the potato and then loosely stack the slices back together.  Neat, huh?

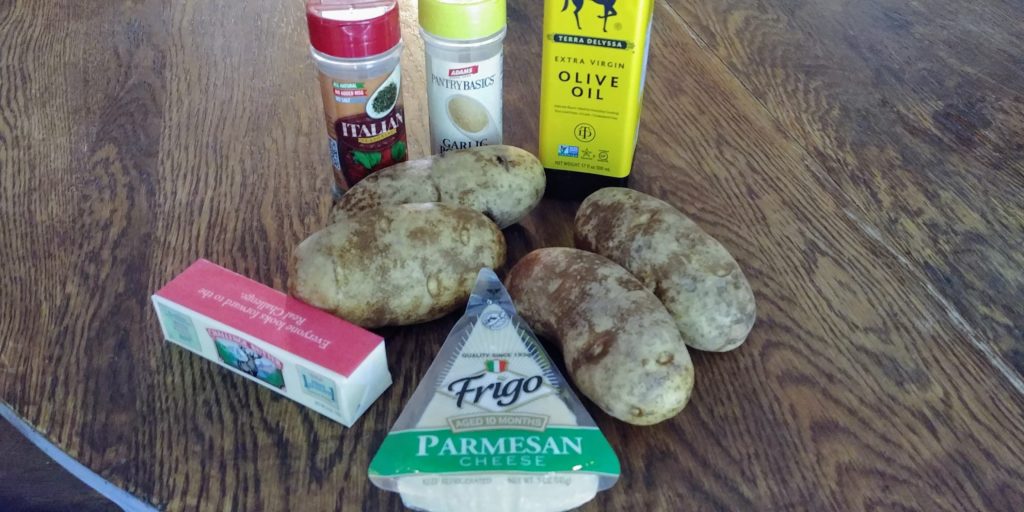
For this dish you will need some nice big baking potatoes.  I usually need 3 or 4 depending on the size of the potatoes.  You also need some olive oil, garlic powder, Italian seasoning (from the spice aisle), butter and grated or shredded Parmesan cheese, plus a little salt and pepper.

Baked Italian Potatoes ingredients


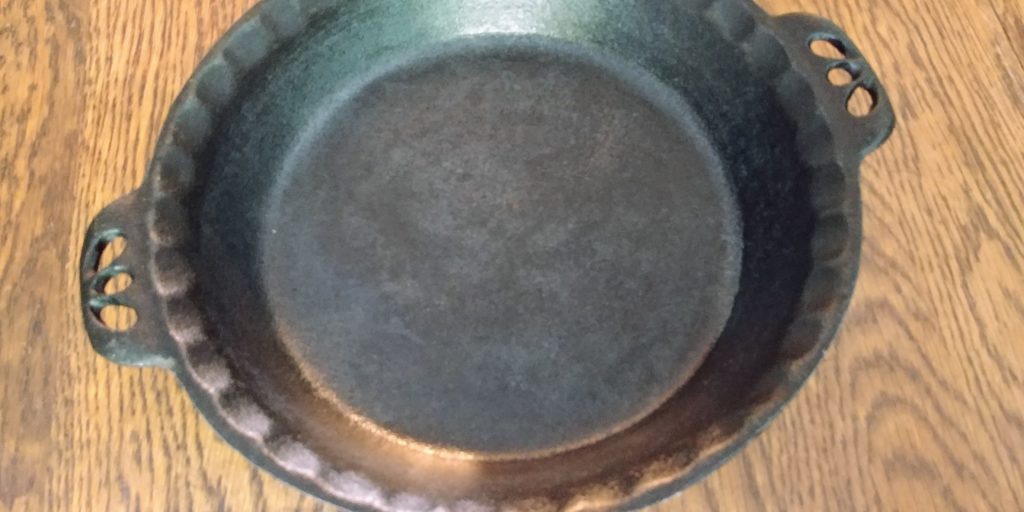
You will bake these taters in a round baking dish or iron skillet.  Actually, you could use any oven-safe skillet, but an iron skillet does work really well for this.  I used the pan pictured below. It is an iron baking dish that is about 10 inches in diameter. You just need a dish or pan that will allow you to keep your potato slices on edge but not packed together too tightly.  Of course, you can always add more potato slices or remove some until you have everything just right.

Baked Italian Potatoes pan


Preheat the oven to 375 degrees.  Brush the entire interior of your dish or skillet with olive oil.  

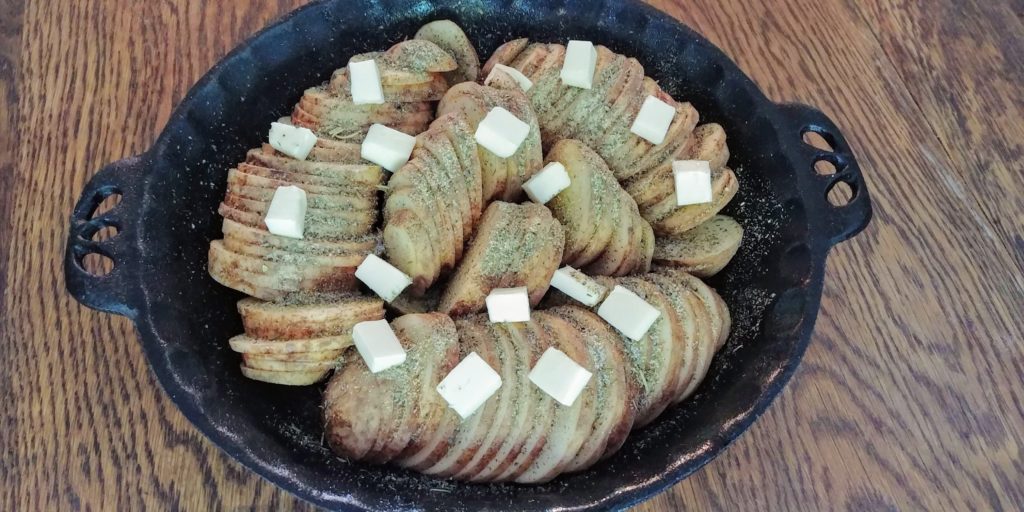
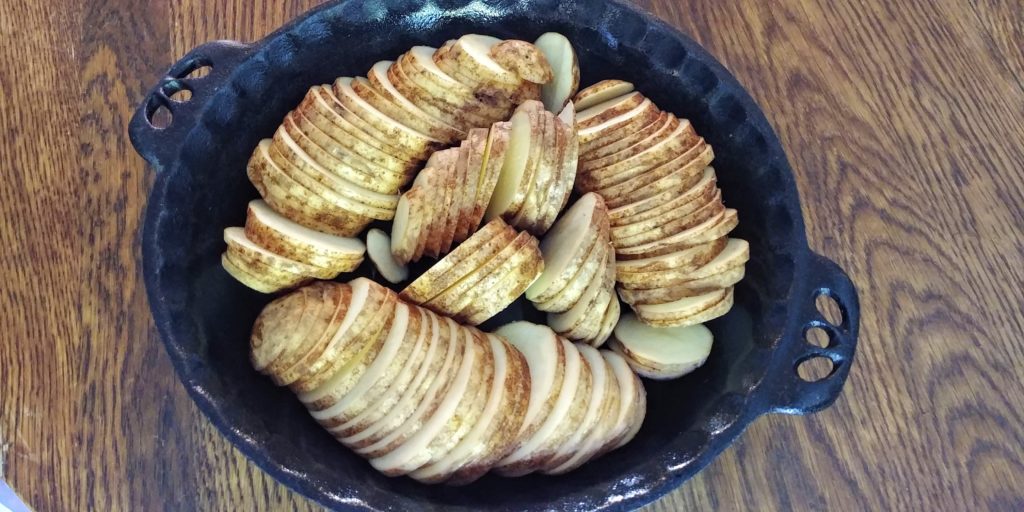
Wash the potatoes well and remove any bad spots but don’t peel them.  Slice the potatoes crosswise into desired thickness. I like mine on the thinner side, so they are usually about ⅛ inch but use your own judgement.  I would not go larger than ¼ inch, though, or the baking time will be off. Slice all the way through the taters but keep the slices kind of together.  Arrange all of the slices in the pan in a circular pattern all the way around. Then, arrange some slices in the middle to fill the hole that is left. Make sure that the slices are vertical (on edge) and arranged loosely.  You want for the butter and seasoning to get into the cracks.

Baked Italian Potatoes in pan


Mix the garlic powder and Italian seasoning together in a small bowl.  Sprinkle the mixture over the potatoes and then sprinkle a little salt and pepper over them as well.


Cut the butter into small cubes.  Arrange the butter cubes over the top of the potatoes as evenly as possible.

Baked Italian Potatoes in pan with seasonings unbaked


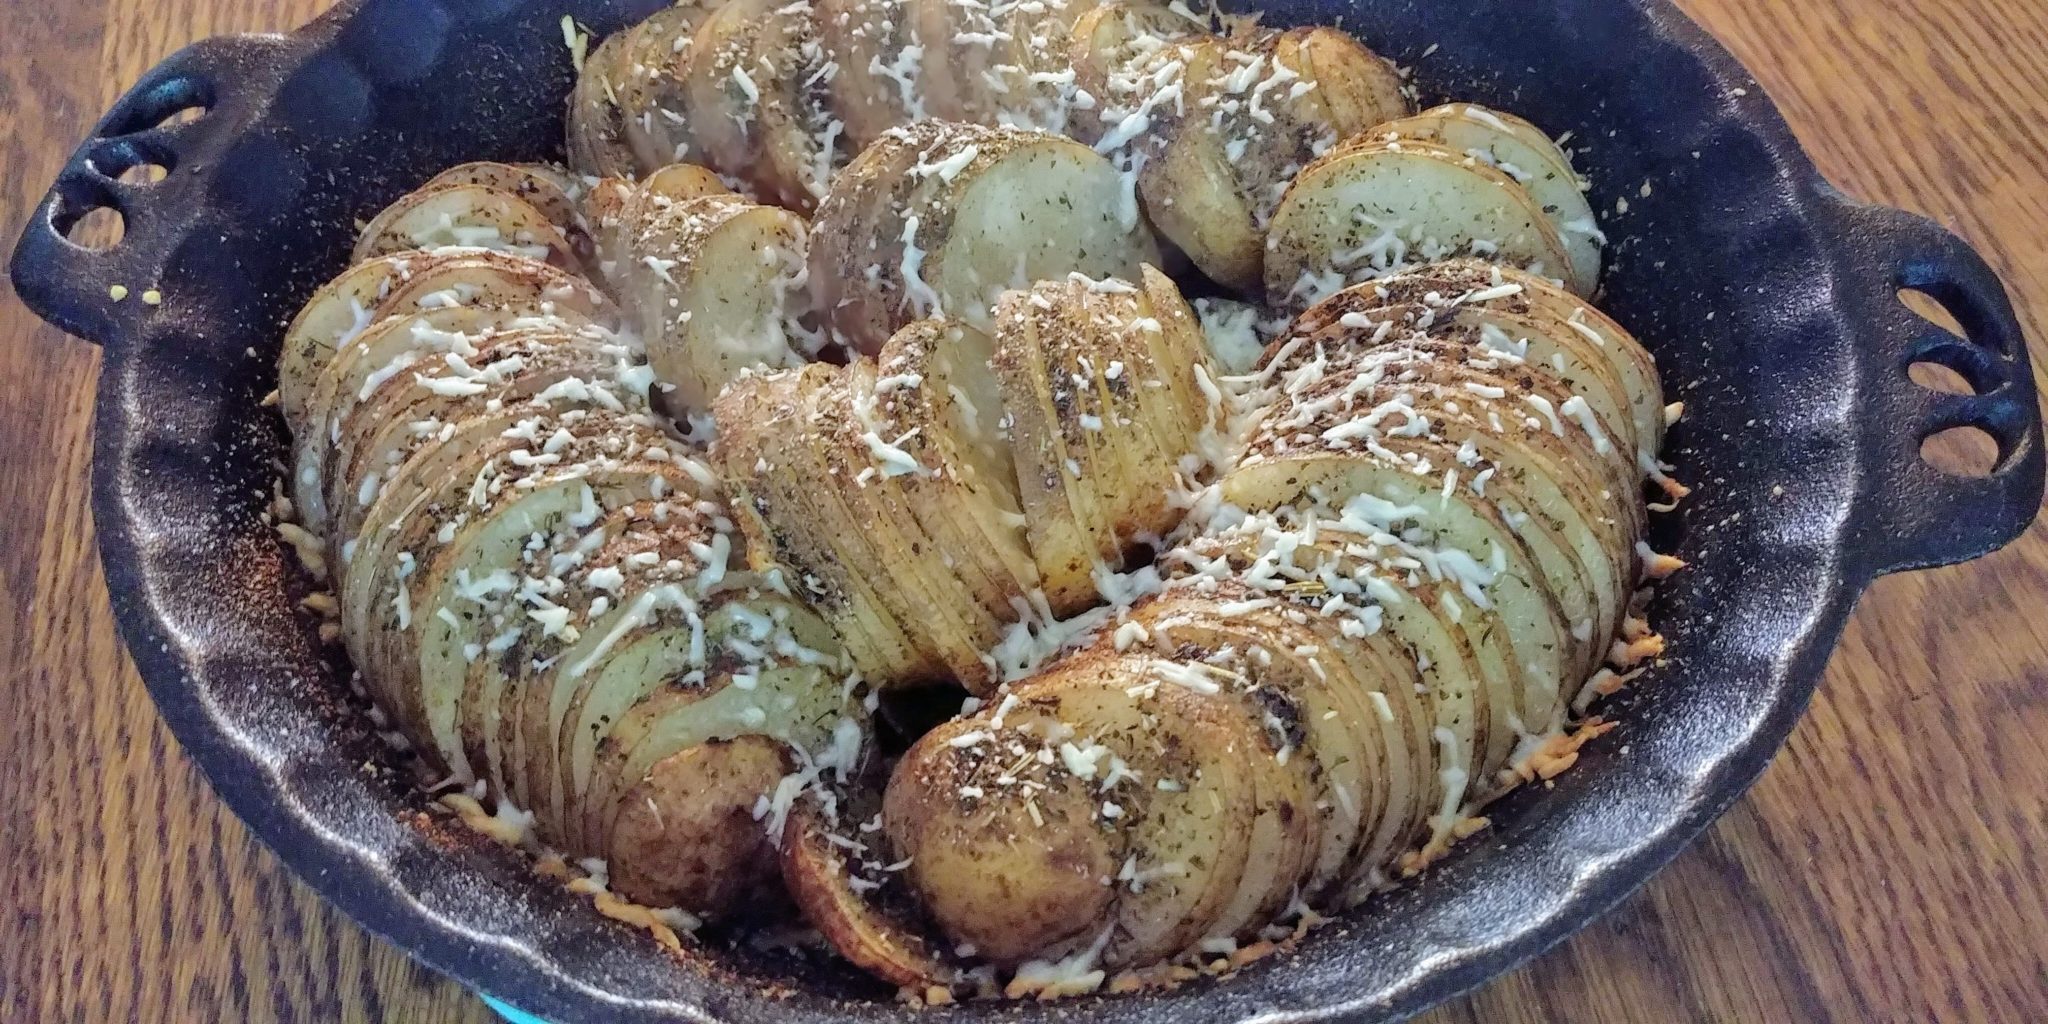
Cover the skillet or pan with foil and bake for 1 hour or until the potatoes are tender.  Remove the foil and sprinkle the Parmesan cheese over the potatoes. Bake for another 15 minutes or until the tops of the potatoes have become crispy.  Remove from the oven and serve. These potatoes are crispy yet tender with a light Italian flavor and a wonderful Parmesan topping. They are a nice addition to a steak or roast beef dinner.  

Baked Italian Potatoes in pan complete 2


Italian Baked Potatoes

October 21, 2018
: Easy

These potatoes are crispy yet tender with a light Italian flavor and a wonderful Parmesan topping.

By:

Ingredients
  • 2 Tablespoons olive oil
  • 3 or 4 large baking potatoes
  • 2 Tablespoons butter, cut into small cubes
  • 1 teaspoon garlic powder
  • 1 teaspoon Italian seasoning
  • 2 Tablespoons Parmesan Cheese (grated or shredded)
  • Salt and Pepper to taste
Directions
  • Step 1 Preheat oven to 375 degrees.
  • Step 2 Brush the entire interior of pan or skillet with olive oil.
  • Step 3 Slice the potatoes crosswise thinly, not more than 1/4 inch.
  • Step 4 Arrange the potato slices on edge loosely in pan or skillet in a circular pattern. Fill the middle with more slices.
  • Step 5 Mix the garlic powder and Italian seasoning together and sprinkle over the potatoes. Then, sprinkle with salt and pepper to taste.
  • Step 6 Dot the potatoes with the cubed butter.
  • Step 7 Cover the pan or skillet with foil and bake for 1 hour.
  • Step 8 Remove the foil then sprinkle the Parmesan cheese over the potatoes.
  • Step 9 Bake, uncovered, for 15 minutes or until the edges of the potatoes are crispy and browned.
Sunday Best Cream Puffs

Sunday Best Cream Puffs

Hi All!  So, this past month has been STRESSFUL to the max.  I mean, these are the days when I could seriously sit in a corner and eat an entire gallon of chocolate ice cream by myself.  I tend to eat my feelings. Yeah, I know, not healthy. But, life has been super hectic with moments that were wonderful and happy and then some that were incredibly hard. One of the hardest parts was the loss of my mom last week. She battled with and suffered from Alzheimer’s Disease for years and while it was very hard to lose her it was also a tremendous relief to know that she could be happy and rest for the first time in a very long time.  Anyone who has lived through Alzheimer’s with a loved one knows that you don’t just lose that person once and grieve. You lose them every day for years and grieve for the duration of their battle. The final breath can seem more like a sigh of relief. So, this post, like many of my writings will feature Mom and her cooking.

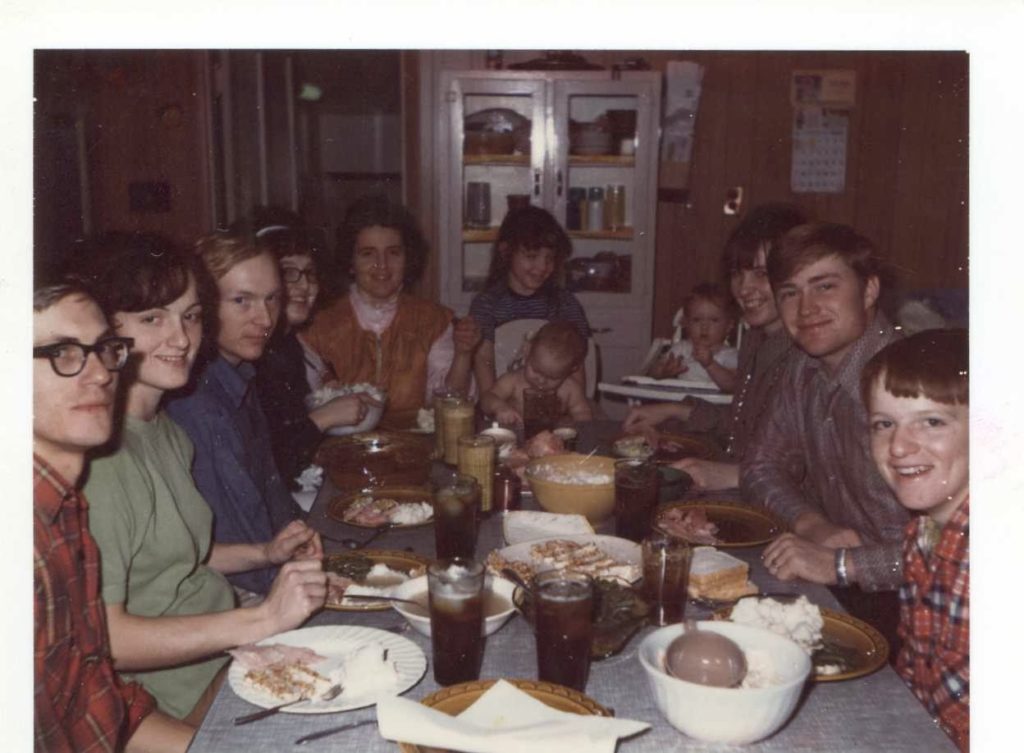
I’m sure that I mentioned this before, but I have a large family.  What I might not have explained is that my siblings and I are spread out in age by quite a bit.  My sisters were teens by the time I came along. They all married and had kids when I was still small.  They stayed close to home with their own families, so we got to see them pretty much every weekend. It was common for everyone to be at our house all day on Sunday.  The guys would mess around on the farm and the girls and the kids would play around the house and watch old movies on tv. Mom would cook a big meal for everyone on Sunday at noon or (more likely) in the evening.  That was a lot of people to feed so she would make dishes that went a long way. Often, it was fried chicken or spaghetti.  The picture below shows one of those dinners.  That’s Mom at the end of the table next to the babies.  I am the little girl standing behind the highchair.  I think that one of my sisters still has some of those brown plates.  

family dinner
family dinner

One of the desserts that I remember most from those days was cream puffs. She made them from scratch with a vanilla custard filling and a sprinkling of powdered sugar on top.  Man, they were good! And, to a little girl, they seemed like something that a princess would eat. That was a very special dessert. A couple of years ago, my sisters and I went on a search for Mom’s recipe books and cards. Unfortunately, some of them have been lost. The cream puff recipe was luckily found, and copies made for all of us.  I had not attempted to make her recipe before now. I have made cream puffs once before that I can remember, and they turned out okay but not as good as Mom’s. I have been thinking about Mom a lot recently and about those days on the farm. I dug through my old tin recipe box and found the copy of her card. I made them up with a vanilla custard recipe that I already had.  I don’t have her custard recipe but this one tastes identical, so I was happy with the result. I did make mine much smaller than Mom did if my memory is correct. Next time, I will definitely make the puffs larger, so I can fit more of that luscious custard inside. Yummmmmmm. These delicious pastries have a beautiful, flaky shell with a silky custard filling.

You do need to plan ahead for this wondrous dessert.  After you bake the cream puffs you need to let them cool completely.  The vanilla custard recipe that I am using says to chill but if I remember correctly, Mom used to serve it slightly warm.  I suspect that it was out of necessity. She had to make such a large batch to feed everyone and I doubt that it would have fit in our frig.  So, anyway, plan accordingly.

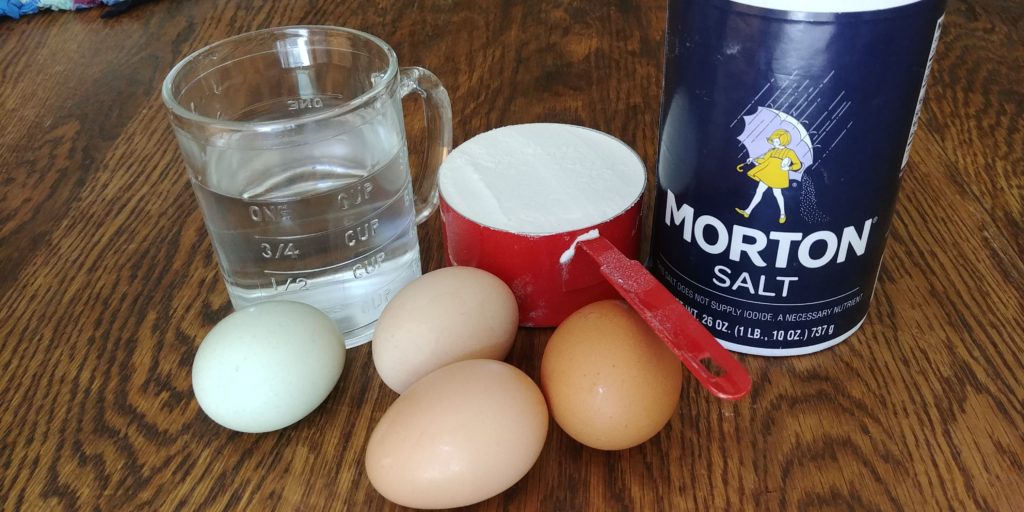
For the cream puffs, you will need 4 eggs, ⅛ teaspoon salt (a pinch) ½ cup butter (cubed), 1 cup flour and 1 cup water.  My mom wrote a scant cup of flour. I’m not sure what she considered scant, but I just used a cup that was almost level and it worked out fine.


Sunday Best Cream Puffs ingredients


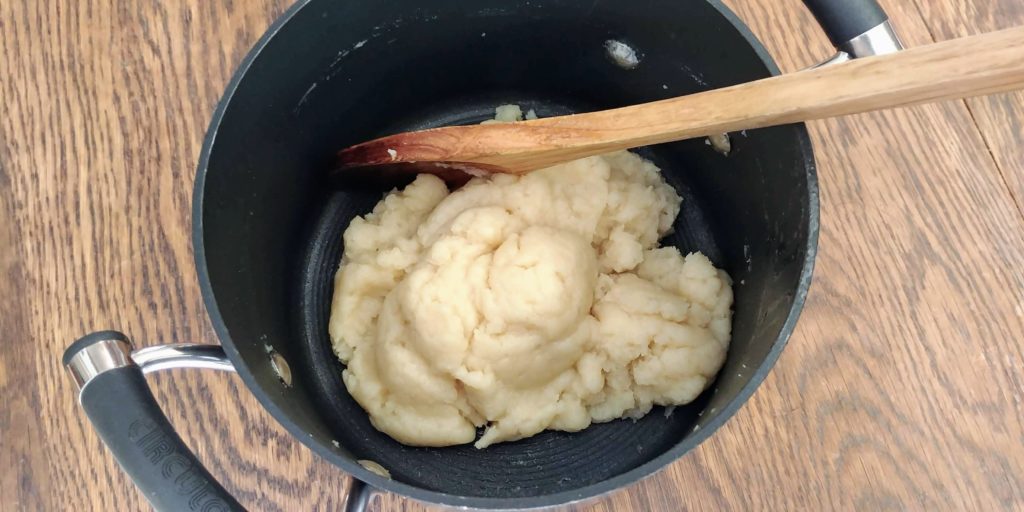
Bring the water and butter to a rolling boil.  Add the flour all at once and stir quickly with a sturdy spoon until the mixture sticks together and pulls away from the sides of the pan.

Sunday Best Cream Puffs dough in pan


Remove from the heat and allow to cool for about 20 minutes.  Add this dough ball to a large mixing bowl or the bowl of your stand mixer and beat in the eggs one a time.  Beat for 5 more minutes on medium speed.


Sunday Best Cream Puffs beaten dough in bowl


Drop the dough in large mounds (at least the size of a tennis ball) on a parchment lined baking sheet and bake for 25 minutes at 400 degrees.


Sunday Best Cream Puffs dough on pan unbaked


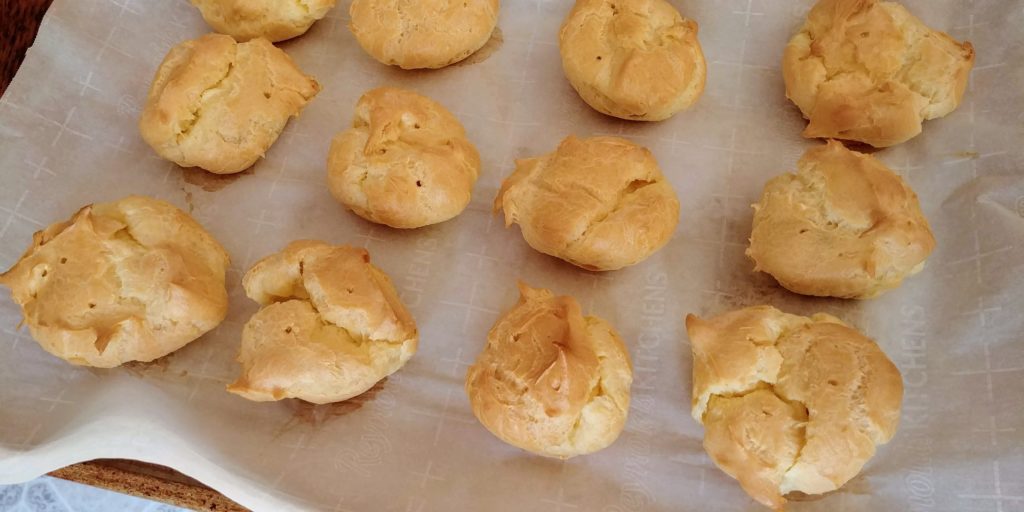
When the puffs are a golden-brown color and sound hollow when thumped they are ready to remove from the oven.  Immediately poke some holes in the sides of the puffs with a wooden skewer or toothpick to allow the steam to escape.  This helps prevent the puffs from becoming soggy inside. Allow the puffs to cool completely.


Sunday Best Cream Puffs on pan baked


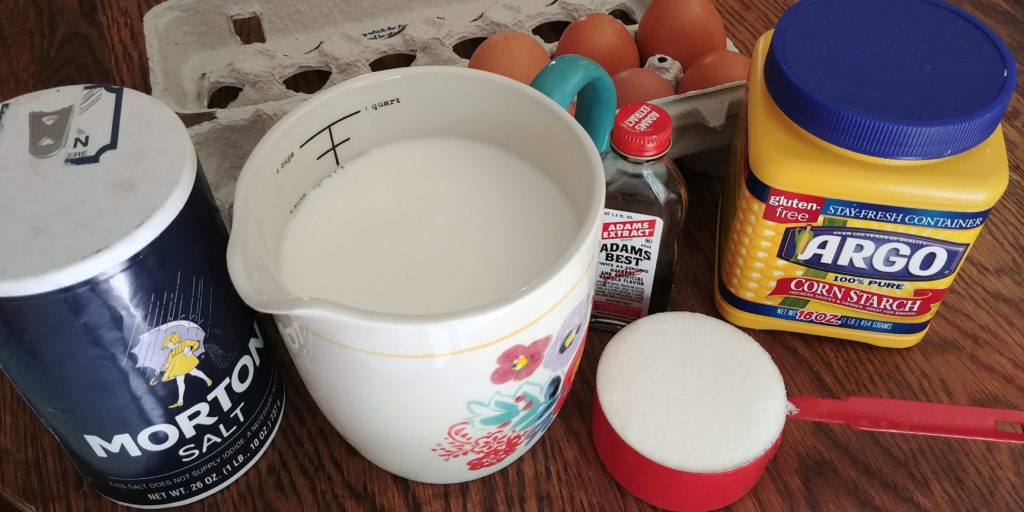
For the vanilla custard filling, you will need 3 egg yolks, 3 cups milk (I used whole), 1/2 cup sugar, 1/3 cup cornstarch, 1/4 teaspoon salt and 2 teaspoons vanilla.  This recipe can be doubled if you want to be sure you have plenty of this filling. It can also be eaten alone if you have any leftovers.


Vanilla Custard Filling for Cream Puffs ingredients


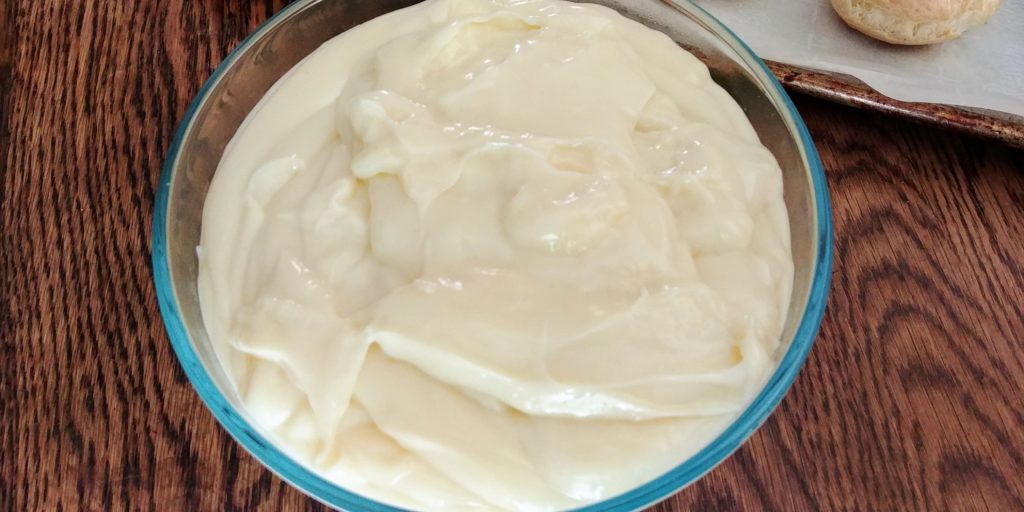
You can make this filling at the same time as the puffs and chill or you can make it shortly before serving.  I kind of like the filling to be a little warm but that’s just me. So, let’s get started on this decadent and delicious custard.  Beat the egg yolks in a medium bowl until frothy. Gradually, stir in the milk and beat until blended. Set aside. In a large heavy-bottomed saucepan with no heat, mix the sugar and cornstarch.  Add a small amount of the milk mixture and stir until you can make a smooth paste. Slowly add the remaining milk mixture and stir until blended. Now, you can turn on the heat to medium-low.  Cook, stirring constantly until the mixture thickens and comes to a full boil. This will take 20 minutes or more so plan accordingly. Once the custard begins to boil continue cooking for 1 minute, making sure to keep stirring.  Remove from the heat as soon as the minute is up. Stir in the vanilla and transfer the custard to a large bowl. You can leave this on the counter for a bit to cool or if you are in a hurry you can set the bowl in cool water in your sink or a larger pan.  Just be careful not to get water in the custard. 
 

Vanilla Custard Filling for Cream Puffs complete in bowl before chilling


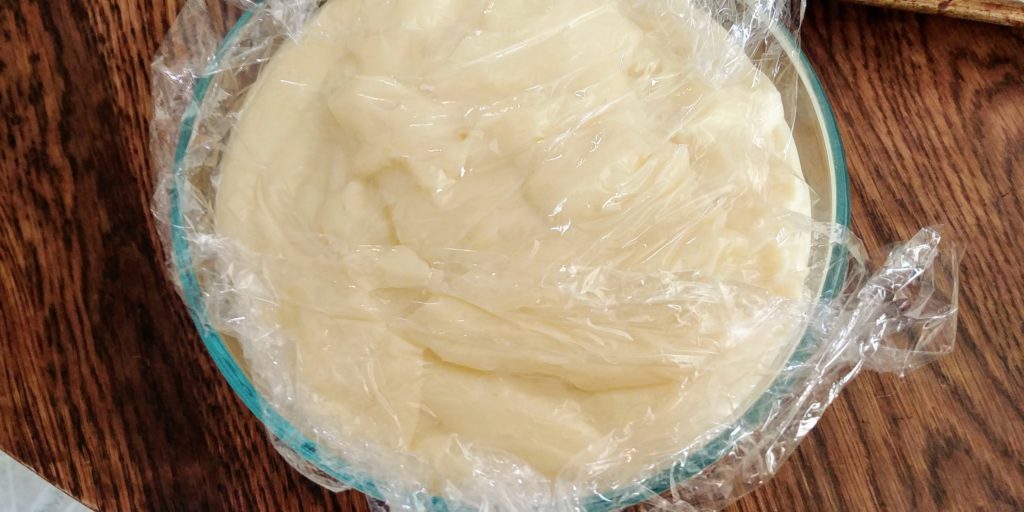
To keep a skin from forming on the custard, press a piece of plastic wrap directly onto the top of the custard while it is cooling. If you want to chill the custard, place it in the frig for at least an hour. Don’t put a lid on it to prevent condensation from collecting on the custard.  I apologize for not including pictures of the custard-making process.  I had to keep stirring and so could not get any shots.  But, it is an easy recipe to follow, anyway.  


Vanilla Custard Filling for Cream Puffs complete in bowl with plastic wrap


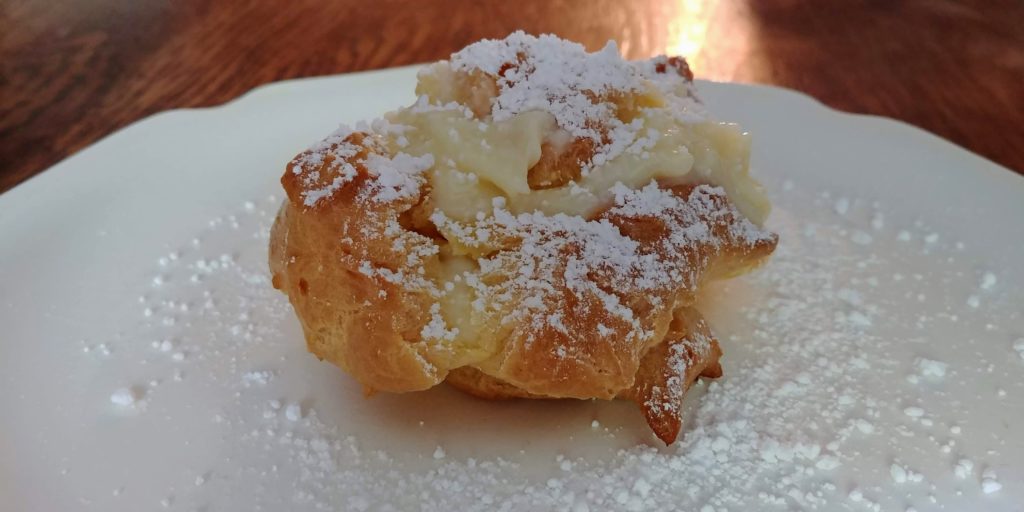
When you are ready to serve the cream puffs you can either cut the top third of the puff off with a serrated knife and then spoon the custard into the nearly hollow inside of the puff.  Or, you can poke a small hole into the side of the puff and use a pastry bag filled with the custard to fill the puff. Place the filled cream puffs onto serving plates and sprinkle them with powdered sugar.  Sink your spoon into the flaky and delicious pastry and silky, creamy center and enjoy.


Sunday Best Cream Puffs with Vanilla Custard complete on plate 2


I always felt like a princess eating this dessert when I was a kid and can still appreciate that feeling of luxury.   I intend to make Sunday Best Cream Puffs more often and when I do I will always think of Mom. I can still picture her standing at the kitchen counter with her sleeves rolled up to the elbows working her culinary magic to feed a bunch of hungry people, laughing and talking all the while.  She will be missed but definitely not forgotten.


young mom
young mom


Sunday Best Cream Puffs with Vanilla Custard Filling

October 11, 2018
: Medium

These delicious pastries have a beautiful, flaky shell with a silky custard filling.

By:

Ingredients
  • For the Pastries:
  • 4 eggs
  • 1/8 teaspoon salt
  • 1 cup flour
  • 1/2 cup butter
  • 1 cup water
  • For the vanilla custard:
  • 3 egg yolks
  • 3 cups milk
  • 1/2 cup sugar
  • 1/3 cup cornstarch
  • 1/4 teaspoon salt
  • 2 teaspoons vanilla
Directions
  • Step 1 To make the puffs, bring the water and butter to a rolling boil.
  • Step 2 Add the flour all at once and stir quickly with a sturdy spoon until the mixture sticks together and pulls away from the sides of the pan. Remove from the heat and allow to cool for about 20 minutes.
  • Step 3 Add the dough ball to a large mixing bowl or the bowl of your stand mixer and beat in the eggs one a time. Beat for 5 more minutes, after the last egg, on medium speed.
  • Step 4 Drop the dough in large mounds (at least the size of a tennis ball) on a parchment lined baking sheet and bake for 25 minutes at 400 degrees. When the puffs are a golden-brown color and sound hollow when thumped they are ready to remove from the oven.
  • Step 5 Immediately poke some holes in the sides of the puffs with a wooden skewer or toothpick to allow the steam to escape.
  • Step 6 To make the custard, beat the egg yolks in a medium bowl until frothy. Gradually, stir in the milk and beat until blended.
  • Step 7 In a large heavy-bottomed saucepan with no heat, mix the sugar and cornstarch.
  • Step 8 Add a small amount of the milk mixture and stir until you can make a smooth paste. Slowly add the remaining milk mixture and stir until blended.
  • Step 9 Turn on the heat to medium-low. Cook, stirring constantly until the mixture thickens and comes to a full boil (20 – 30 minutes).
  • Step 10 Once the custard begins to boil continue cooking for 1 minute, stirring constantly. Remove from the heat as soon as the minute is up. Stir in the vanilla and transfer the custard to a large bowl.
  • Step 11 To keep a skin from forming on the custard, press a piece of plastic wrap directly onto the top of the custard while it is cooling.
  • Step 12 Chill the custard in the refrigerator for at least an hour or serve slightly warm.
  • Step 13 To assemble the cream puffs, either cut the top third of the puff off with a serrated knife and then spoon the custard into the nearly hollow inside of the puff. Or, you can poke a small hole into the side of the puff and use a pastry bag filled with the custard to fill the puff.
  • Step 14 Place the filled cream puffs onto serving plates and sprinkle them with powdered sugar.


Grandma Birdie’s Peanut Butter Candies

Grandma Birdie’s Peanut Butter Candies

Hey Everyone!  Have a I got a golden oldie recipe for you today!  This is a family favorite! Actually, it is a multiple family favorite.  The recipe comes from my husband’s maternal Grandma, Birdie. Yep, her real name was Birdie – cute, huh?  My husband and his brother remember Birdie making these as snacks for them when they would visit her house after school or in the evenings to play games with Grandpa Bert.  The candies have always been a favorite of that family and now are a favorite with my sons, especially Alex. He has actually taken over the making of these delicious little morsels, for the most part, in my immediate family.  Alex has taken them to gatherings with his Greene County friends and they have become favorites of some of those guys. I have shared the recipe with some of their moms too. The recipe is so easy and although we have always called them candies, I could see calling them no-bake cookies as well.  There is very little cooking involved. You can easily make these in about 15 minutes, including the time it takes to gather the ingredients and measure everything. There are 5 ingredients in total, most of which you probably already have in your pantry. I don’t normally have plain Special K, so I can never make these on the spur of the moment which is probably a good thing.  These are really, really good and very addictive. Once you eat one it is hard to stop. If you are like me, you try to justify it by thinking of all the vitamins and good stuff in the cereal and the protein in the peanut butter. But, hey, just enjoy them. No judgement here.

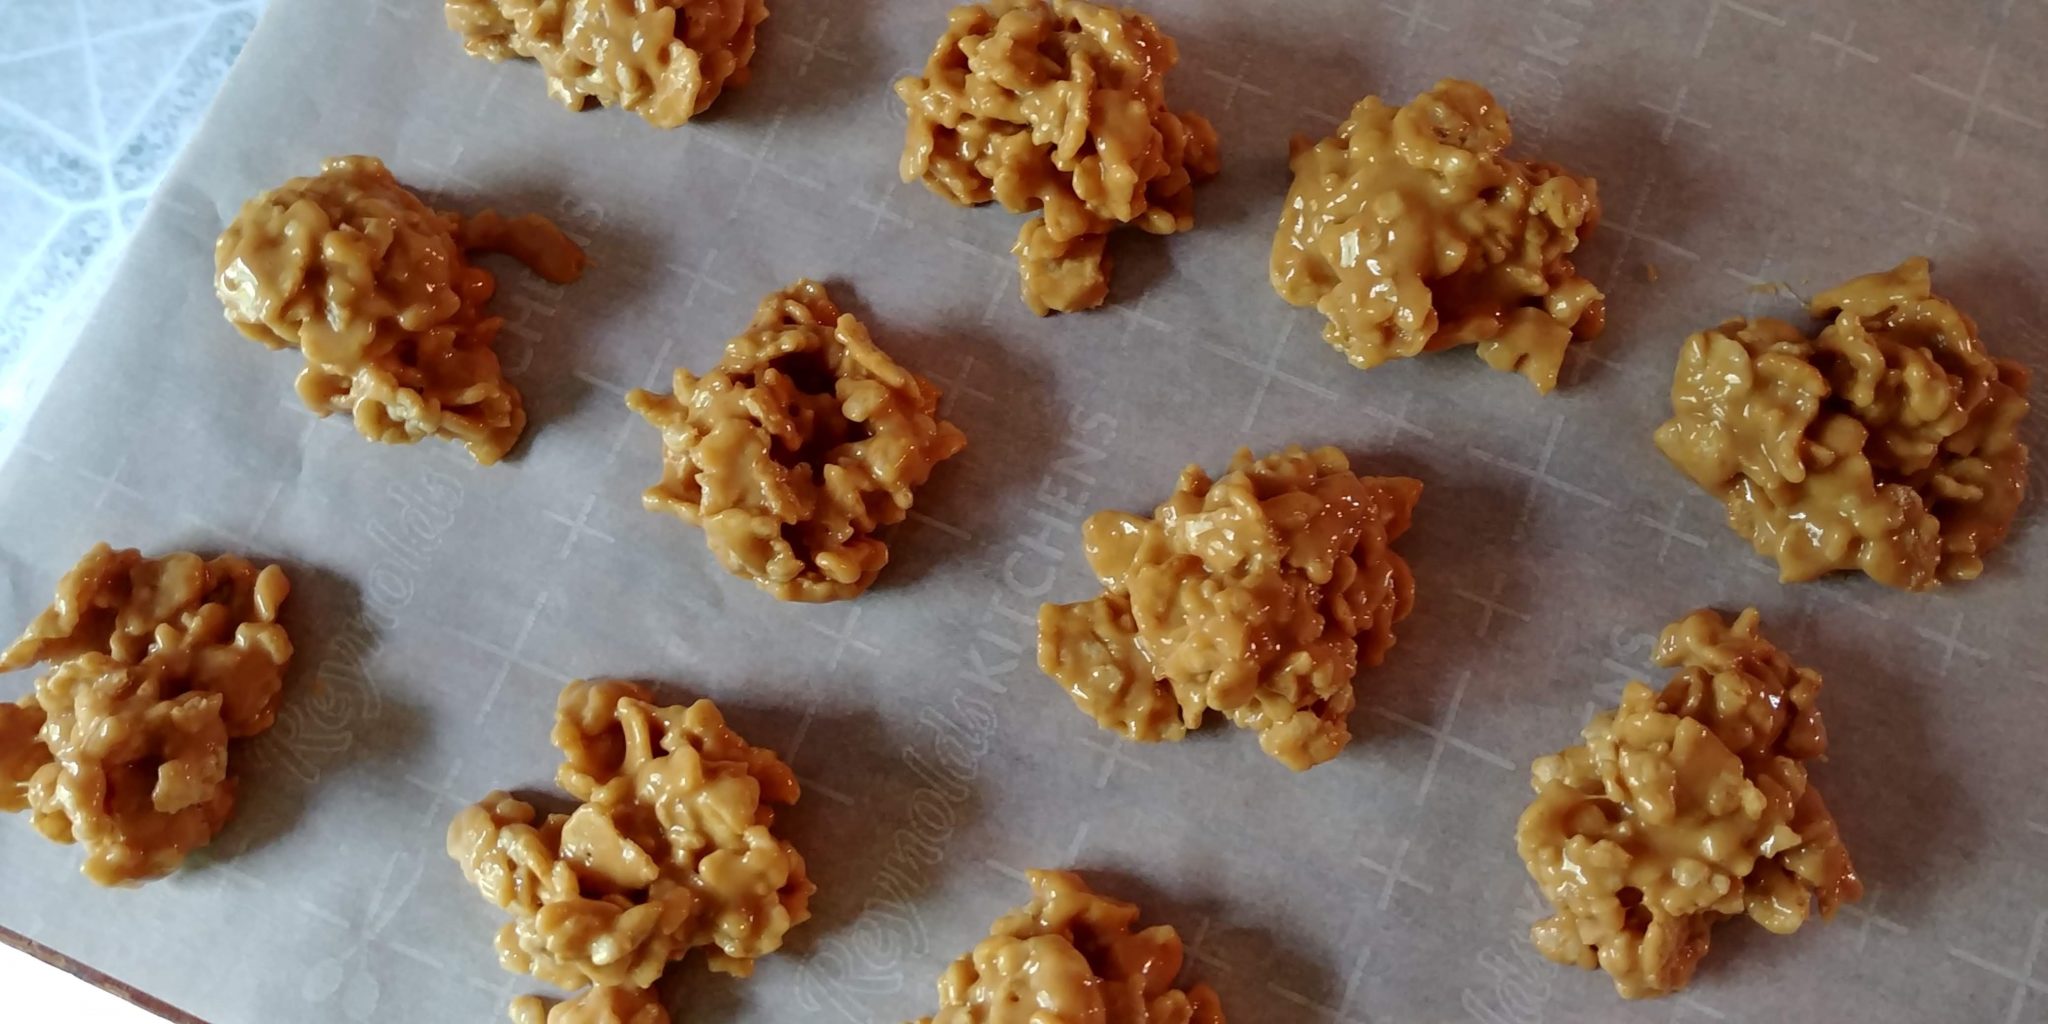
This is an old recipe. This is witnessed by the listing of ingredients on our copy.  It calls for Oleo rather than butter. Alex and I always have a chuckle over that. Oleo is an old-timey term for margarine.  Back in the day, lots and lots of recipes called for margarine rather than butter. We use butter for these candies. I don’t use much margarine at all and I don’t really know if the end result would be all that different, but we love them with butter, so I am sticking with it.   I mean, c’mon, butter makes nearly everything better.  We also triple the original recipe, so I am going to give you those measurements.  I believe that the original recipe made just enough to be eaten right away. It was probably just right to feed two hungry boys and their grandparents.  We like to have them around for a while. They keep well if sealed in an airtight container. There is no need to refrigerate them. They travel well but if it is rather warm, you might want to separate each layer with parchment paper so that they don’t stick together.  This is also a good idea when they are sitting on the counter during the summer months. However, if they do stick together, then you pull out one really big candy and you can say that you are only eating one because technically you are. You see how my mind works? I am always looking for a way to justify the calories.  Sorry. Not sorry. Ok, back to the candies. It is difficult to find something to dislike about these. The candies are soft and sweet and chewy and peanut buttery with a bit of crunch. They make a great snack and pack up well for lunchboxes.

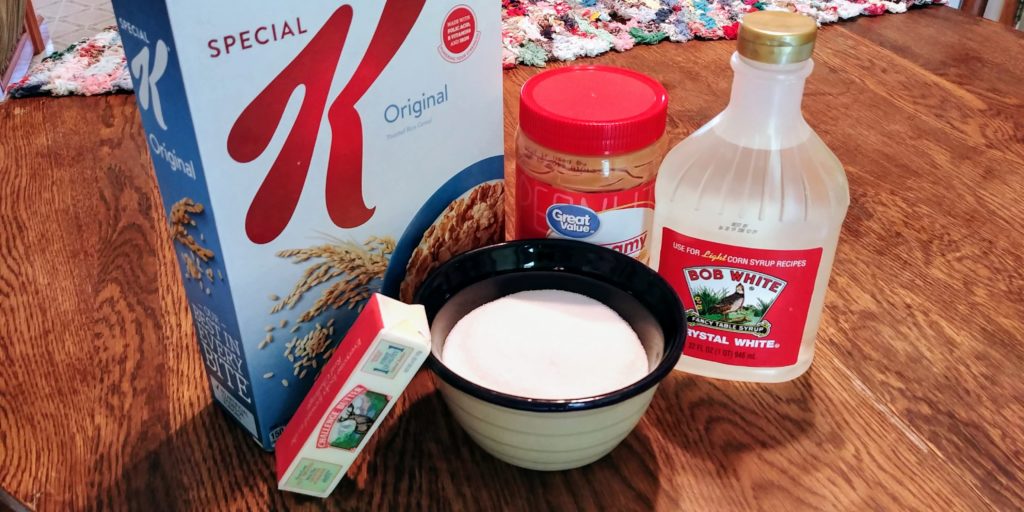
To make these delectable morsels you will need original Special K cereal.  You can also use plain corn flakes, but I think that the texture of the Special K holds up better.  You will also need peanut butter (plain or crunchy), white corn syrup, butter, and sugar. That’s it.  Just 5 simple ingredients to make a great candy.

Grandma Birdie's Peanut Butter Candies ingredients
Grandma Birdie’s Peanut Butter Candies ingredients


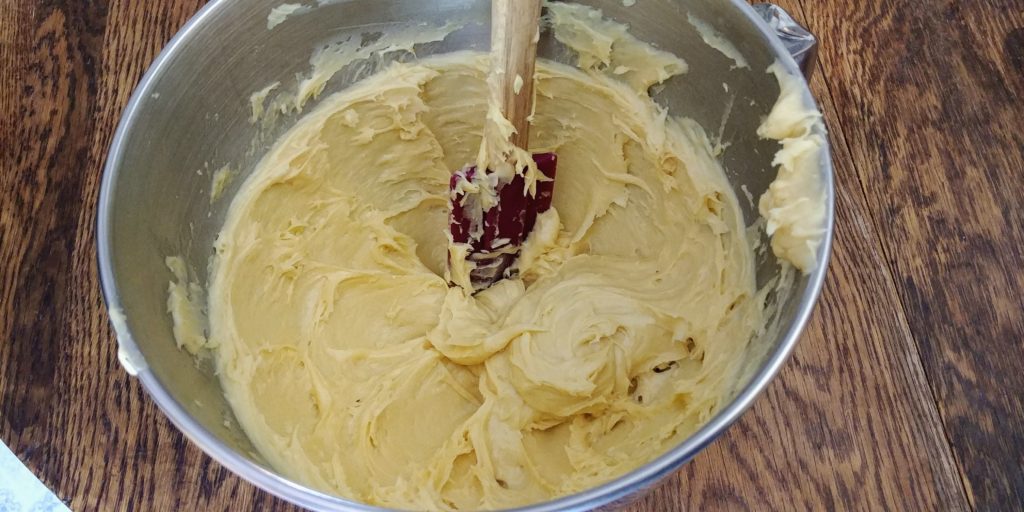
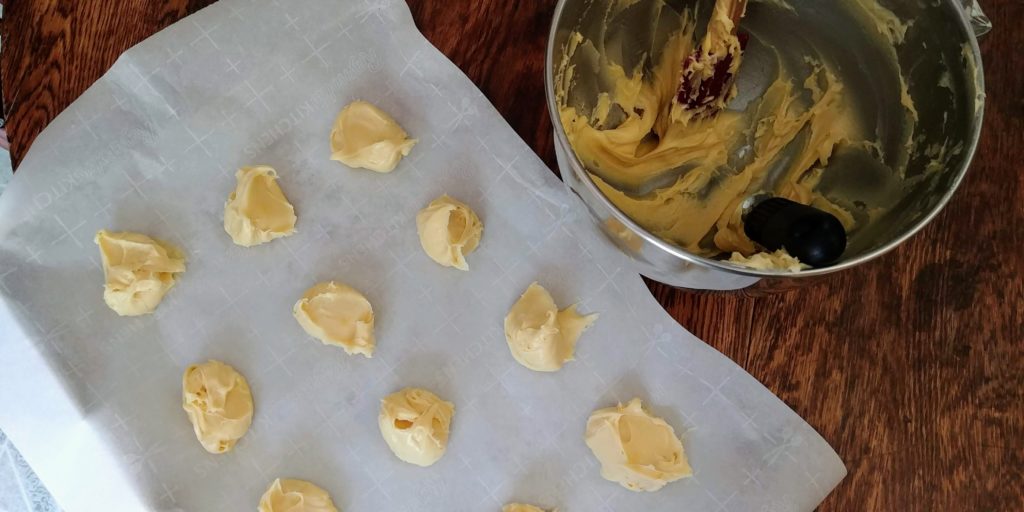
I suggest that you measure all of your ingredients first and have them at the ready.  This recipe moves fast. Once your syrup and sugar begin to boil there is no time to measure peanut butter.  So, anyway, measure everything first. In a large saucepan or stockpot, combine the sugar and corn syrup, mixing well.  Heat this over medium or medium-low heat until the mixture comes to a full boil. You can see in my picture that large bubbles cover the entire surface.  Remove from the heat.

(more…)

Vintage Icebox Cookies

Vintage Icebox Cookies

Hi All!  How is everyone?  That good, huh? It has been kind of busy here and the next few weeks look to be really hectic.  This is always a busy time of year for us. Both of my sons’ birthdays are in September and there are always lots of events to attend.  I normally attempt to do a fall cleaning of the house, basement and yard before we have a birthday party for the guys. But, I give up on that this year.  I am hollering, UNCLE. There is just no time and I don’t really want to burn vacation days to do it. The house will just have to be good enough this year.  I think that I said the same thing last year…hmmm…I spot a trend here. Oh well, there are more important things in life than washing walls and cleaning out closets, right?  Right. And, one of those things is baking cookies. Even when I am busy I just can’t rely on store-bought packages of cookies to feed my loved ones. Don’t get me wrong, I love a double-stuff Oreo passionately, but baking cookies is a way for me to stay sane.

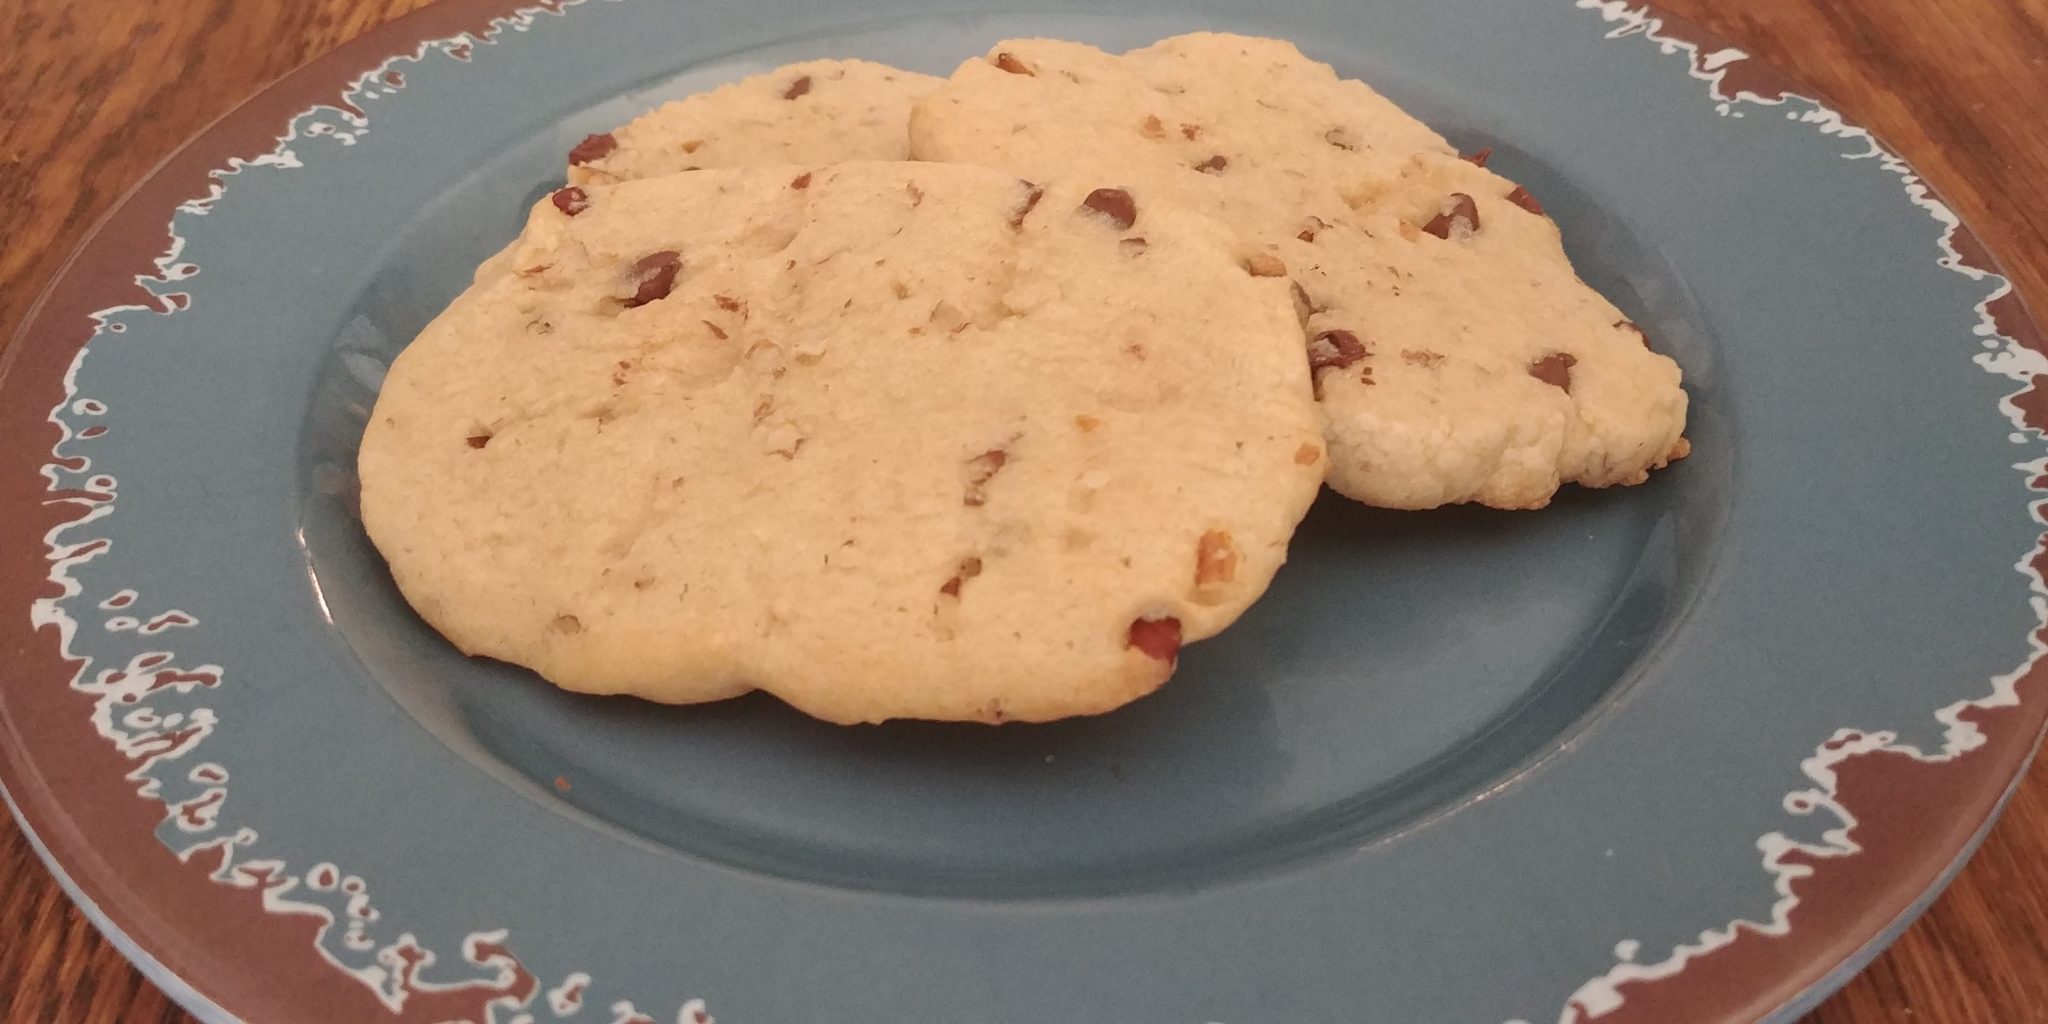
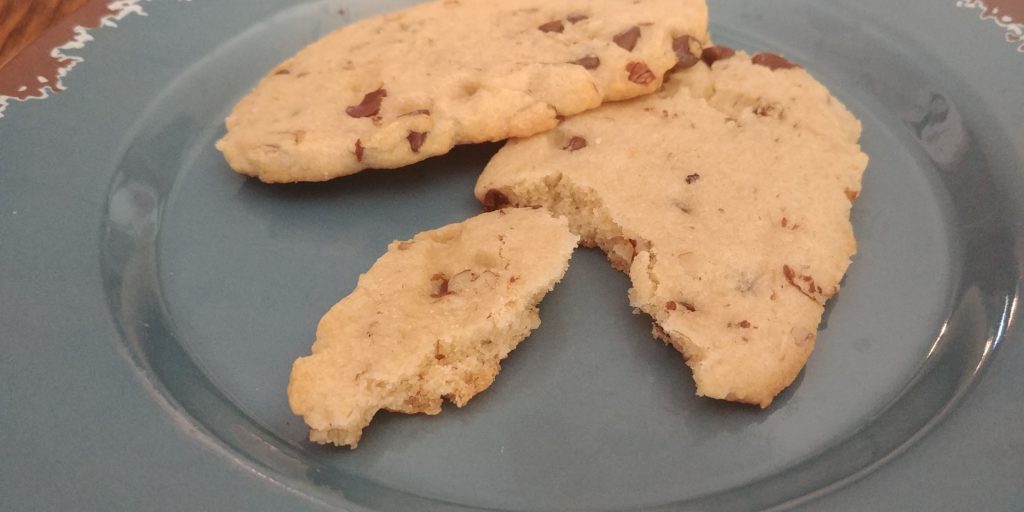
For years, I have seen recipes for icebox or refrigerator cookies that you can make ahead of time and then just slice and bake when you need them and only as many as you need.  Those would be absolutely perfect for times like this, but I gotta say, that I have never been a fan. It isn’t that I disliked them. I just never had them. My mom did not bake icebox cookies, so I really had no exposure to them.  I have said before that I am a huge fan of fat, chewy cookies and icebox cookies are neither of those things. So, I guess I just figured that I wouldn’t like them. Now, my father-in-law, Gary, has an icebox cookie recipe that he has loved for years and years.  I have been a part of that family, in some way, for like 37 years and until a few months ago I never really paid these cookies much attention. But, one day, a bag of them showed up on our kitchen table and I decided to properly evaluate them. Okay, in common terms, I was hungry, and I ate one.  The cookie was nice and crisp and buttery with little bits of nuts. I determined that I DO like these cookies. And, I also determined that I needed to share this recipe with you. I texted Amy, my stepmother-in-law, to ask for the recipe. She shared a picture of the actual recipe from a WWII era (1942) cookbook.  The page was yellowed and obviously much-used and loved. There is a basic recipe and then lots of suggestions for variations follow. Gary uses the nut variation, normally using hickory nuts, pecans or black walnuts. I like to bake with hickory nuts, but I did not have the time to find any in the freezer and then pick through them to get out any stray bits of shell.  I opted for pecans and then added mini chocolate chips for my own twist and dubbed them Vintage Icebox Cookies. The dough is very easy to mix up with stuff you probably already have on hand. You do need to chill the dough at least overnight. It can be chilled for several days or frozen for future use. Just make sure that you wrap it up nice and tight so that the dough does not take on that freezery taste.  The width of your slices determines if your cookies turn out very crisp or firm but soft. I sliced my first batch too thick and they didn’t crisp up like I wanted so the remaining batches were sliced about ⅛ inch thick.

Vintage Icebox Cookies are perfect if you need a large batch because the recipe makes a fair amount and it is easily doubled.  The finished cookies stack nicely for storage and hold up well to transportation. I doubled my batch so that I would have enough to share with my office and with Alex’s office.  They didn’t last long. This cookie is crisp but not hard, buttery and not overly sweet. The variations are endless, making this one of the most versatile go-to cookie doughs that you will ever make.

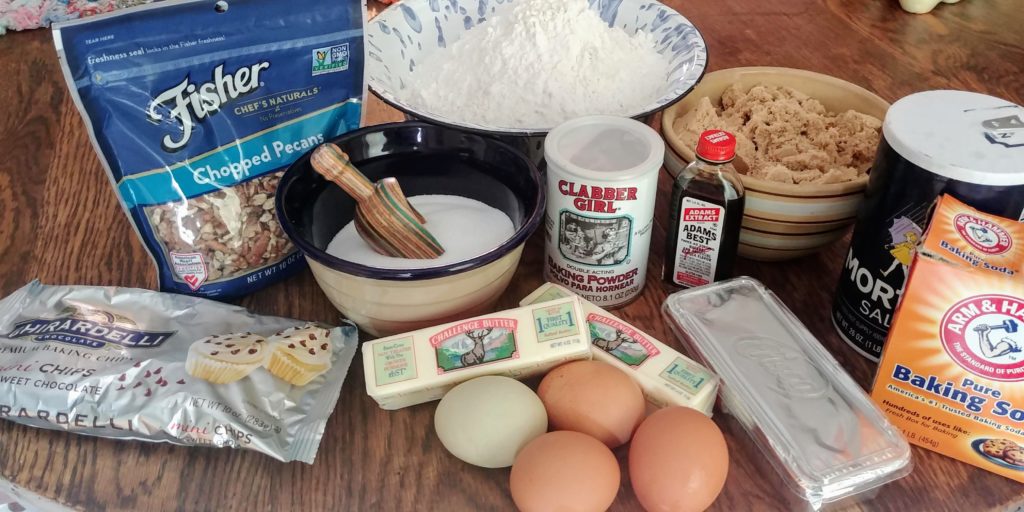
You are going to need flour, sugar, baking powder, baking soda, salt, shortening (such as Crisco), butter, brown sugar, granulated white sugar, eggs and vanilla for the basic dough.  If you want to add nuts, you will need finely ground nuts of your choice. For my version, you will also need mini chocolate chips. I am going to give you measurements for a single batch, but I actually made a double batch this time as you will see by my pictures.

Icebox cookies ingredients


To begin, you need to do something a little unusual, but essential.  Measure out 4 cups of all-purpose flour and sift it into a large bowl. Then measure 4 cups of that sifted flour and add to a different large bowl.  You will be surprised in the difference. I actually had an entire cup extra of the sifted flour to put back into my canister.  Add the baking powder, baking soda and salt to the newly measured flour and then sift again. Set aside.
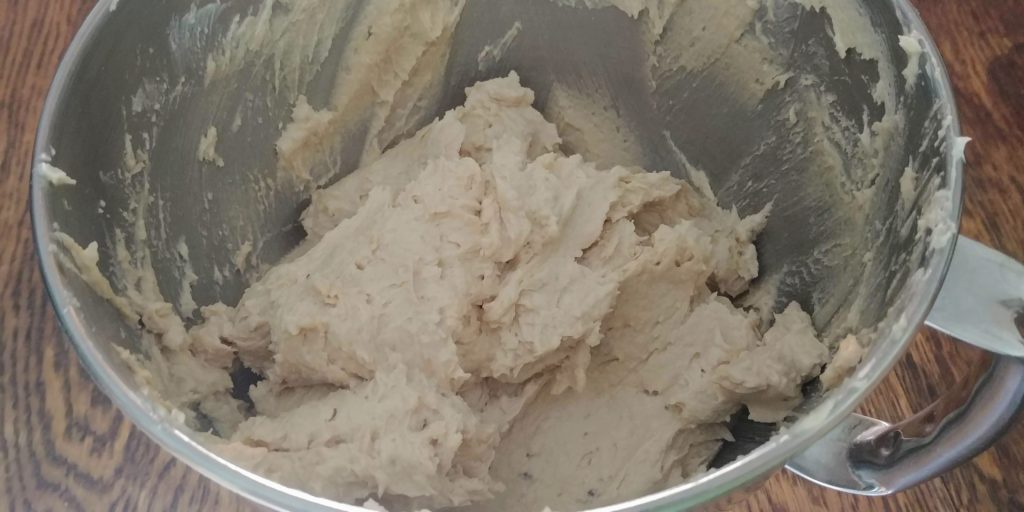
Cream the shortening and softened butter until completely combined.  Add the sugars gradually and beat on medium speed until lightened in color, scraping the sides of the bowl occasionally.  Add the beaten eggs and vanilla and mix until everything is combined.

Gradually mix in the dry ingredients until just combined.


Icebox cookies dough


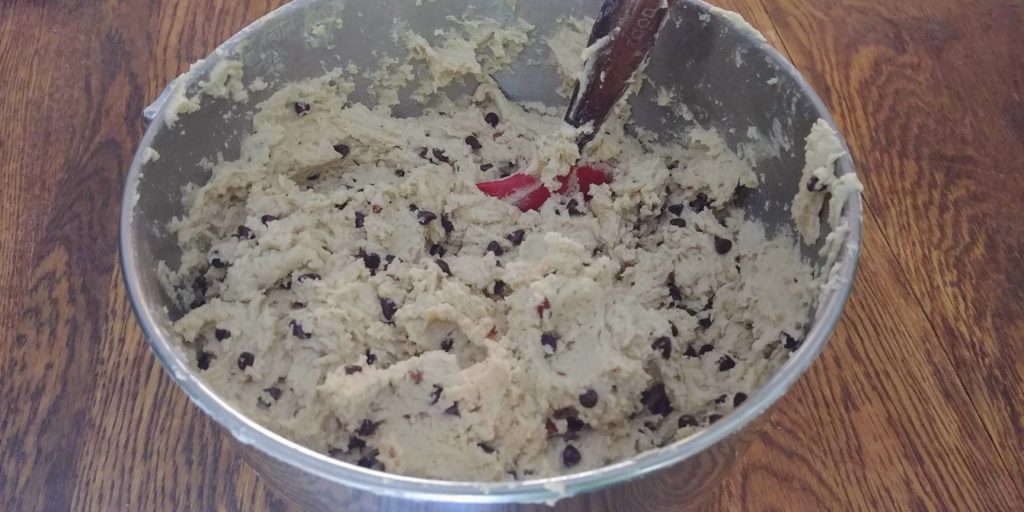
Stir in your additions, such as finely ground nuts (1 cup or more) and/or mini chocolate chips (1 cup or more).  This is where you can get creative. You could add finely chopped dried fruit, toffee bits, coconut or flavorings.

Icebox cookies dough with chips and nuts


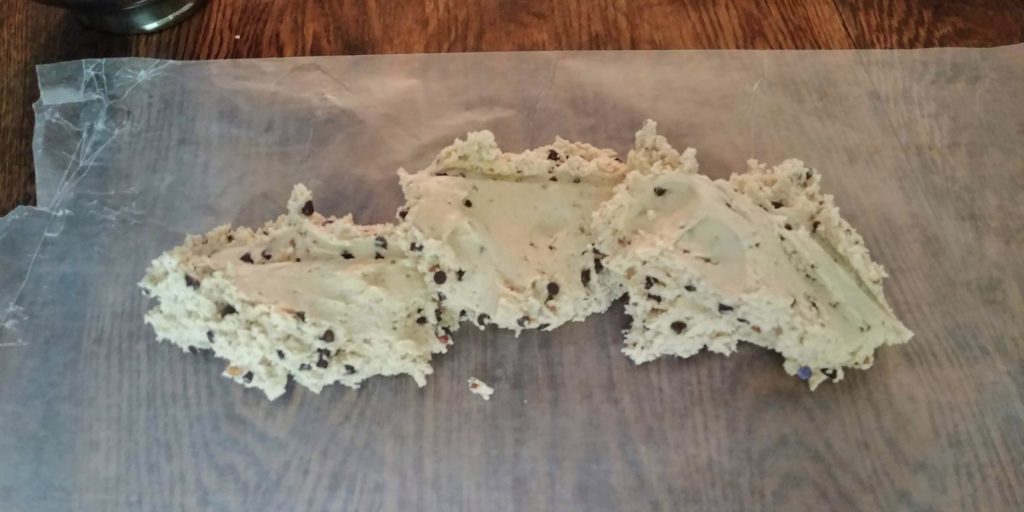
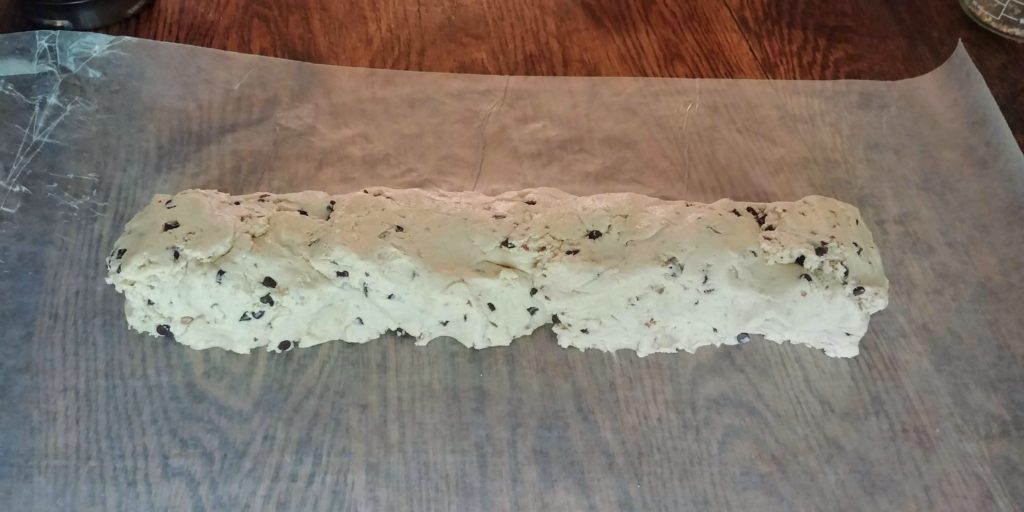
Tear off a piece of wax paper that is about 18 inches long.  Scoop the dough onto the wax paper and shape into a log that is about 3 inches in diameter.

Icebox cookies dough unformed
Icebox cookies dough formed into log


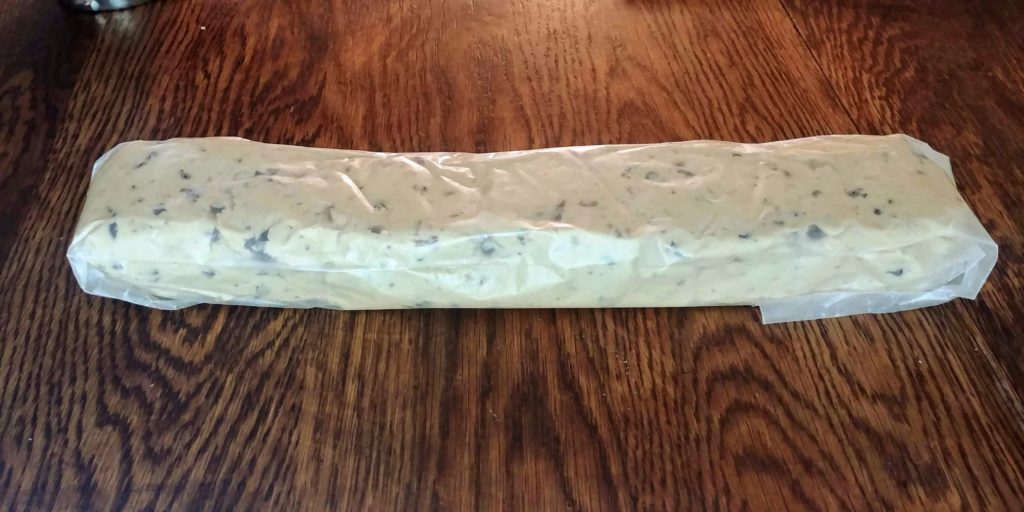
Wrap the dough tightly with the wax paper, sealing the ends with tape or twist ties.  Refrigerate overnight, at least.

Icebox cookies dough formed into log and wrapped

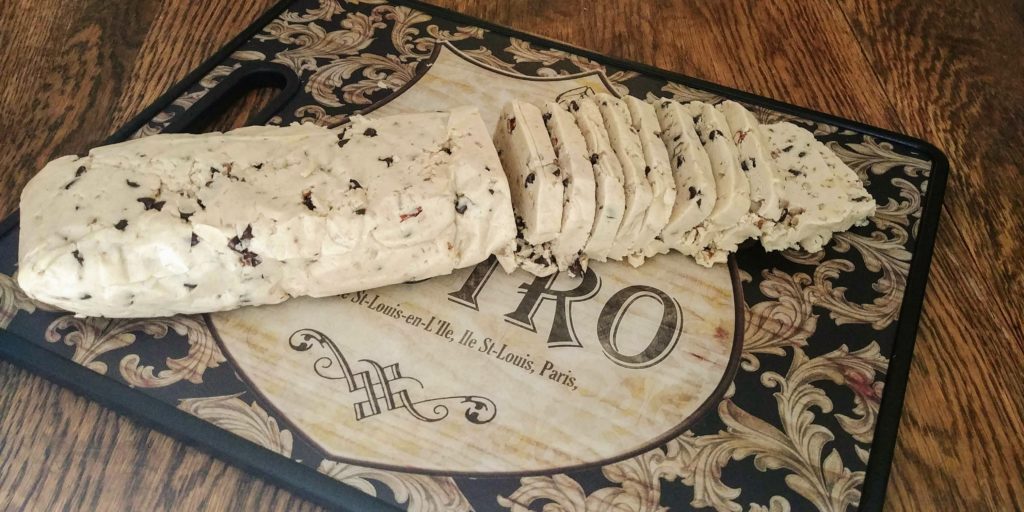
When you are ready to bake, preheat the oven to 400 degrees.  Remove the wax paper and use a sharp knife to cut the dough log crosswise into about ⅛ inch slices.  The cookies will expand a bit during baking so take that into account. Place the slices on an ungreased baking sheet or one lined with parchment paper.  Bake for 5 – 8 minutes or until the edges are very lightly browned. Mine took 7 minutes.

Icebox cookies log sliced 2


Allow the cookies to remain on the cookie sheet for about 5 minutes and then remove to a cooling rack or parchment on your countertop.  After the cookies have cooled completely they will be crisper. The single batch makes about 6 dozen Vintage Icebox Cookies depending on how thick you slice them.   Enjoy them with a cold glass of milk or steaming cup or tea. Delicious!


Icebox cookies complete 3


Vintage Icebox Cookies

September 22, 2018
: Easy

This cookie is crisp but not hard, buttery and not overly sweet. The variations are endless, making this one of the most versatile go-to cookie doughs that you will ever make.

By:

Ingredients
  • 4 cups all-purpose flour, sifted
  • 1 teaspoon baking powder
  • 1/4 teaspoon baking soda
  • 1 teaspoon salt
  • 1 cup softened butter
  • 1/3 cup Crisco or another shortening
  • 1 cup brown sugar, packed
  • 2/3 cup granulated sugar
  • 2 eggs, beaten
  • 1 1/2 teaspoons vanilla
  • 1 cup of finely chopped pecans
  • 1 cup of mini chocolate chips
Directions
  • Step 1 Measure out 4 cups of all-purpose flour and sift it into a large bowl. Then measure 4 cups of that sifted flour and add to a different large bowl. Add the baking powder, baking soda and salt to the newly measured flour and then sift again. Set aside.
  • Step 2 Cream the shortening and softened butter until completely combined. Add the sugars gradually and beat on medium speed until lightened in color, scraping the sides of the bowl occasionally.
  • Step 3 Add the beaten eggs and vanilla and mix until combined.
  • Step 4 Gradually mix in the dry ingredients until just combined.
  • Step 5 Stir in the finely chopped nuts and mini chocolate chips or your choice of additions.
  • Step 6 Tear off a piece of waxed paper that is about 18 inches long. Scoop the dough onto the wax paper and shape into a log that is about 3 inches in diameter. Wrap the dough tightly with the wax paper, sealing the ends with tape or twist ties. Refrigerate overnight, at least.
  • Step 7 When you are ready to bake, preheat the oven to 400 degrees.
  • Step 8 Remove the wax paper and use a sharp knife to cut the dough log crosswise into about ⅛ inch slices.
  • Step 9 Place the slices on an ungreased baking sheet or one lined with parchment paper. Bake for 5 – 8 minutes or until the edges are very lightly browned.
  • Step 10 Allow the cookies to remain on the cookie sheet for about 5 minutes and then remove to a cooling rack or parchment on your countertop.


Tastes Like Love Cinnamon Roll Cake

Tastes Like Love Cinnamon Roll Cake

Hi Everyone!  How is the weather in your neck of the woods?  Has the summer heat finally left you? I’m not sure it will ever leave here. Mind you, I like summer. I love swimming at my sister, Marilyn’s, pool and watching the lightning bugs.  But, when the end of August comes around I start to think of Autumn and all the good things it brings. There are pleasant days and cool nights when you can leave the windows open and hear the bugs and birds, the sight of colorful leaves and pumpkins and best of all – the food.  I get a real craving for soups and casseroles. The baking is different once the temperatures drop too. Yes, I still make cookies and cakes, but in Autumn there are pumpkin and squash desserts galore and then many recipes have that wonderful touch of cinnamon.

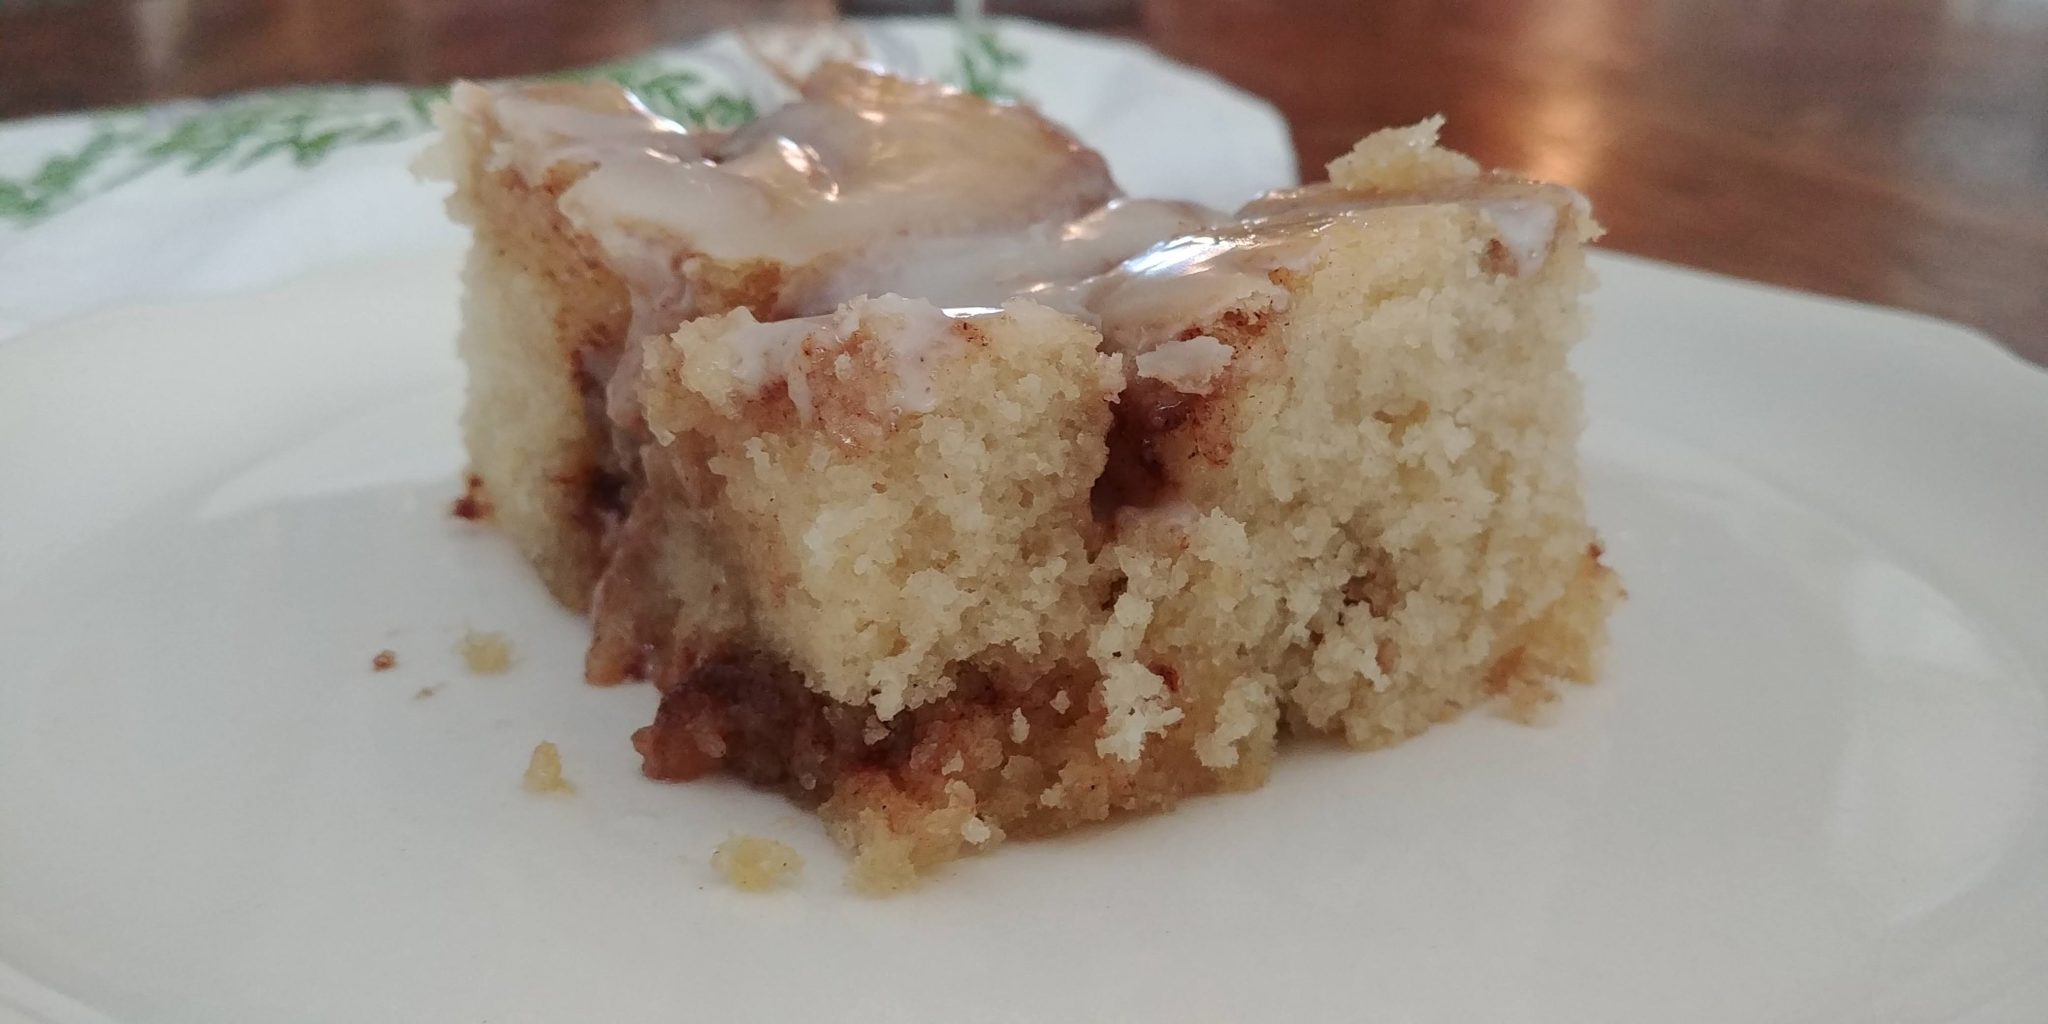
I adore a good cinnamon roll.  If you recall, a few months ago I told you all about the tea ring which is just like a giant cinnamon roll.  I could seriously eat a whole tea ring and not break a sweat. Yes, I know, I have a problem – a gooey, cinnamony, yeasty, wonderful problem.  However, cinnamon rolls and even tea rings are a time commitment that I can’t always make. But, good news, I am going to share with you a cake recipe that is super easy and super quick and super delicious.  Seriously, this cake tastes just like a big old gooey cinnamon roll. The cake is fluffy with pockets of cinnamon sugar swirled throughout with a nice simple vanilla glaze on top. I have taken this moist and yummy cake to family gatherings and I have never had a complaint yet.  And, believe me, you can always trust your loved ones to let you know the truth about food.  But this cake is just too darn good to criticize. You could easily serve this cake for a holiday breakfast, dessert, with coffee when guests drop by or any old time. It is fantastic warm but also keeps well in a sealed container for a few days. I like to keep mine in the frig and then warm pieces for serving.  I have often thought that a drizzle of apple pie filling would be great for pie lovers. I am just happy with the cake as it is – simple and cozy with the flavors of home and love.

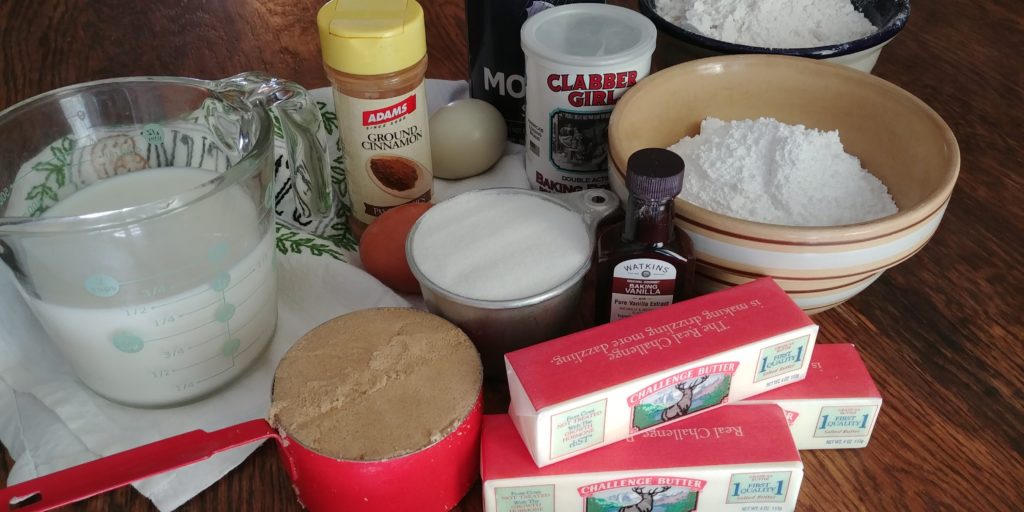
This cake is totally from scratch but is still so very simple.  Don’t be apprehensive about this recipe. It is as easy as pie – or cake.  You will need flour, salt, sugar, baking powder, eggs, vanilla, milk (2 % or whole), and melted butter for the cake.  The cinnamon filling is made with softened butter, brown sugar, flour and cinnamon (duh). The glaze is made with powdered sugar, vanilla and milk or heavy cream.  I really like to use cream but milk works too.

Cinnamon Roll Cake Ingredients


Preheat your oven to 350 degrees and spray a 9 X 13 cake pan with cooking spray.

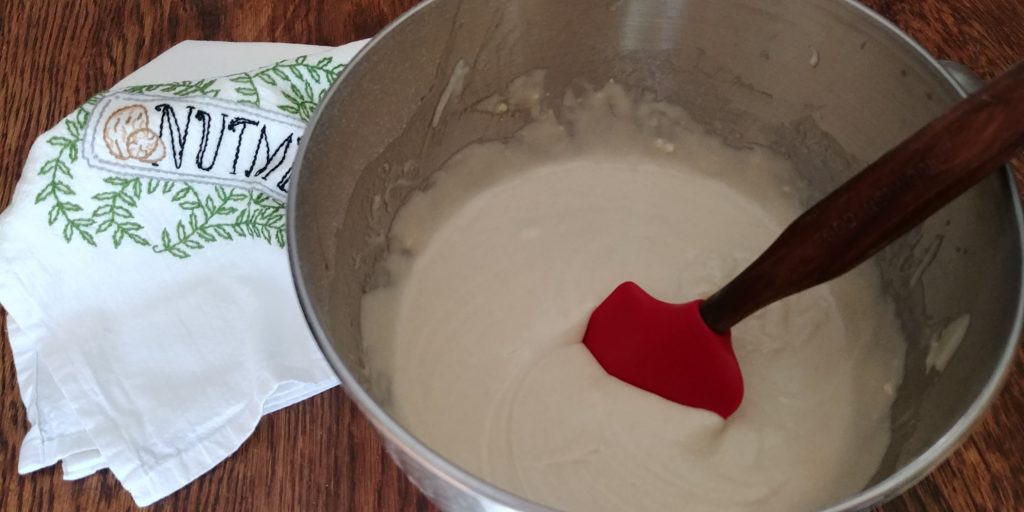
In the bowl of your stand mixer or large mixing bowl if using a hand mixer, combine 3 cups of flour, ¼ teaspoon salt, 1 cup sugar and 4 teaspoons of baking powder with a whisk or fork until everything is pretty evenly distributed.  Add in 2 eggs, 3 teaspoons of vanilla and 1 ½ cups milk and mix well. Turn the mixer down to low and slowly add ½ cup of butter that has been melted and cooled slightly. Mix this just until everything is combined. Pour the batter into the prepared cake pan and set aside.
Cinnamon Roll Cake first step


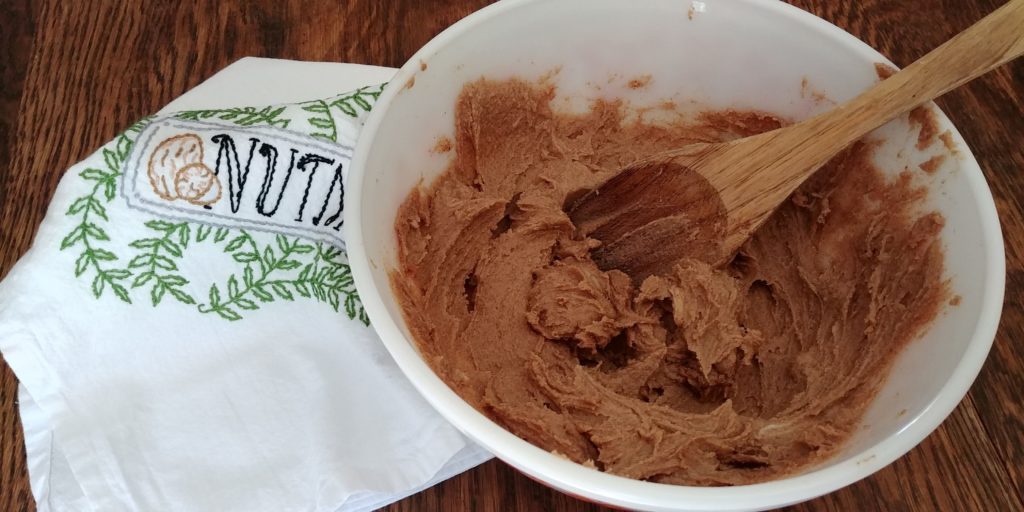
Now you need to make the cinnamon filling.  This is the most strenuous part of the whole proceeding.  Add 1 cup of softened butter, 1 cup of brown sugar, 2 Tablespoons of flour and 1 Tablespoon of cinnamon to a medium bowl and mix by hand with a wooden or plastic spoon.  Don’t use a mixer if you can help it because the filling might become too soft. Use some elbow grease and mix until you have a nice paste consistency and you don’t see too many pockets of butter left.

Cinnamon Roll Cake filling


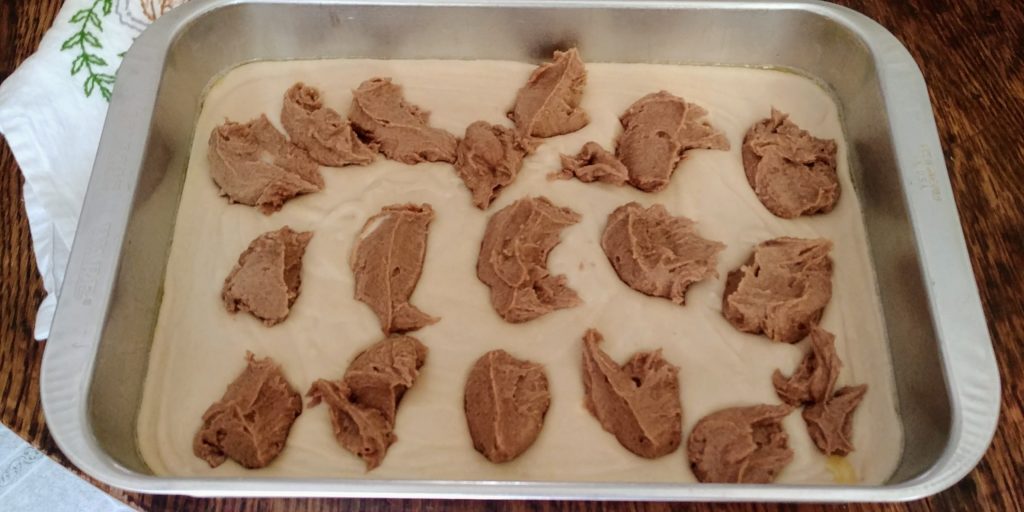
Drop the cinnamon filling all over the cake batter in globs that are about the size of a walnut.


Cinnamon Roll Cake batter and filling before swirl

Cinnamon Roll Cake batter and filling before swirl


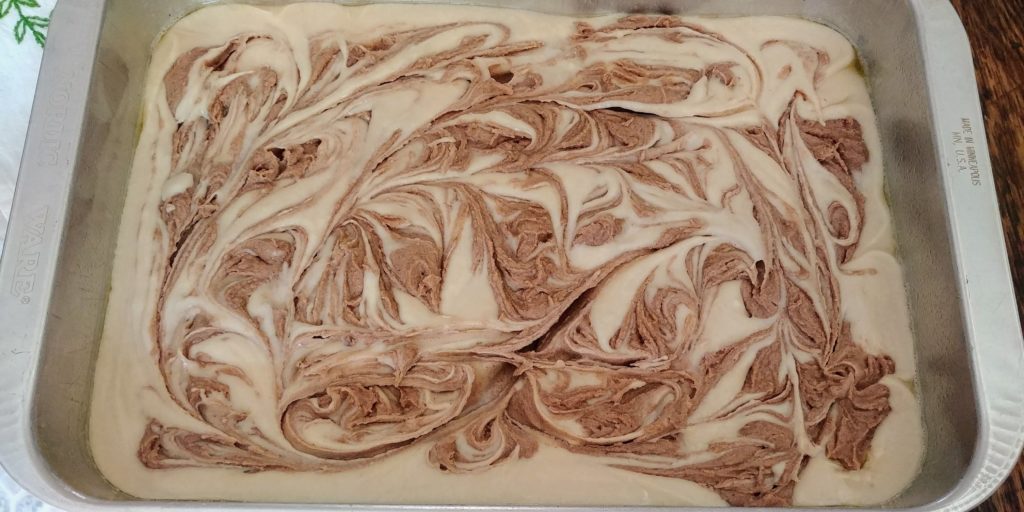
Once you have dropped all of the filling on the batter use a table knife to run through the globs to make streaks and swirls throughout the cake.  You want to have cinnamon filling in each bite so swirl pretty liberally but don’t go so far as stirring.

Cinnamon Roll Cake swirled unbaked


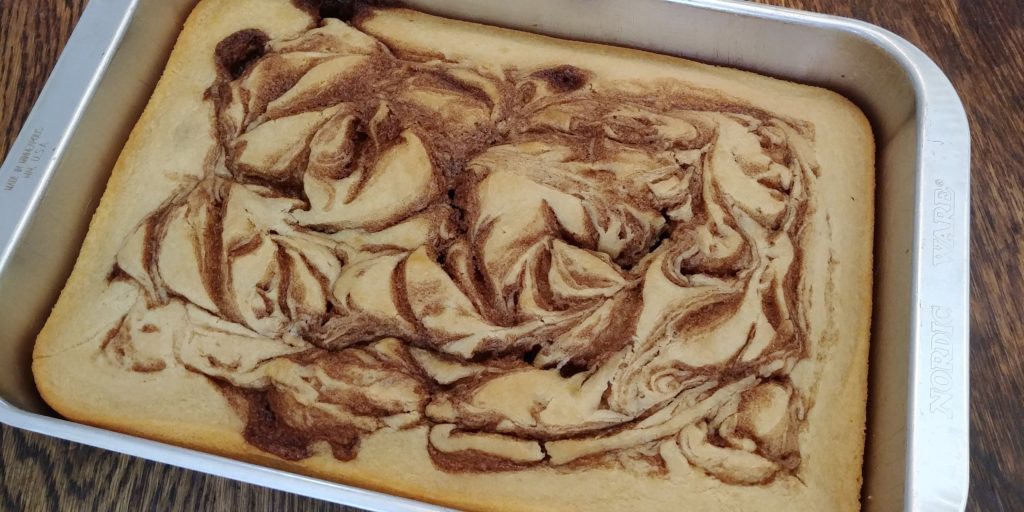
Bake for 35 – 40 minutes until a toothpick inserted in the center comes out pretty clean and the edges are very slightly browned.  Do not overbake.

Cinnamon Roll Cake baked unglazed


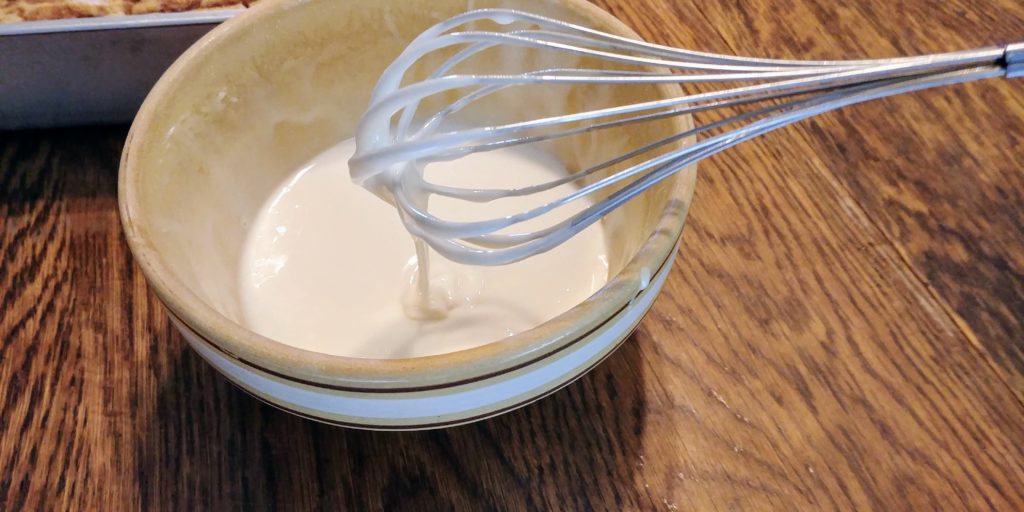
After the cake has cooled for about 30 minutes, make the glaze.  To do that, you will need to add 2 cups of powdered sugar to a large measuring cup or small bowl.  Mix in milk or cream and 1 teaspoon of vanilla just until you have a nice thick glaze. I used about 3 Tablespoons of milk for mine but you may need more.


Cinnamon Roll Cake glaze in bowl


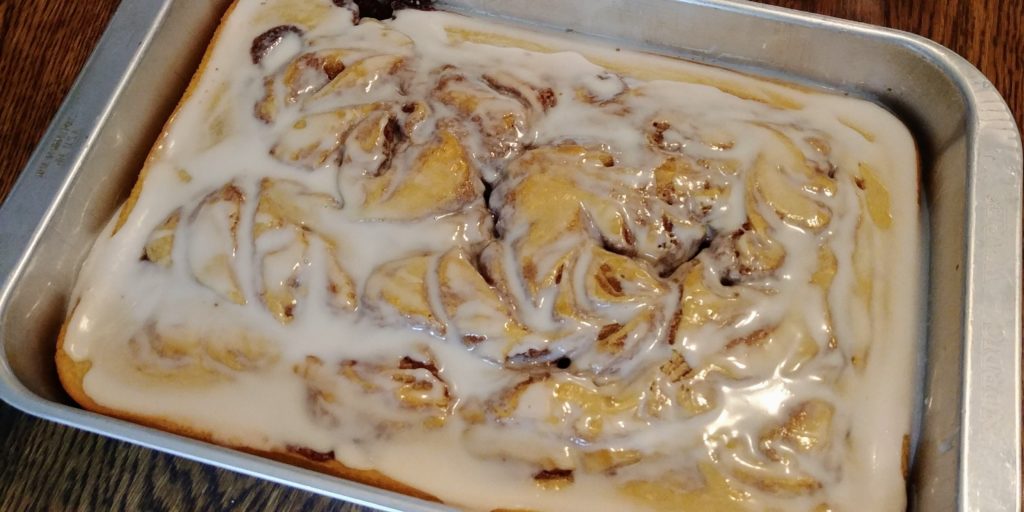
Pour the glaze in a thin stream over the warm cake, allowing it to run into all the little cracks and crevices.

Cinnamon Roll Cake glazed in pan


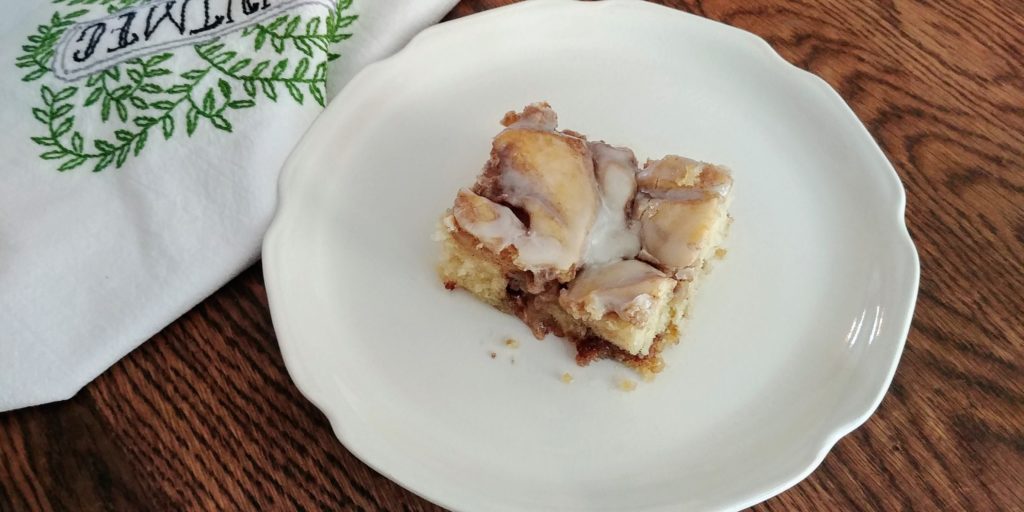
Serve this delicious cake warm or cool.  Either way, you will not be disappointed.  

Cinnamon Roll Cake complete on plate 3


Tastes Like Love Cinnamon Roll Cake

September 11, 2018
: 12 or more
: Medium

This cake tastes just like a big old gooey cinnamon roll. The cake is fluffy with pockets of cinnamon sugar swirled throughout with a nice simple vanilla glaze on top.

By:

Ingredients
  • For the cake:
  • 3 cups all-purpose flour
  • 1/4 teaspoon salt
  • 4 teaspoons baking powder
  • 1 cup white sugar
  • 2 eggs
  • 3 teaspoons vanilla
  • 1 1/2 cups milk
  • 1/2 cup butter, melted and cooled slightly
  • For the filling:
  • 1 cup softened butter
  • 1 cup brown sugar
  • 2 Tablespoons flour
  • 1 heaping Tablespoon of cinnamon
  • For the glaze:
  • 2 cups powdered sugar
  • 3 - 5 Tablespoons milk or cream
  • 1 teaspoon vanilla
Directions
  • Step 1 Preheat your oven to 350 degrees and spray a 9 X 13 cake pan with cooking spray.
  • Step 2 In the bowl of your stand mixer or large mixing bowl if using a hand mixer, combine 3 cups of flour, ¼ teaspoon salt, 1 cup sugar and 4 teaspoons of baking powder with a whisk or fork until everything is pretty evenly distributed.
  • Step 3 Add in 2 eggs, 3 teaspoons of vanills and 1 ½ cups milk and mix well.
  • Step 4 Turn the mixer down to low and slowly add ½ cup of butter that has been melted and cooled slightly. Mix this just until everything is combined.
  • Step 5 Pour the batter into the prepared cake pan and set aside.
  • Step 6 To make the cinnamon filling, add 1 cup of softened butter, 1 cup of brown sugar, 2 Tablespoons of flour and 1 heaping Tablespoon of cinnamon to a medium bowl and mix by hand with a wooden or heavy plastic spoon.
  • Step 7 Drop the cinnamon filling all over the cake batter in globs that are about the size of a walnut.
  • Step 8 Use a table knife to run through the globs to make streaks and swirls throughout the cake.
  • Step 9 Bake for 35 – 40 minutes until a toothpick inserted in the center comes out pretty clean and the edges are very slightly browned. Do not overbake.
  • Step 10 Allow the cake to cool for about 30 minutes.
  • Step 11 To make the vanilla glaze add 2 cups of powdered sugar to a large measuring cup or small bowl. Mix in milk or cream and 1 teaspoon of vanilla just until you have a nice thick glaze.
  • Step 12 Pour the glaze in a thin stream over the warm cake.
Ladybug Cookies

Ladybug Cookies

Hi Everyone!  A couple of weeks ago I told you all about the Goode family reunion.  Well, we did have that event and it was very well-attended. I think that the crowd was the biggest in many years.  When I was a kid I remember that it was huge but about 10 or so years ago the numbers began to dwindle. I think that the younger families were having fewer children and were busy with their kids’ activities.  Or, maybe they didn’t realize the importance of keeping in touch with relatives. But, last year there were some family members there that we locals had not seen in a while and then this year there were even more.  I was pleased to see my Aunt Wissy’s family and my cousin Charlene as well as many others. There was, of course, a huge amount of food. I wanted to take a picture of the buffet before everyone grabbed plates and began to pile on but I (as usual) was running behind.  I just barely got there and put my contributions out before everyone began to line up. Oh well, maybe next year. There was a big pot of squirrel and noodles and a big platter of fried squirrel. There was also an abundance of fried chicken and pork chops, garden-grown veggies and lots of salads, including one of my favorites – potato salad.  I told you before that I am from a farm family. We hunt and fish and cook and bake and EAT.

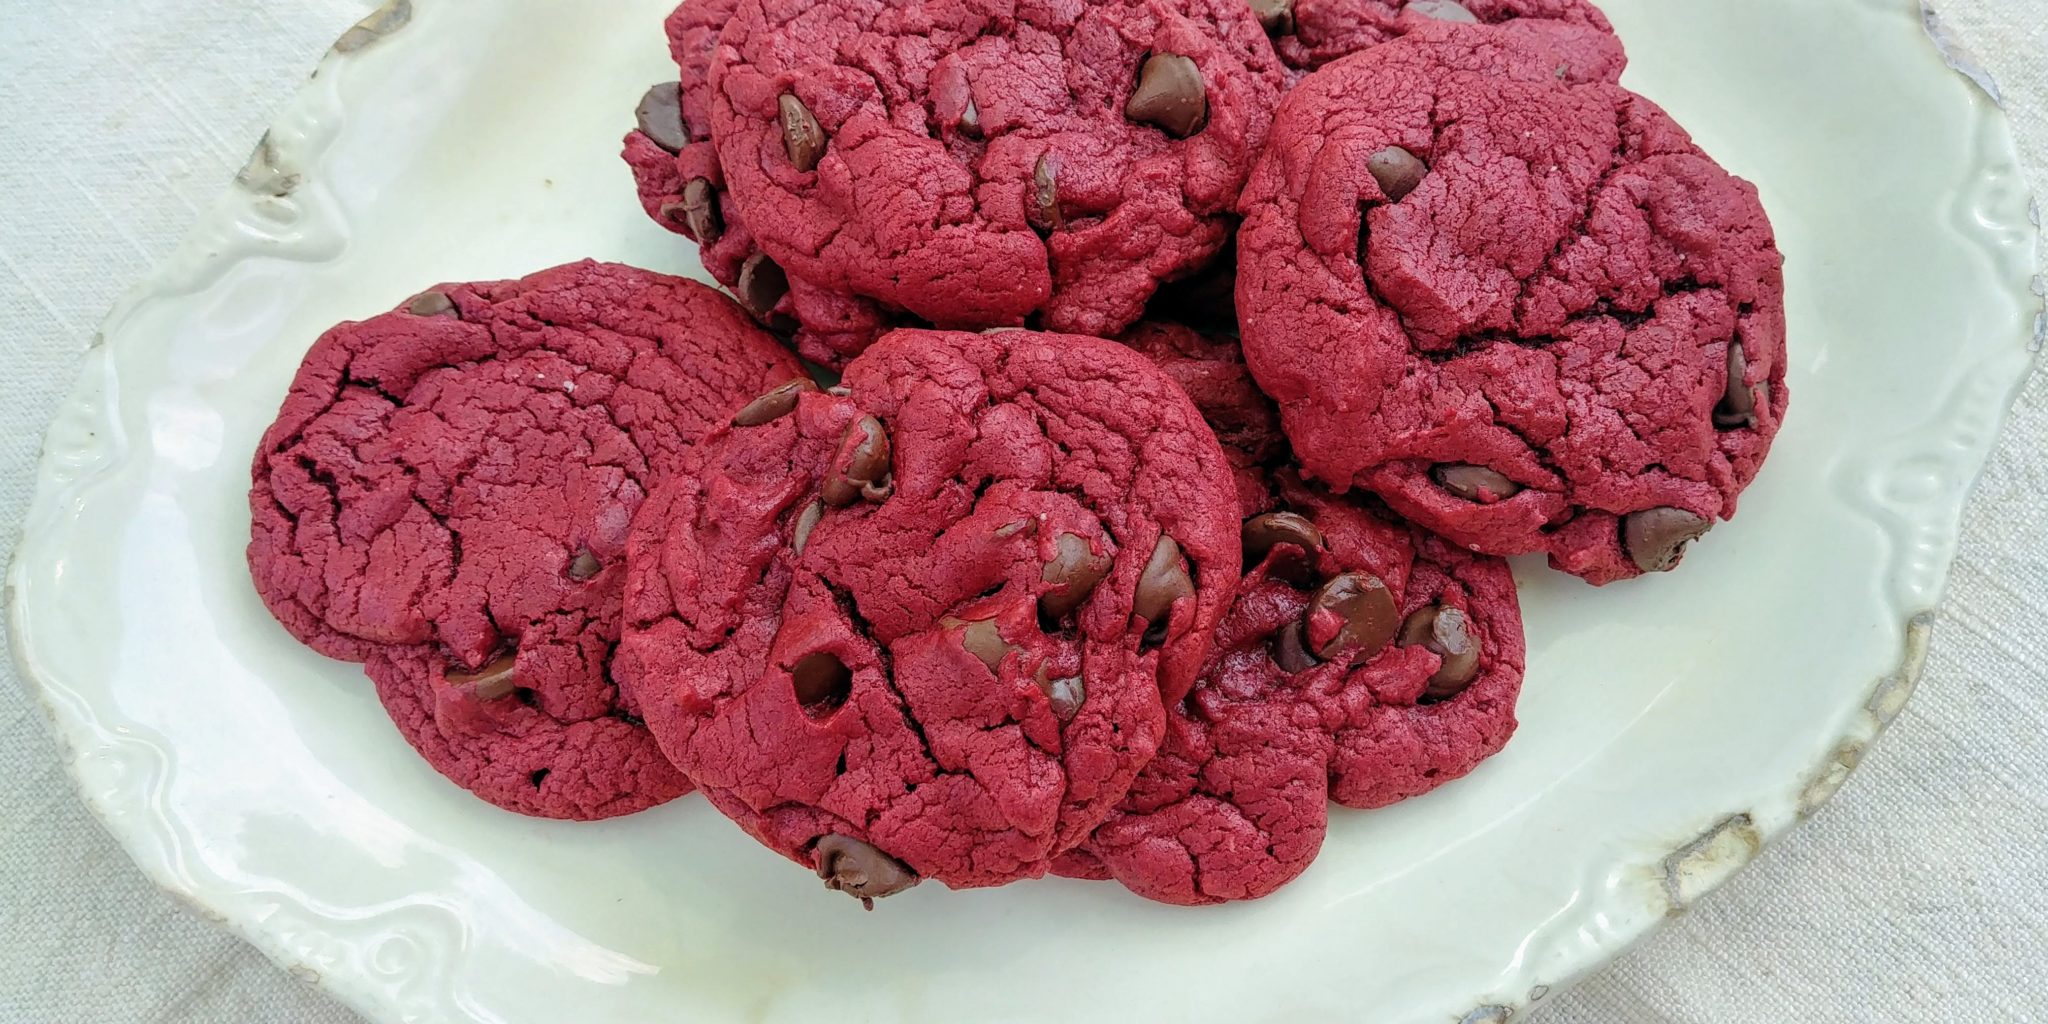
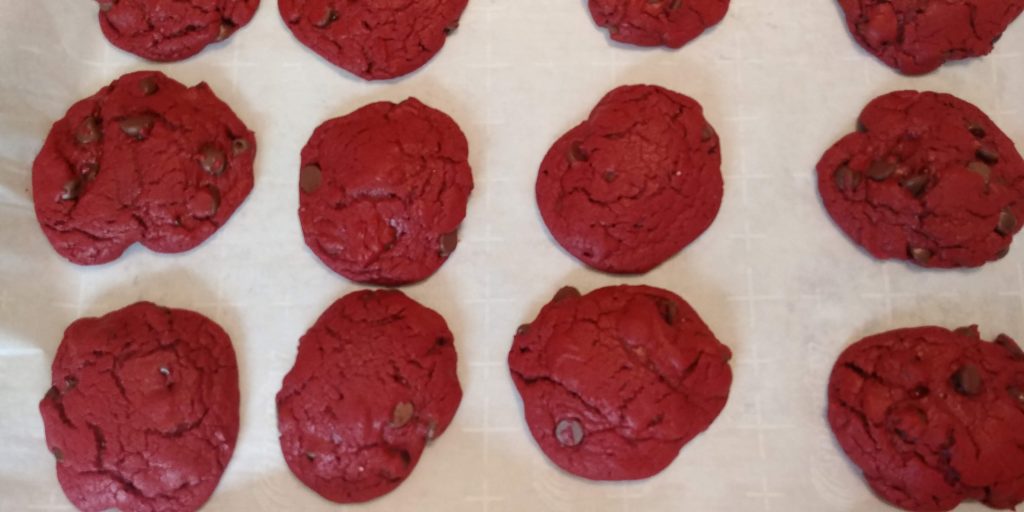
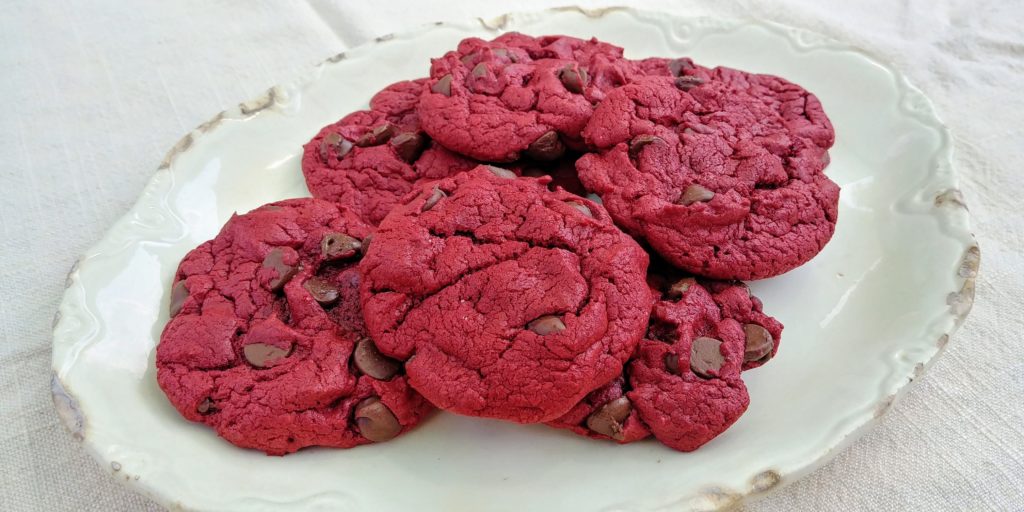
I made my often-requested Ladybug Cookies.  This recipe comes from one that I read in a Gooseberry Patch cookbook when my kids were small.  It was a basic box cake mix cookie recipe and I usually made chocolate cookies with it. Then, one day, for some reason that I can’t remember, I decided to try red velvet cake mix.  My boys loved them. And, they dubbed them Ladybug Cookies because the finished product looks kind of like a big red ladybug. Shortly after I came up with this recipe some little girls who lived in my mother-in-law’s neighborhood set up a lemonade stand and wrote and sold a cute little cookbook.  The recipes were contributions from friends and neighbors. We shared the Ladybug Cookie recipe and so it was published the first time. Years later I submitted the recipe to Gooseberry Patch and it was published in the Christmas Cookie Jar cookbook. I have always been a Gooseberry Patch cookbook junkie, so I was especially thrilled when that happened.

In the subsequent years, I have made these cookies hundreds of time.  They are always a big hit when I take them to potlucks, holiday gatherings or to work.  My kids love to have them warm from the oven any time of the year. Recently, I have tweaked the recipe just a bit.  I discovered a while back that the batter had become very oily and kind of loose. The cookies flattened out more than usual too.  I finally figured out that the box of cake mix had decreased in weight by a couple of ounces. That difference, though small, was affecting my finished result.  I played around a bit with different ideas but ultimately decided that the addition of some flour would probably do the trick nicely and it does. I have also played with different brands of cake mix and though the cookies do turn out slightly different in color depending on the brand the taste is virtually the same.  The other change that I have made is the recommendation that you let the cookie dough rest for about 15 minutes before you bake the first batch. The dough seems to tighten up a bit if you do this and your cookies will stay nice and plump. I am not a flat cookie fan. I like my cookies big and fat. I almost always double this recipe.  Believe me, these cookies do not stay around long. I figure that if I am baking I might as well have enough to share with friends and family. So, I am giving you the ingredient measurements for a double batch. If you don’t need that many cookies you can easily halve everything. No biggie.  Ladybug Cookies are plump and tender with that wonderful moist red velvet cake flavor and loads of melty chocolate chips. And, they are super cute!

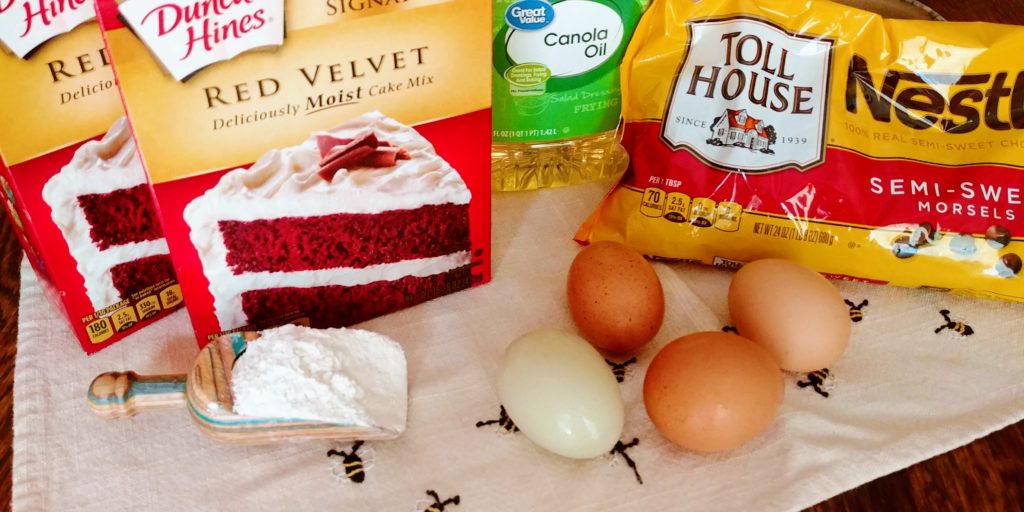
To start, you will need 2 boxes  (15.25 oz. each) of red velvet cake mix (any brand), 1 cup of vegetable or canola oil, 4 eggs, ¼ cup all-purpose flour and 3 – 4 cups of semi-sweet chocolate chips.  

Ladybug Cookies Ingredients


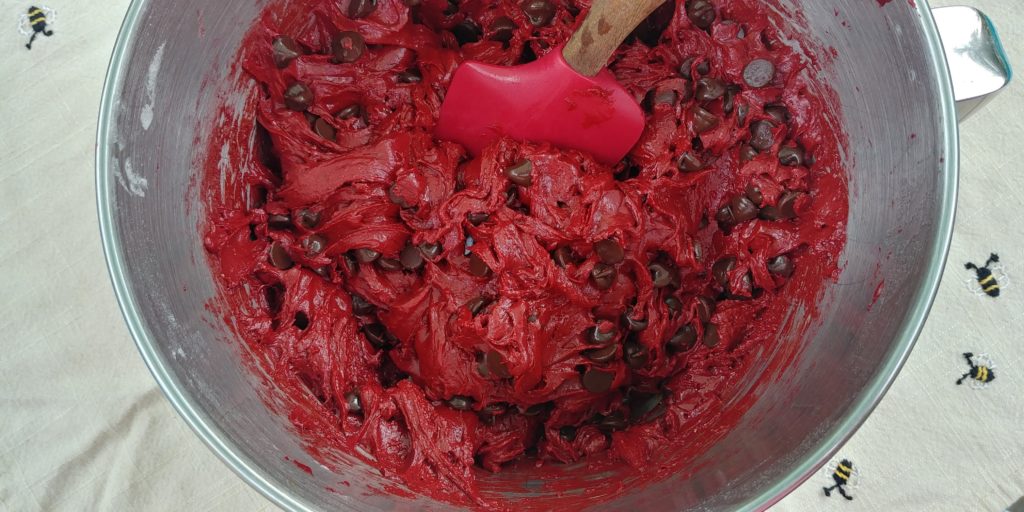
Preheat the oven to 350 degrees and line your baking sheets with parchment paper (if desired).  Crack the eggs into a mixing bowl or the bowl of your stand mixer, if using one. I have to crack mine into a small bowl or measuring cup first.  I am rarely able to break an egg without getting a piece of shell in it. I am lousy at it. Anyway, beat the eggs just a bit and then add the cake mix, flour, and oil.  Mix until well combined, scraping the sides as needed. This will only take a minute or so. Stir in the chocolate chips and let the dough rest for about 15 minutes.  I use 4 cups of chocolate chips because I am a chocoholic but you can lessen the amount if you want more cookie and less chocolate.  

Ladybug Cookies batter in bowl

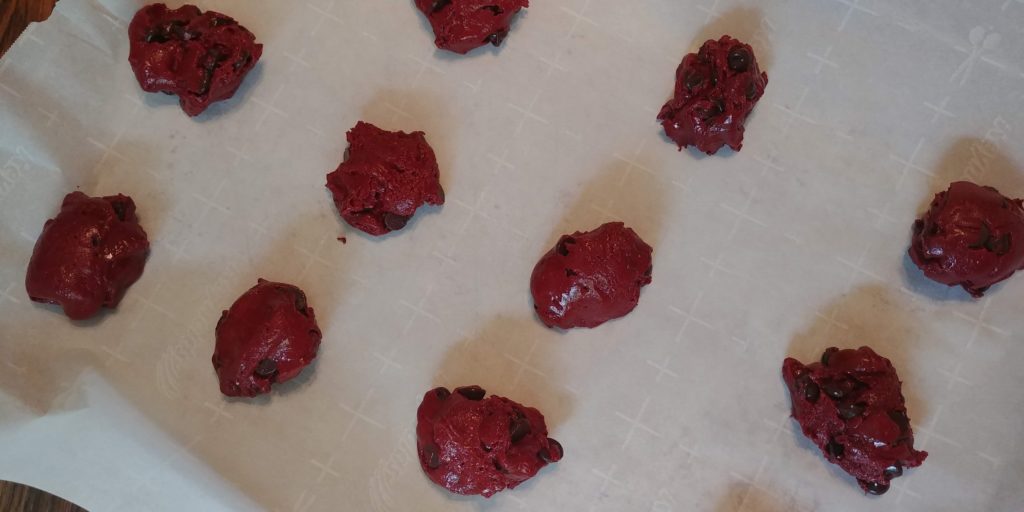
Scoop 2 tablespoon-sized mounds of dough onto the cookie sheet.

Ladybug Cookies unbaked cookies on sheet


Bake for 9 – 10 minutes or until the centers are set and no longer glossy.  Leave them on the cookie sheet for a couple of minutes before removing to a rack or a parchment lined surface.  Please excuse the blurry picture.  I think my lens had flour or cookie dough or something on it.  Go figure.  


Ladybug Cookies baked cookies on sheet

See how easy that is? Anybody can do it and I guarantee that you will get oodles of compliments.  Now get a big old glass of cold milk and enjoy!

Ladybug Cookies baked cookies on plate 2


Ladybug Cookies

September 3, 2018
: Easy

Ladybug Cookies are plump and tender with that wonderful moist red velvet cake flavor and loads of melty chocolate chips.

By:

Ingredients
  • 2 boxes of red velvet cake mix (any brand)(15.25 oz. each)
  • 1 cup canola or vegetable oil
  • 1/4 cup all-purpose flour
  • 4 eggs, lightly beaten
  • 3 - 4 cups semi-sweet chocolate chips
Directions
  • Step 1 Preheat the oven to 350 degrees and line your baking sheets with parchment paper (if desired).
  • Step 2 Crack the eggs into a mixing bowl or the bowl of your stand mixer, if using one, and beat for about 1 minute.
  • Step 3 Add the cake mix, flour and oil. Mix until well combined, scraping the sides as needed.
  • Step 4 Stir in the chocolate chips and let the dough rest for about 15 minutes.
  • Step 5 Scoop 2 tablespoon-sized mounds of dough onto the cookie sheet and bake for 9 – 10 minutes or until the centers are set and no longer glossy.
  • Step 6 Leave them on the cookie sheet for a couple of minutes before removing to a rack or a parchment lined surface.
Doritos Chicken Casserole

Doritos Chicken Casserole

Hello to one and all!  How is everyone doing? Are all the kids back in school yet?  For the first time in many, many, many years I am not buying notebooks and pencils and folders.  It feels weird. Alex (son, the younger) and I went clothes shopping a couple of weeks ago and as we passed the back-to-school section I mentioned to him that we don’t have to buy any of that stuff this year.  It was a bit sad, but also, it was incredibly happy. Most of my readers might not realize but law school students still need notebooks and such. Now that Alex has graduated and is finished with his bar exam, he doesn’t have to think about homework and classes.  I’m not sure that he knows what to do with himself in the evenings. He has started his new job as a Public Defender in Missouri. Last week was his first official week. He has a bit of a commute and I know how crappy that can be. So, I tried to load him up with leftovers and heat-and-eat foods for his suppers.  He loves to cook but the new schedule will take some time to get used to and I wanted to help out as much as I could. I made one of his all-time favorite dishes and then sent the entire thing back with him. He can get several meals out of it and even freeze some if he chooses. I told him on Saturday that I would be sending an entire Doritos Chicken Casserole back with him.  His response was, “YES!”, so I think he approved of the idea.

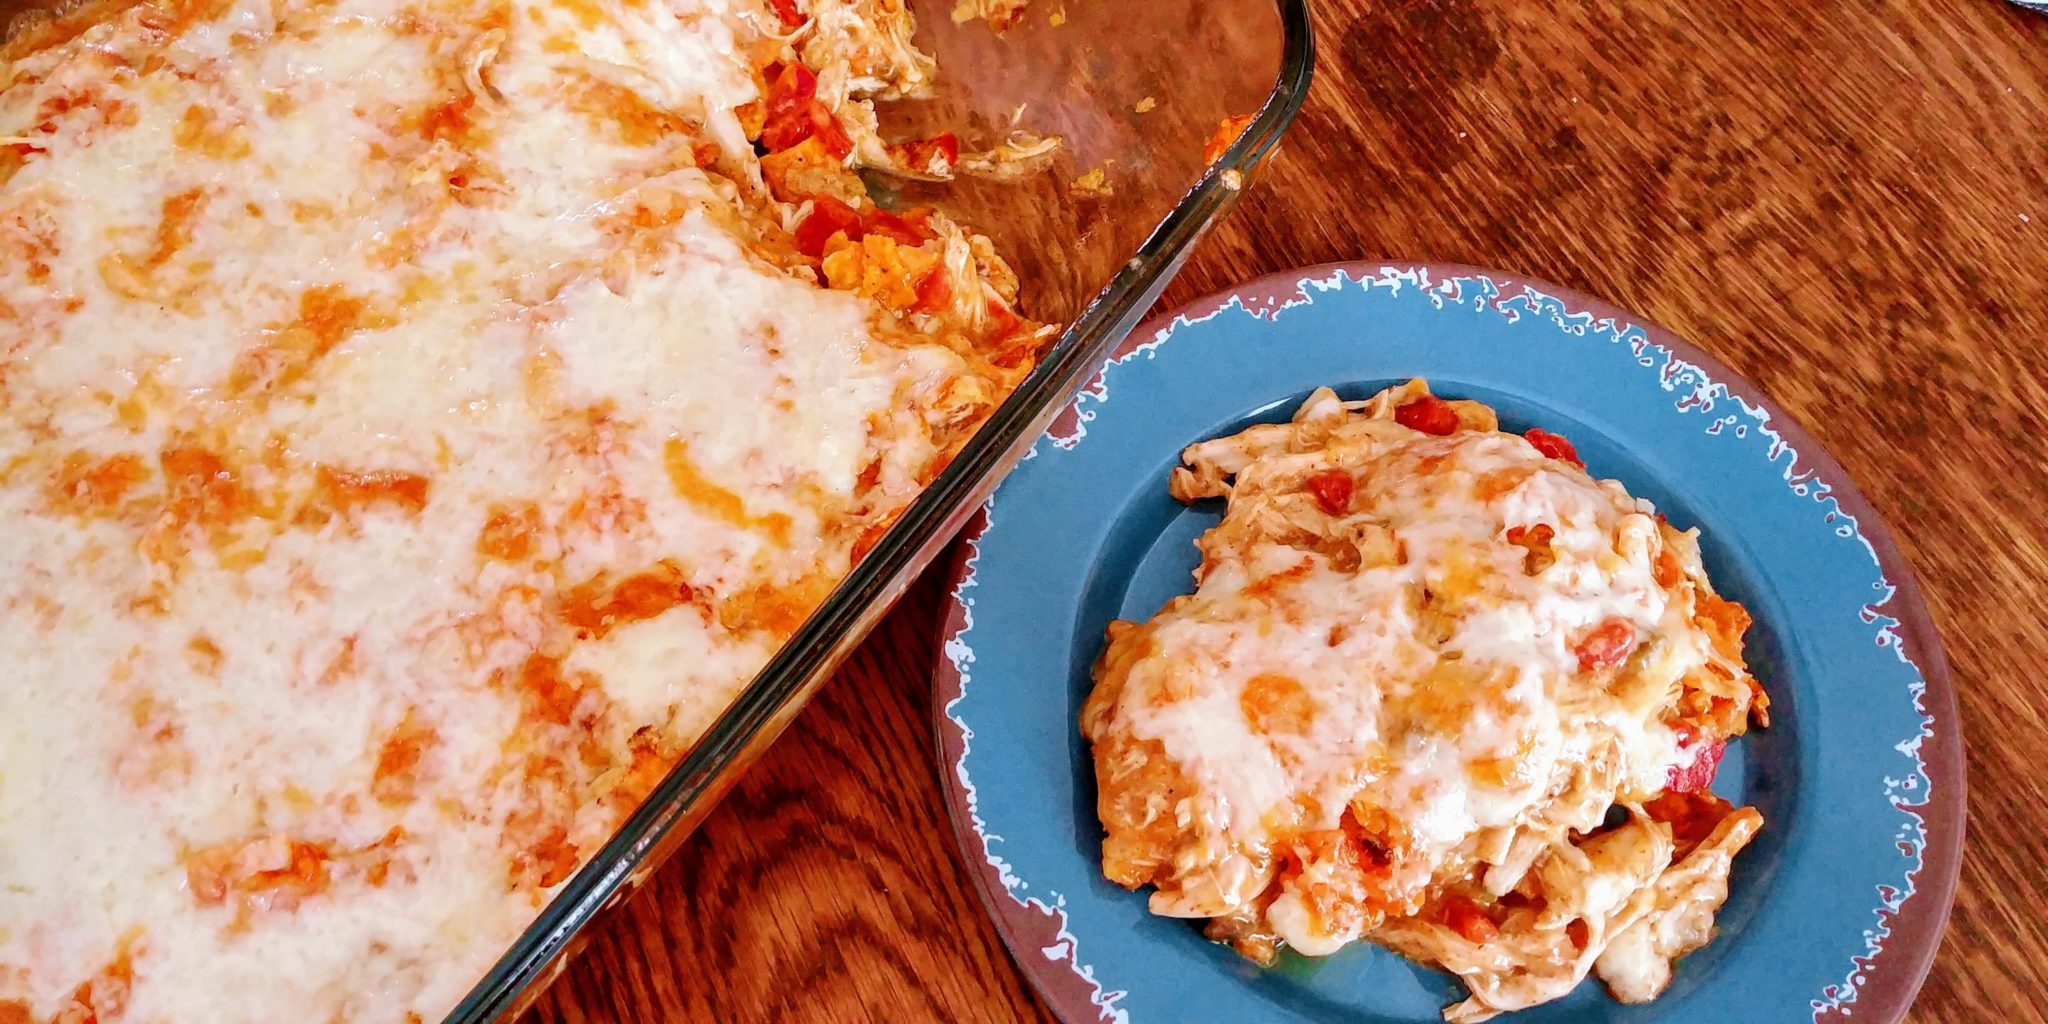
This is such an easy recipe.  It is a great starter dish for those who have just begun to spread their culinary wings.  The ingredients are an unusual mix but come together to make a delicious and decadent casserole. Fair warning, this is not a healthy dish, at all.  But, life isn’t all about only eating healthy foods. Sometimes you gotta live a little and eat what makes you happy. And, Doritos make Alex happy. Heck, Doritos make most people happy.  What’s not to like? They have a nice substantial crunch, ultra-cheesy flavor and they make your fingers orange. Any chip that causes you to lick your fingers like a 6-year-old has to be good, right?  As a part of this casserole, the Doritos add a wonderful texture and cheesy flavor. The mixture of soups and Rotel creates a nice creamy sauce for the rotisserie chicken to wallow in. Then top it all off with shredded cheese that gets all melty and bubbly and browned in the oven and you will be saying, “mmmmmmmmm…..mmmm…..mmmm”.

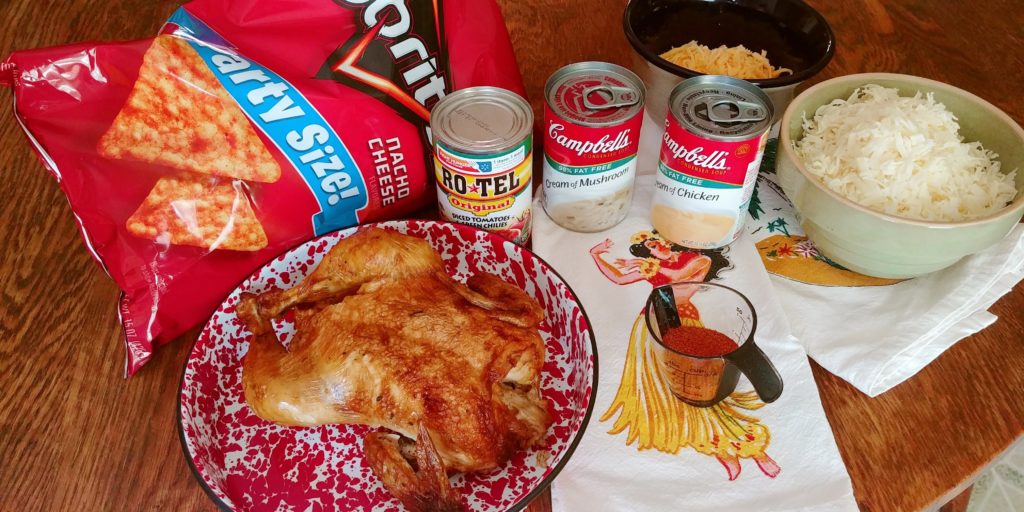
Doritos Chicken Casserole ingredients


For this dish you will need a rotisserie chicken (or you can boil or bake a chicken yourself) that yields about 4 cups when removed from the bones and shredded.  A party-sized bag of Doritos. You will have a few chips left. Darn, right? You will also need a can of cream of mushroom soup and a can of cream of chicken soup.  I always use the healthier versions of these soups that have less fat and/or sodium. Believe me, there is enough salt in this dish without any extra in the soups. You need a can of the original Rotel and some shredded cheddar cheese.  I used sharp white cheddar and a smaller amount of yellow cheddar this time, but I have also used the Mexican blend of pre-shredded cheese before. You will use taco seasoning as well. I used my own blend of spices this time but if you want to use the packaged variety, feel free.  Just make sure to only use the amount required and not the whole envelope. (more…)