Hi All! How is everyone? That good, huh? It has been kind of busy here and the next few weeks look to be really hectic. This is always a busy time of year for us. Both of my sons’ birthdays are in September and there are always lots of events to attend. I normally attempt to do a fall cleaning of the house, basement and yard before we have a birthday party for the guys. But, I give up on that this year. I am hollering, UNCLE. There is just no time and I don’t really want to burn vacation days to do it. The house will just have to be good enough this year. I think that I said the same thing last year…hmmm…I spot a trend here. Oh well, there are more important things in life than washing walls and cleaning out closets, right? Right. And, one of those things is baking cookies. Even when I am busy I just can’t rely on store-bought packages of cookies to feed my loved ones. Don’t get me wrong, I love a double-stuff Oreo passionately, but baking cookies is a way for me to stay sane.
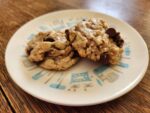
For years, I have seen recipes for icebox or refrigerator cookies that you can make ahead of time and then just slice and bake when you need them and only as many as you need. Those would be absolutely perfect for times like this, but I gotta say, that I have never been a fan. It isn’t that I disliked them. I just never had them. My mom did not bake icebox cookies, so I really had no exposure to them. I have said before that I am a huge fan of fat, chewy cookies and icebox cookies are neither of those things. So, I guess I just figured that I wouldn’t like them. Now, my father-in-law, Gary, has an icebox cookie recipe that he has loved for years and years. I have been a part of that family, in some way, for like 37 years and until a few months ago I never really paid these cookies much attention. But, one day, a bag of them showed up on our kitchen table and I decided to properly evaluate them. Okay, in common terms, I was hungry, and I ate one. The cookie was nice and crisp and buttery with little bits of nuts. I determined that I DO like these cookies. And, I also determined that I needed to share this recipe with you. I texted Amy, my stepmother-in-law, to ask for the recipe. She shared a picture of the actual recipe from a WWII era (1942) cookbook. The page was yellowed and obviously much-used and loved. There is a basic recipe and then lots of suggestions for variations follow. Gary uses the nut variation, normally using hickory nuts, pecans or black walnuts. I like to bake with hickory nuts, but I did not have the time to find any in the freezer and then pick through them to get out any stray bits of shell. I opted for pecans and then added mini chocolate chips for my own twist and dubbed them Vintage Icebox Cookies. The dough is very easy to mix up with stuff you probably already have on hand. You do need to chill the dough at least overnight. It can be chilled for several days or frozen for future use. Just make sure that you wrap it up nice and tight so that the dough does not take on that freezery taste. The width of your slices determines if your cookies turn out very crisp or firm but soft. I sliced my first batch too thick and they didn’t crisp up like I wanted so the remaining batches were sliced about ⅛ inch thick.
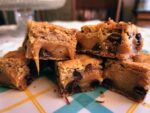
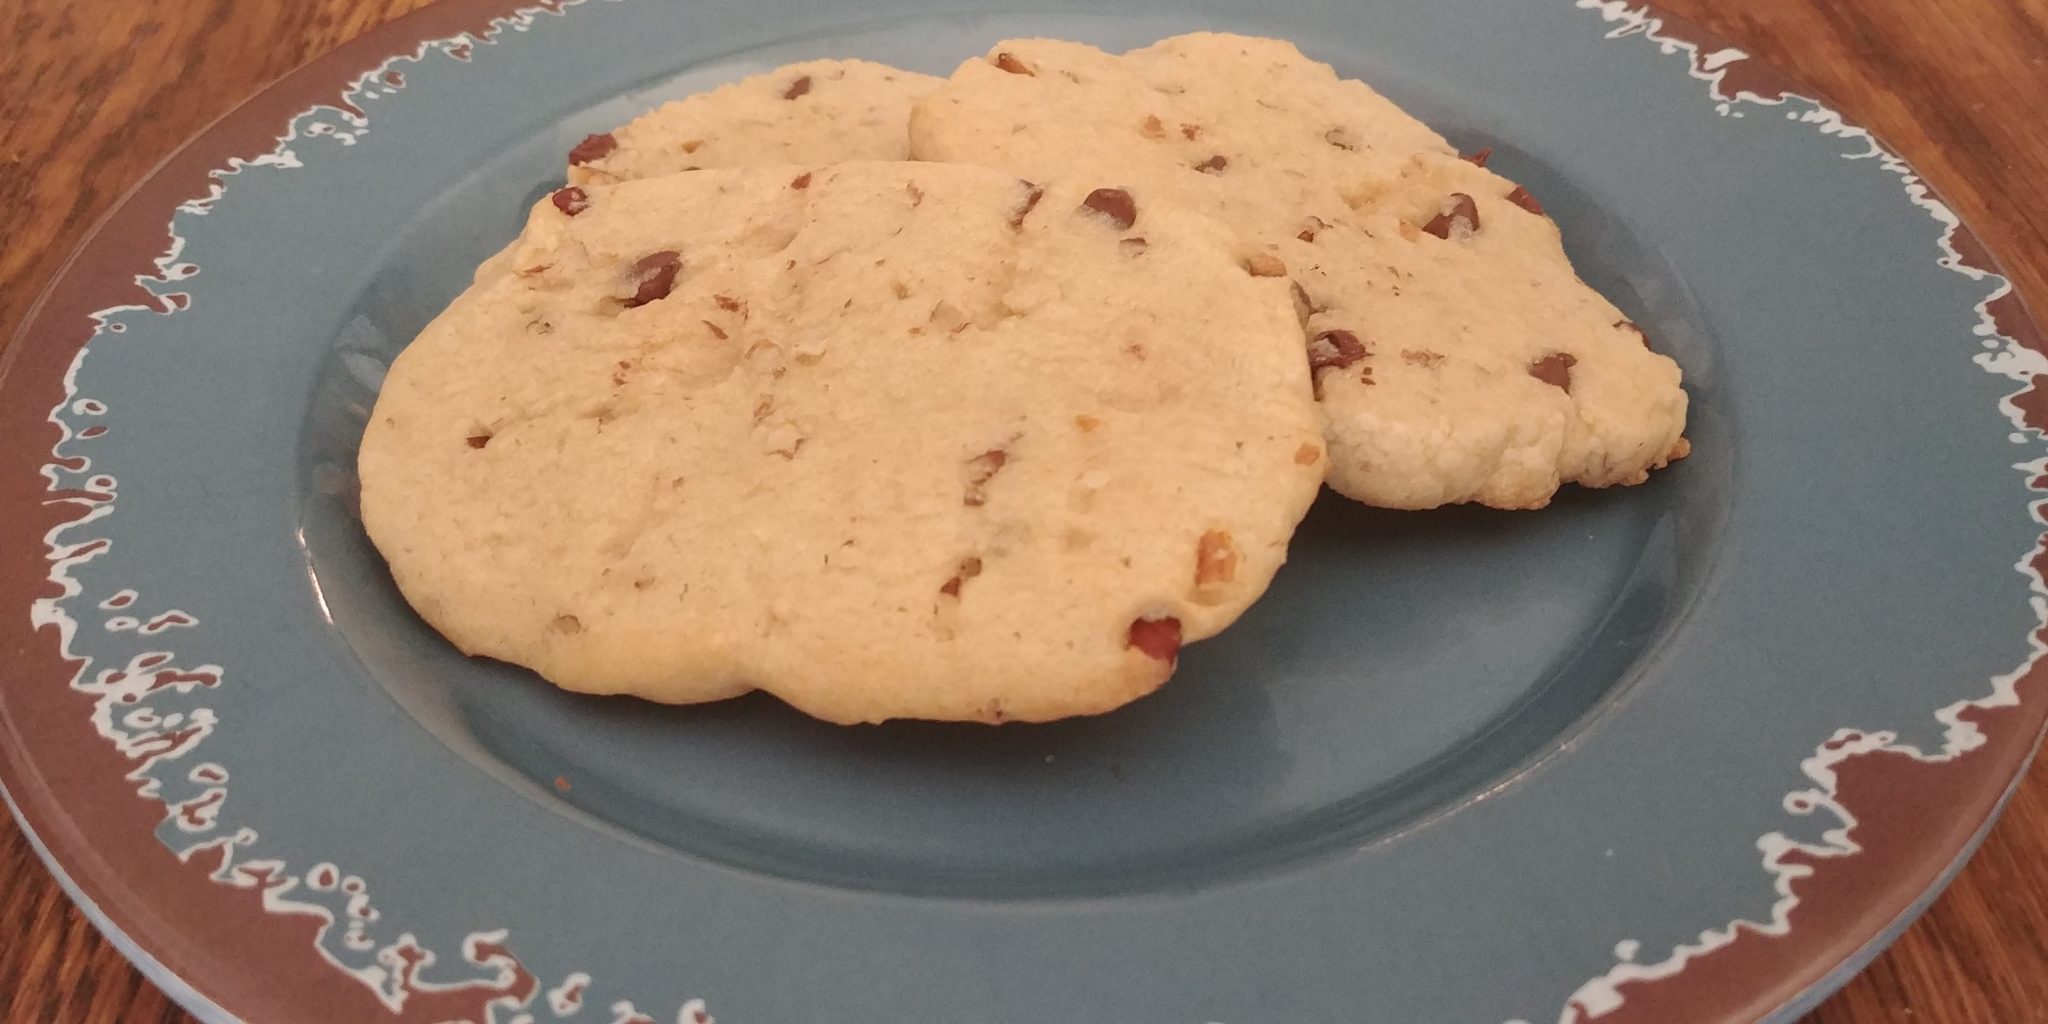
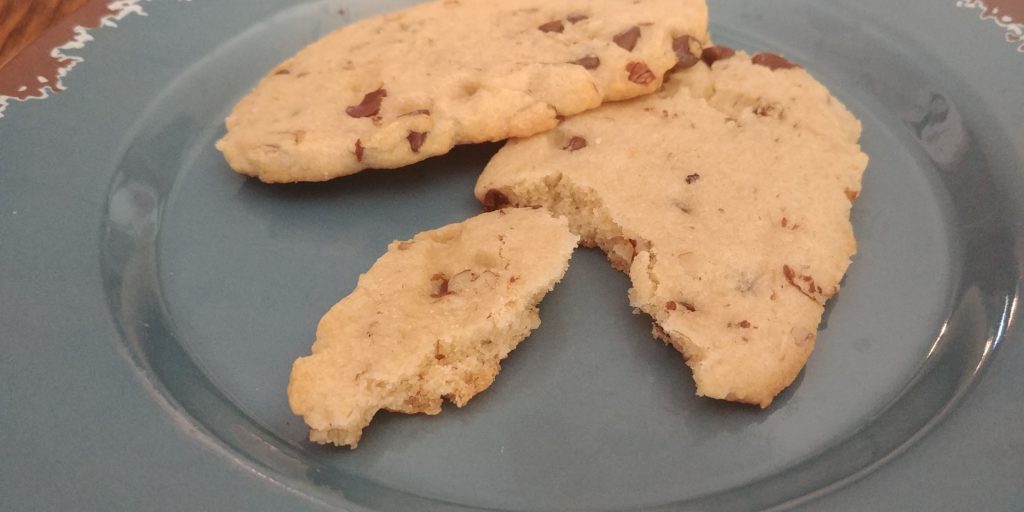
Vintage Icebox Cookies are perfect if you need a large batch because the recipe makes a fair amount and it is easily doubled. The finished cookies stack nicely for storage and hold up well to transportation. I doubled my batch so that I would have enough to share with my office and with Alex’s office. They didn’t last long. This cookie is crisp but not hard, buttery and not overly sweet. The variations are endless, making this one of the most versatile go-to cookie doughs that you will ever make.
You are going to need flour, sugar, baking powder, baking soda, salt, shortening (such as Crisco), butter, brown sugar, granulated white sugar, eggs and vanilla for the basic dough. If you want to add nuts, you will need finely ground nuts of your choice. For my version, you will also need mini chocolate chips. I am going to give you measurements for a single batch, but I actually made a double batch this time as you will see by my pictures.
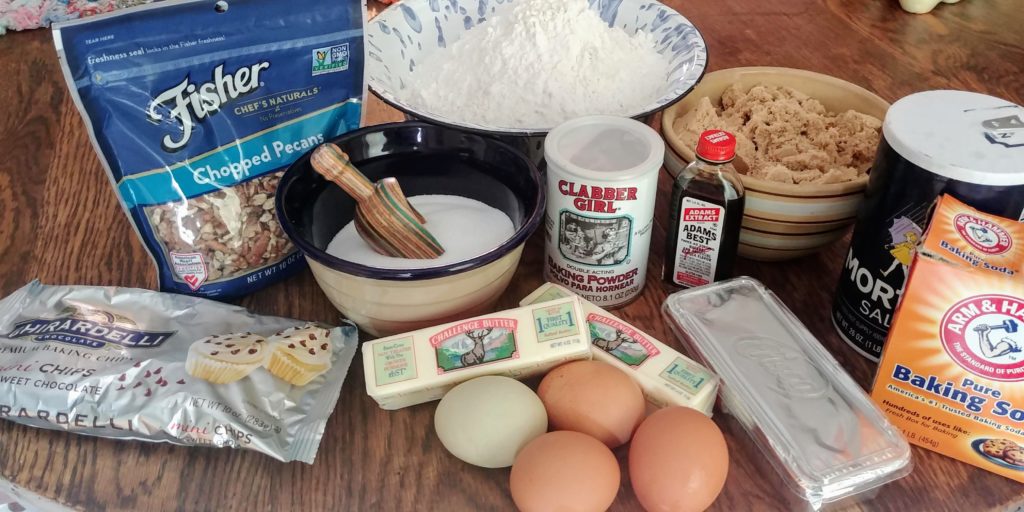
To begin, you need to do something a little unusual, but essential. Measure out 4 cups of all-purpose flour and sift it into a large bowl. Then measure 4 cups of that sifted flour and add to a different large bowl. You will be surprised in the difference. I actually had an entire cup extra of the sifted flour to put back into my canister. Add the baking powder, baking soda and salt to the newly measured flour and then sift again. Set aside.
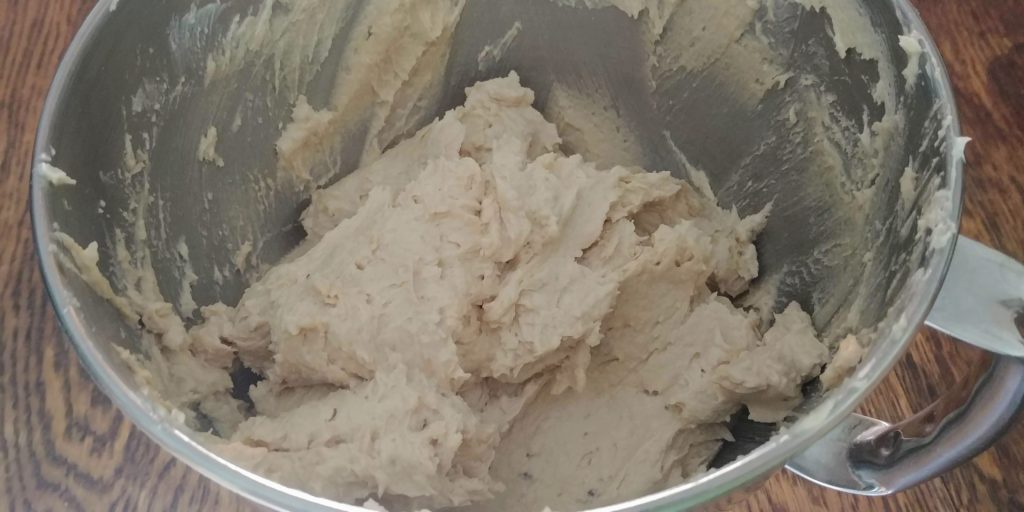
Cream the shortening and softened butter until completely combined. Add the sugars gradually and beat on medium speed until lightened in color, scraping the sides of the bowl occasionally. Add the beaten eggs and vanilla and mix until everything is combined.
Gradually mix in the dry ingredients until just combined.
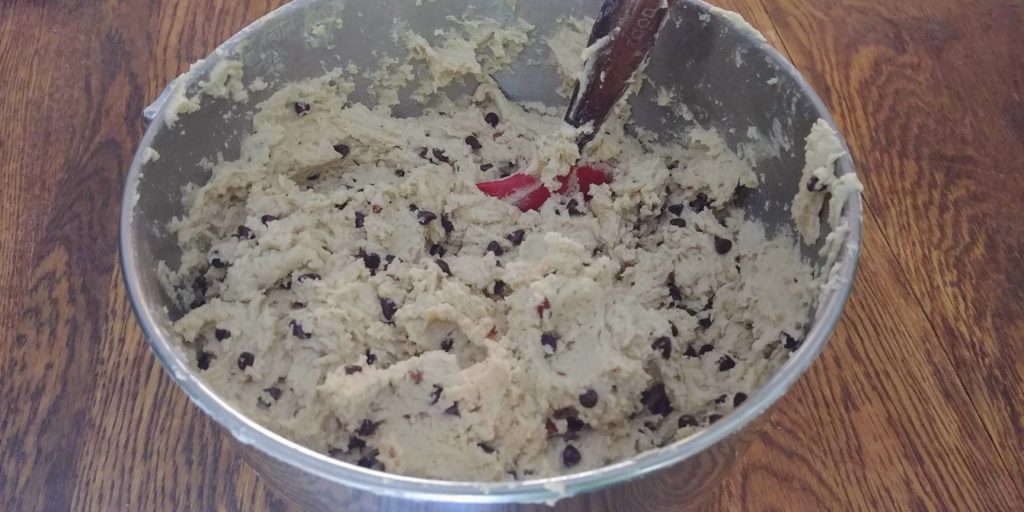
Stir in your additions, such as finely ground nuts (1 cup or more) and/or mini chocolate chips (1 cup or more). This is where you can get creative. You could add finely chopped dried fruit, toffee bits, coconut or flavorings.
Tear off a piece of wax paper that is about 18 inches long. Scoop the dough onto the wax paper and shape into a log that is about 3 inches in diameter.
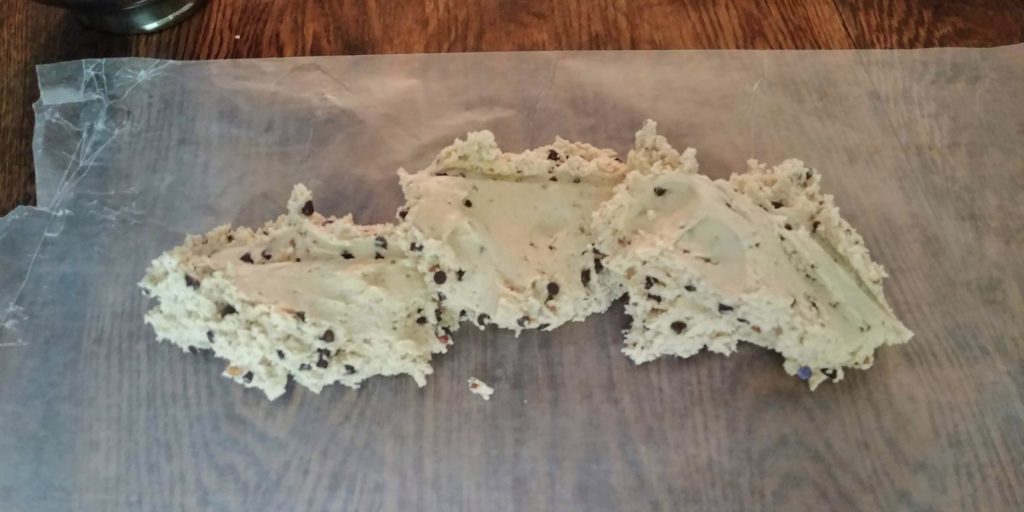
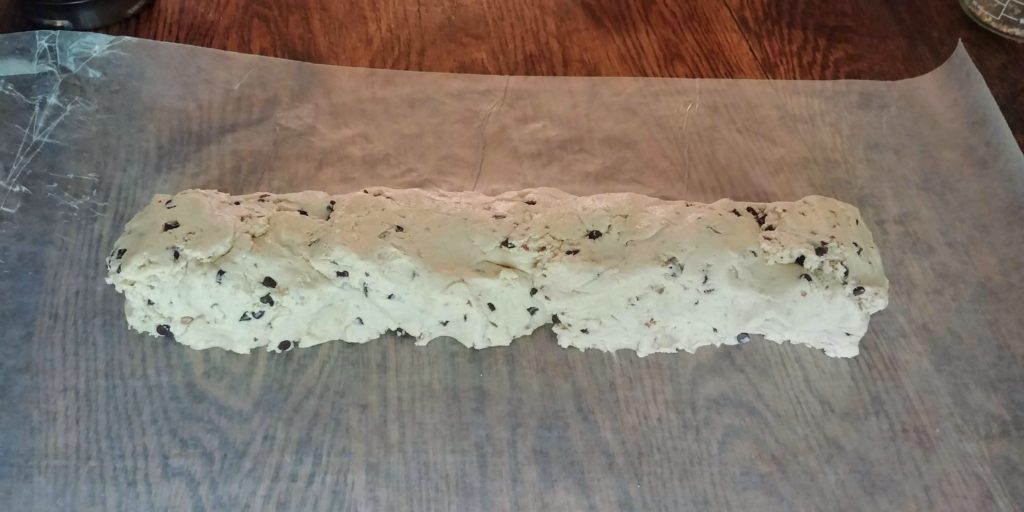
Wrap the dough tightly with the wax paper, sealing the ends with tape or twist ties. Refrigerate overnight, at least.

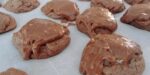
When you are ready to bake, preheat the oven to 400 degrees. Remove the wax paper and use a sharp knife to cut the dough log crosswise into about ⅛ inch slices. The cookies will expand a bit during baking so take that into account. Place the slices on an ungreased baking sheet or one lined with parchment paper. Bake for 5 – 8 minutes or until the edges are very lightly browned. Mine took 7 minutes.
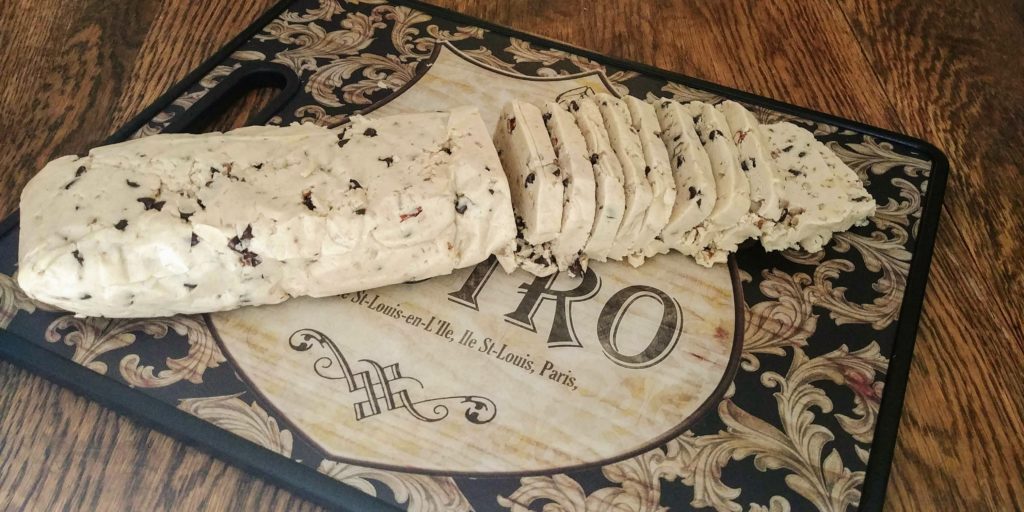
Allow the cookies to remain on the cookie sheet for about 5 minutes and then remove to a cooling rack or parchment on your countertop. After the cookies have cooled completely they will be crisper. The single batch makes about 6 dozen Vintage Icebox Cookies depending on how thick you slice them. Enjoy them with a cold glass of milk or steaming cup or tea. Delicious!
Vintage Icebox Cookies
This cookie is crisp but not hard, buttery and not overly sweet. The variations are endless, making this one of the most versatile go-to cookie doughs that you will ever make.

Ingredients
- 4 cups all-purpose flour, sifted
- 1 teaspoon baking powder
- 1/4 teaspoon baking soda
- 1 teaspoon salt
- 1 cup softened butter
- 1/3 cup Crisco or another shortening
- 1 cup brown sugar, packed
- 2/3 cup granulated sugar
- 2 eggs, beaten
- 1 1/2 teaspoons vanilla
- 1 cup of finely chopped pecans
- 1 cup of mini chocolate chips
Directions
- Step 1 Measure out 4 cups of all-purpose flour and sift it into a large bowl. Then measure 4 cups of that sifted flour and add to a different large bowl. Add the baking powder, baking soda and salt to the newly measured flour and then sift again. Set aside.
- Step 2 Cream the shortening and softened butter until completely combined. Add the sugars gradually and beat on medium speed until lightened in color, scraping the sides of the bowl occasionally.
- Step 3 Add the beaten eggs and vanilla and mix until combined.
- Step 4 Gradually mix in the dry ingredients until just combined.
- Step 5 Stir in the finely chopped nuts and mini chocolate chips or your choice of additions.
- Step 6 Tear off a piece of waxed paper that is about 18 inches long. Scoop the dough onto the wax paper and shape into a log that is about 3 inches in diameter. Wrap the dough tightly with the wax paper, sealing the ends with tape or twist ties. Refrigerate overnight, at least.
- Step 7 When you are ready to bake, preheat the oven to 400 degrees.
- Step 8 Remove the wax paper and use a sharp knife to cut the dough log crosswise into about ⅛ inch slices.
- Step 9 Place the slices on an ungreased baking sheet or one lined with parchment paper. Bake for 5 – 8 minutes or until the edges are very lightly browned.
- Step 10 Allow the cookies to remain on the cookie sheet for about 5 minutes and then remove to a cooling rack or parchment on your countertop.