To me, one of the best parts of baking and cooking is sharing what I make with others. I love to make someone else happy with something yummy that I have created. I have nothing against using a mix, refrigerated cookie dough, or frozen pie crust. It does not matter if you bake from scratch or pop something in the microwave. What counts is that you put forth an effort to brighten someone else’s day. It really is the thought that counts.
And, while I do love to get compliments on my cooking and baking, the warm fuzzies I get when I think that someone really enjoys what I have made is even better.
This is where working in an office environment comes as a real asset. Since I enjoy baking and cooking so much I tend to have more goodies around than I should. My sons have homes of their own and don’t live right next door. There is a limit to what my husband and I can eat. I need an outlet for my baking and cooking finished products and that is where my coworkers come in.
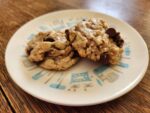
When I worked at Illinois College I could bake several times a week and the student workers would devour everything that I brought to work. Now that I am in a state office I can drop baked goods in the breakroom and they will disappear within a couple of days. When someone is having a stressful day at work a cookie can help get them through to quitting time. I will admit that I use them to taste test new recipes and experiments but they don’t seem to mind. I get to perfect my craft and they get free treats – it is a win-win situation.
In my division of our agency we also celebrate birthdays. We track the birthdays of each person and choose a work day to celebrate with treats and a little sign placed outside of their cubicle. If at all possible, I make it a point to bring a homemade treat to share. I also try to choose a treat that the birthday boy/girl will really love. This usually means some sneaky questions or stealthily looking around someone’s cubicle when you are meeting with them to see what their favorite snacks are or what they like to bring for lunch. But sometimes I get lucky and the person just tells me what their favorite is which makes things a whole lot easier.
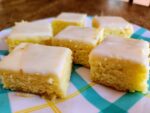
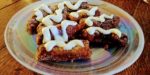
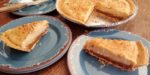
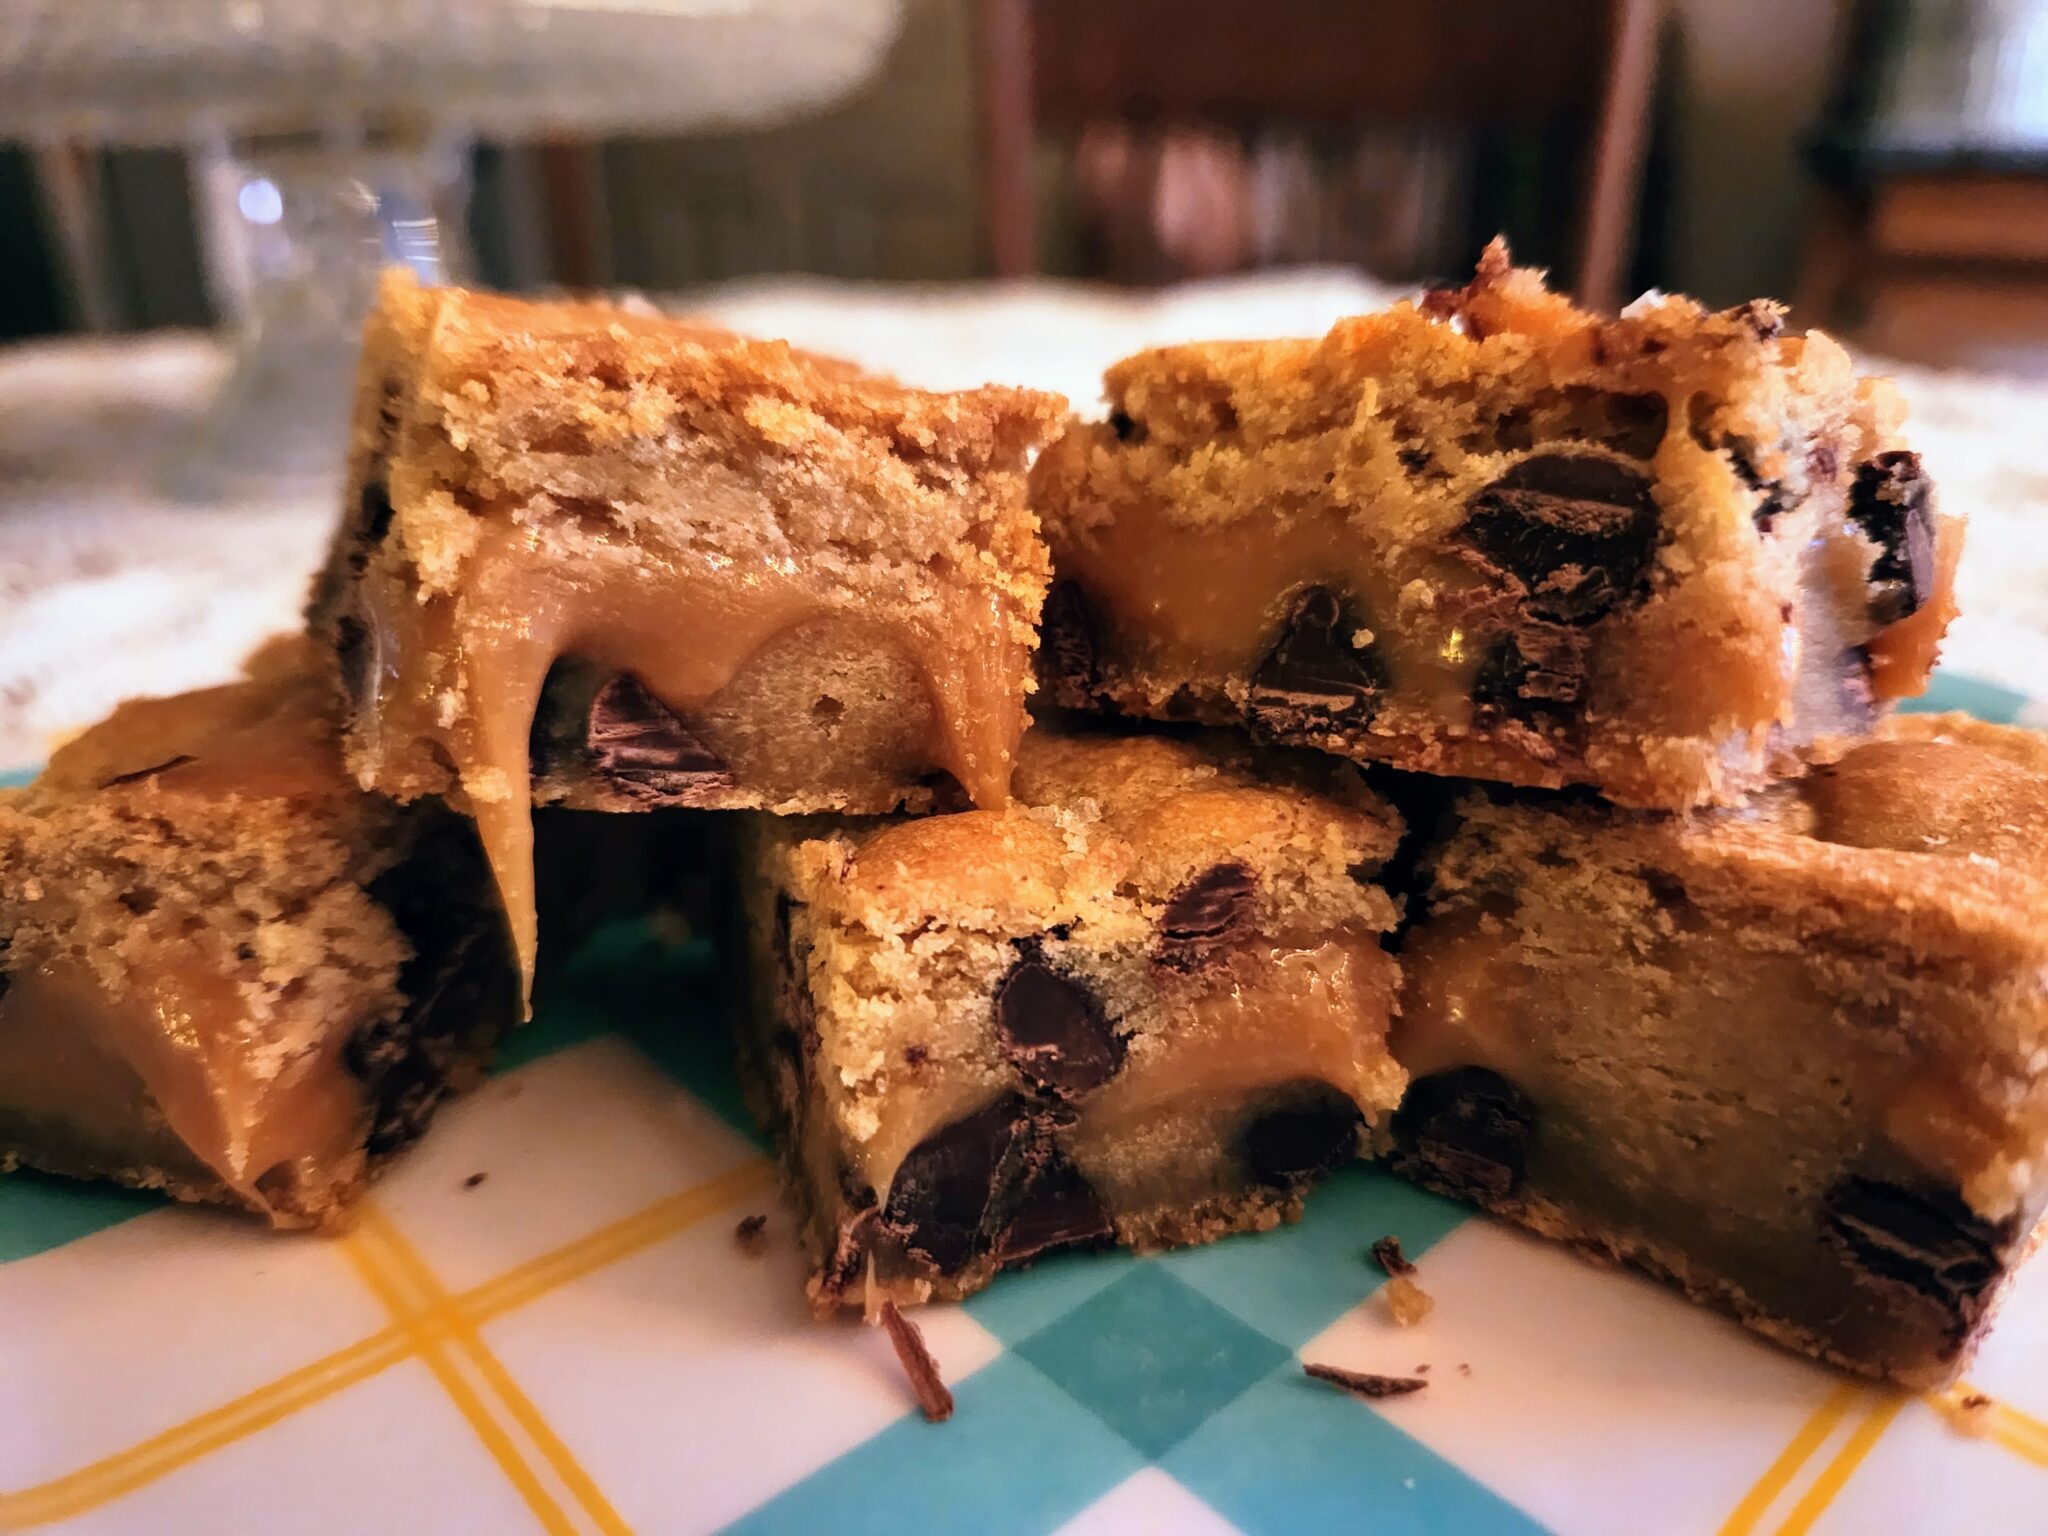
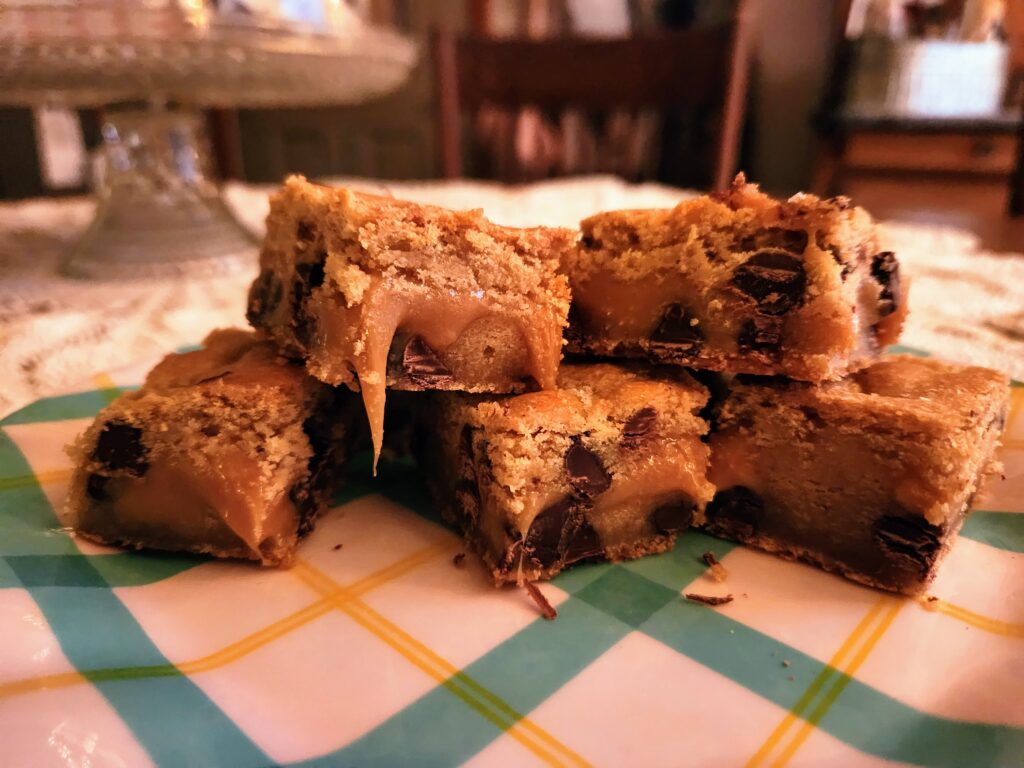
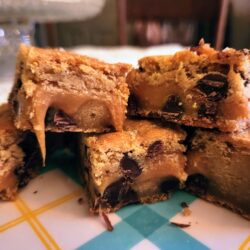
My supervisor, Stephanie, had a birthday recently and I knew exactly what to bring because she had told me previously her favorite of the treats that I had brought to work. Stephanie is a great supervisor and I wanted to make her day super special. So, I made Ooey Gooey Salted Caramel Chocolate Chip bars for her. These bars are super easy to make and turn out soft and chewy. They are buttery and chocolatey with a layer of gooey caramel that melts in your mouth. They keep well in an airtight container for days.
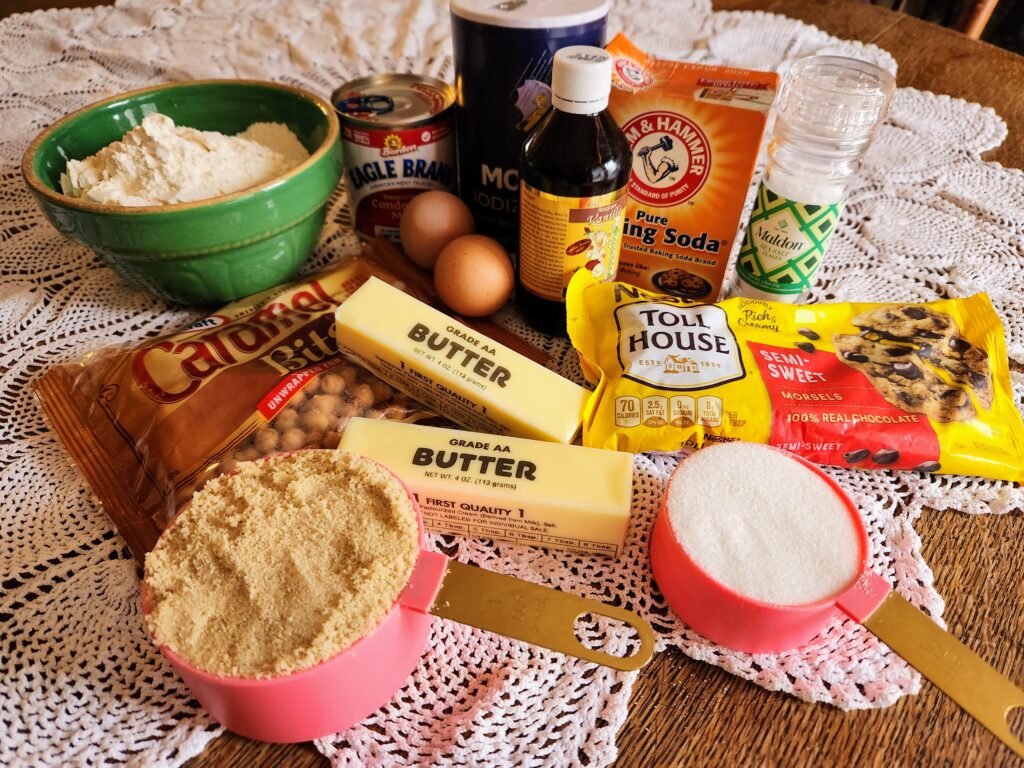
You will need 1 cup salted butter at room temperature, 1 cup packed light brown sugar, ½ cup granulated sugar, 2 large eggs, 1 teaspoon salt, 1 teaspoon baking soda, 1 teaspoon vanilla, 2 ½ cups flour, 2 cups semisweet chocolate chips, 1 can sweetened condensed milk (14 oz), 1 10 oz. package of caramel bits and 1 teaspoon flakey sea salt.
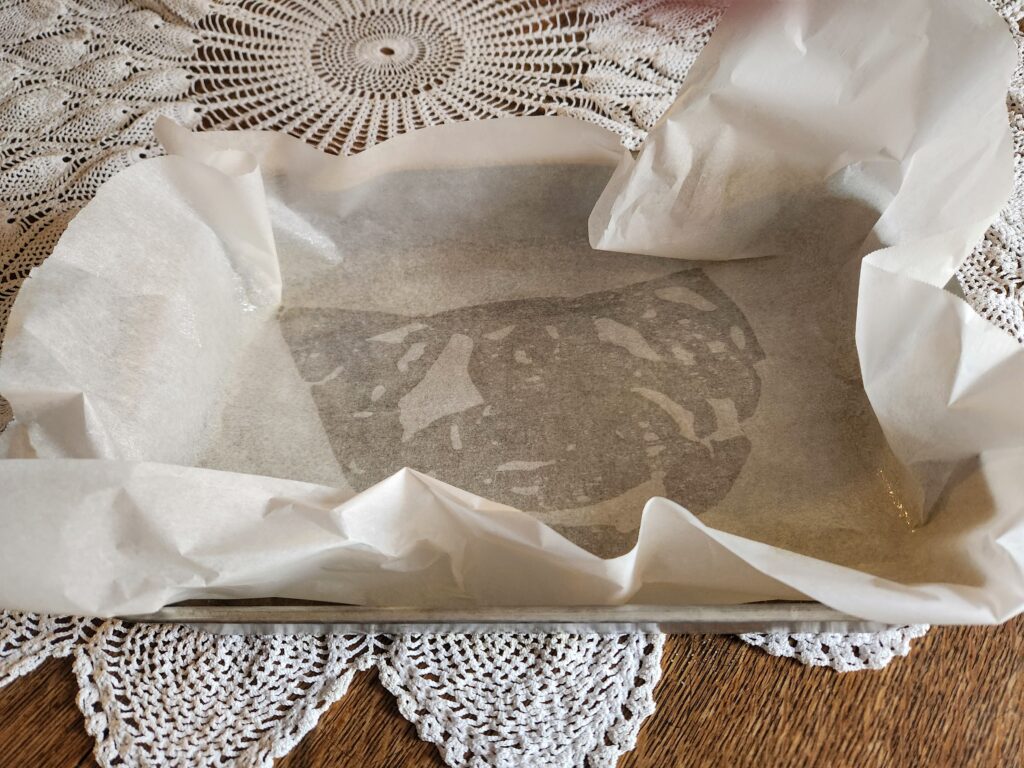
To begin this epic journey, preheat your oven to 350 degrees. Line a 9 X 13 baking dish with parchment. I like to spray the pan with non-stick cooking spray and then line the pan with paper. Then spray the parchment paper too. Spraying the pan just helps the paper to stick to the bottom but it is not necessary.
With your stand or hand held mixer cream the butter, brown sugar and white sugar until fluffy. This normally takes about 2 minutes. Scrape down the sides of the bowl periodically.
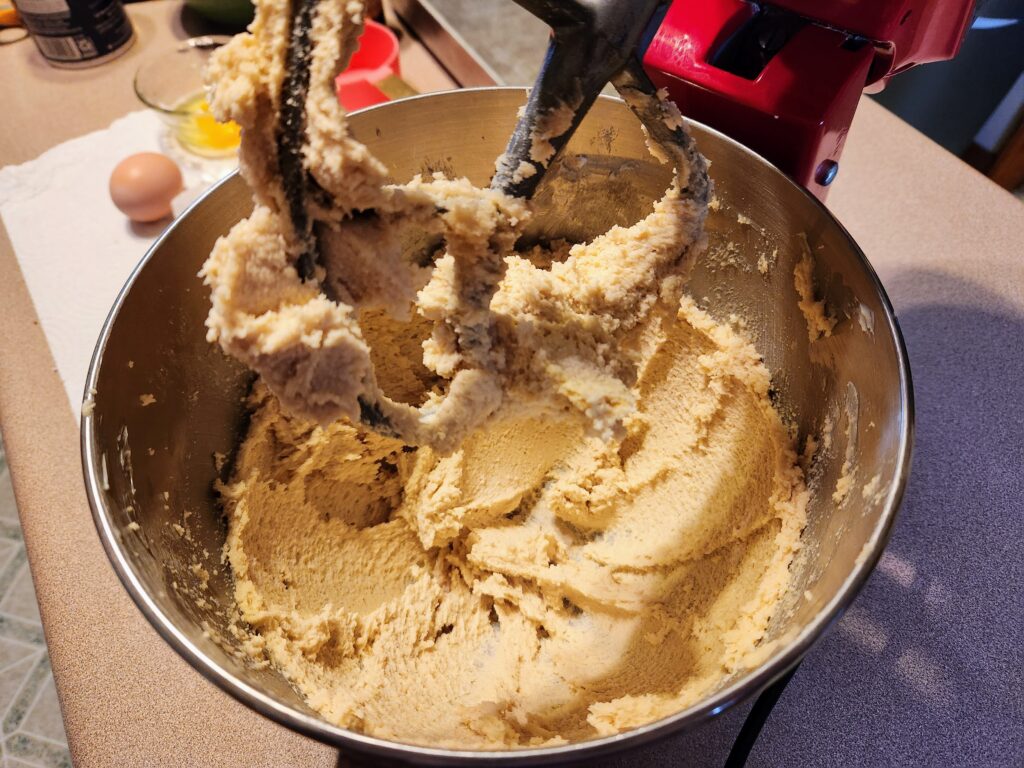
Add the eggs, vanilla, salt (just the regular salt, not the sea salt) and baking soda and mix until smooth. Again, scraping the sides and bottom of the bowl as needed.
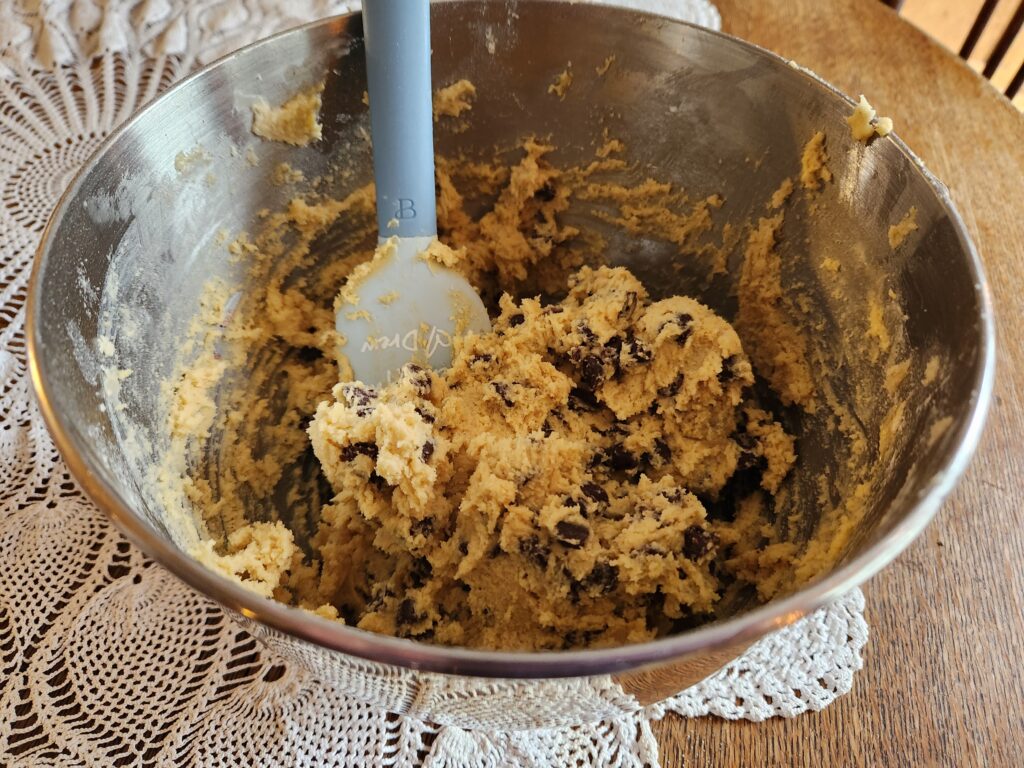
Add the flour in increments until just combined.
Stir in the chocolate chips. Note, you can use milk or dark chocolate chips rather than semi-sweet. All are delicious.
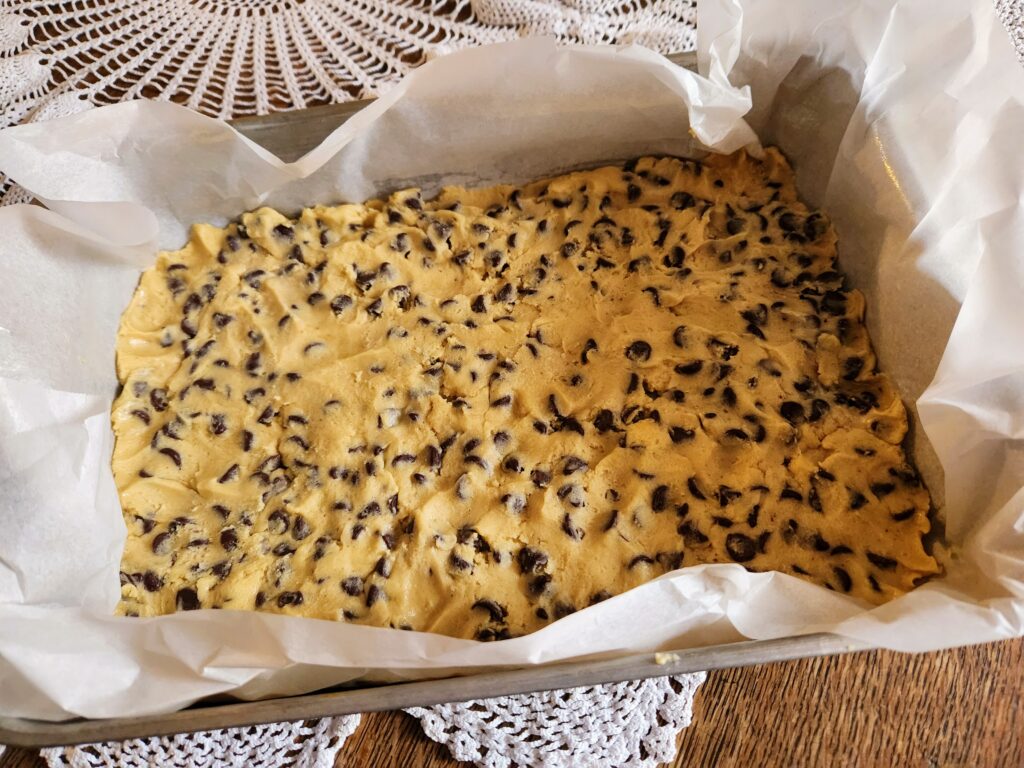
Press half of the dough into your prepared pan and set aside. Hold onto the other half of the dough for a bit.
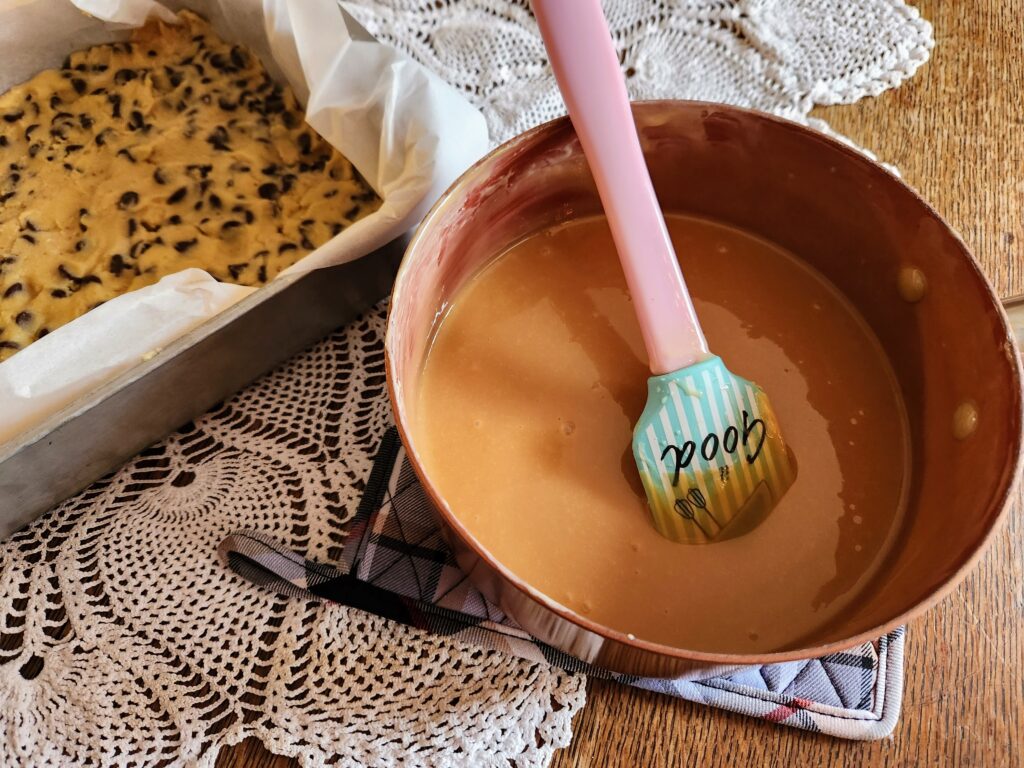
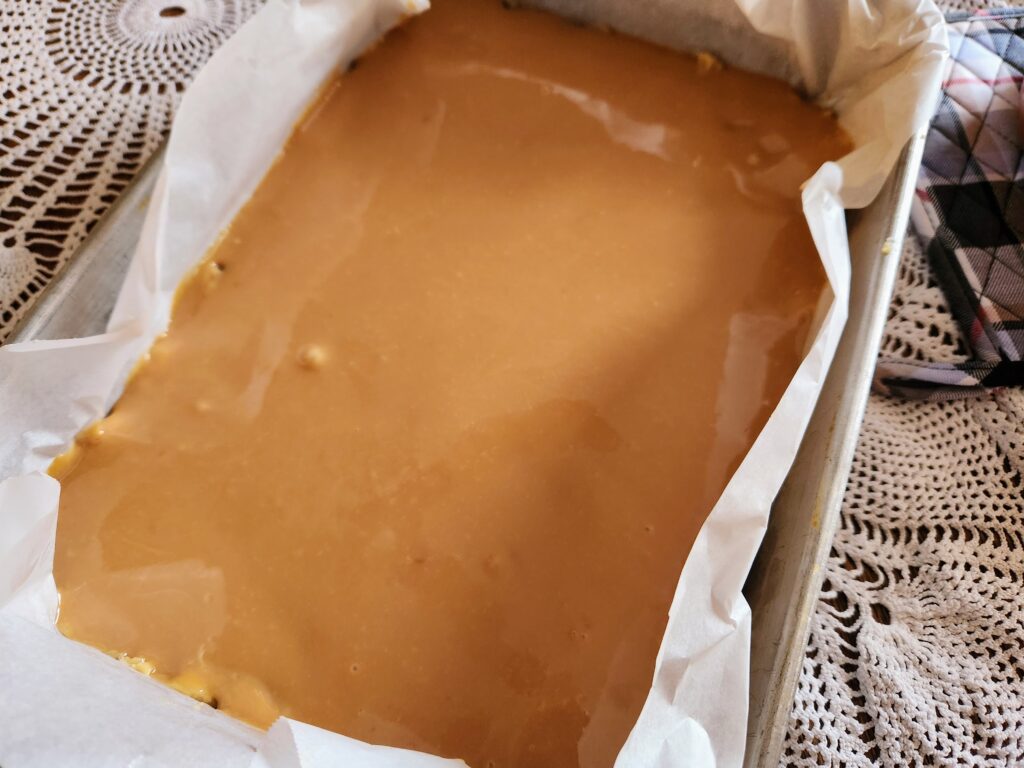
Next, add the caramel bits and sweetened condensed milk to a medium saucepan and melt together on medium-low heat until smooth. Make sure to stir this often as caramel can burn easily. Remove this mixture from the heat and carefully pour over the first half of cookie dough that you have pressed into the pan. Spread evenly with a spatula making sure to get the caramel all the way to the edges.
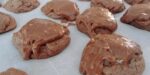
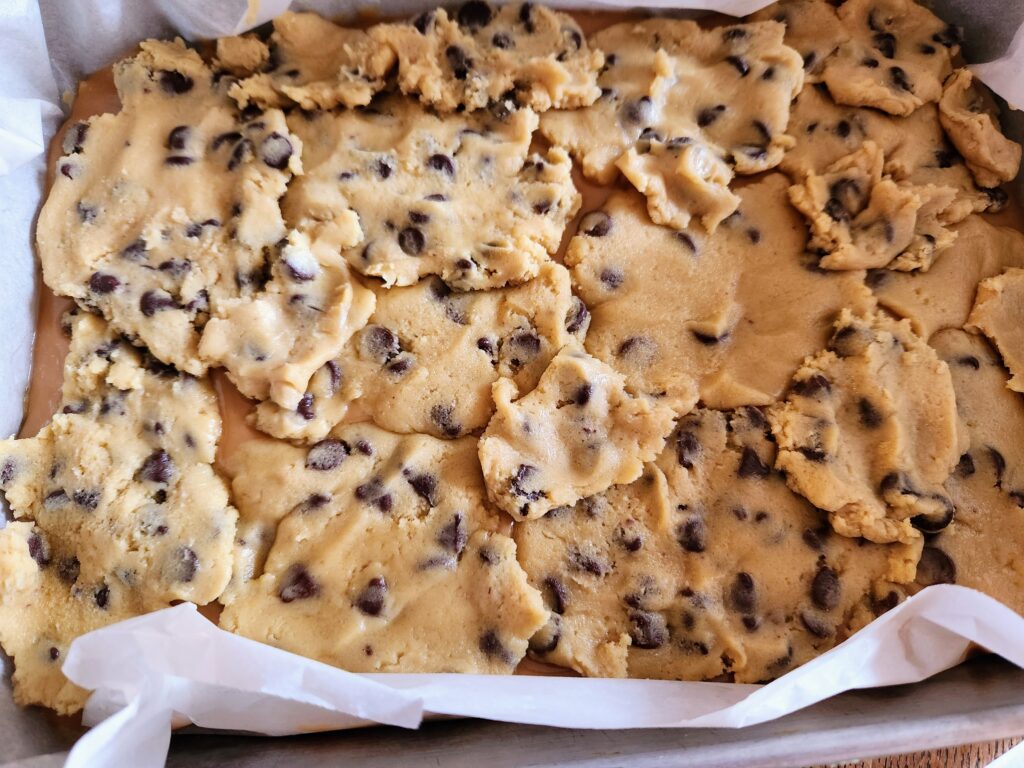
Take small bits of the remaining dough and flatten into discs to lay on top of the caramel mixture. You will need to use slightly wet hands or spray your hands with cooking spray to keep the dough from sticking to you too much. Try to cover as much of the caramel as possible. It is kind of like a delicious puzzle at this point. If you don’t want to mess with this you can just drop teaspoon sized blobs of dough all over the caramel.
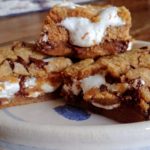
Bake for 25 to 30 minutes or until golden brown with the center just beginning to firm up. It should still be wiggly but not raw in the center.
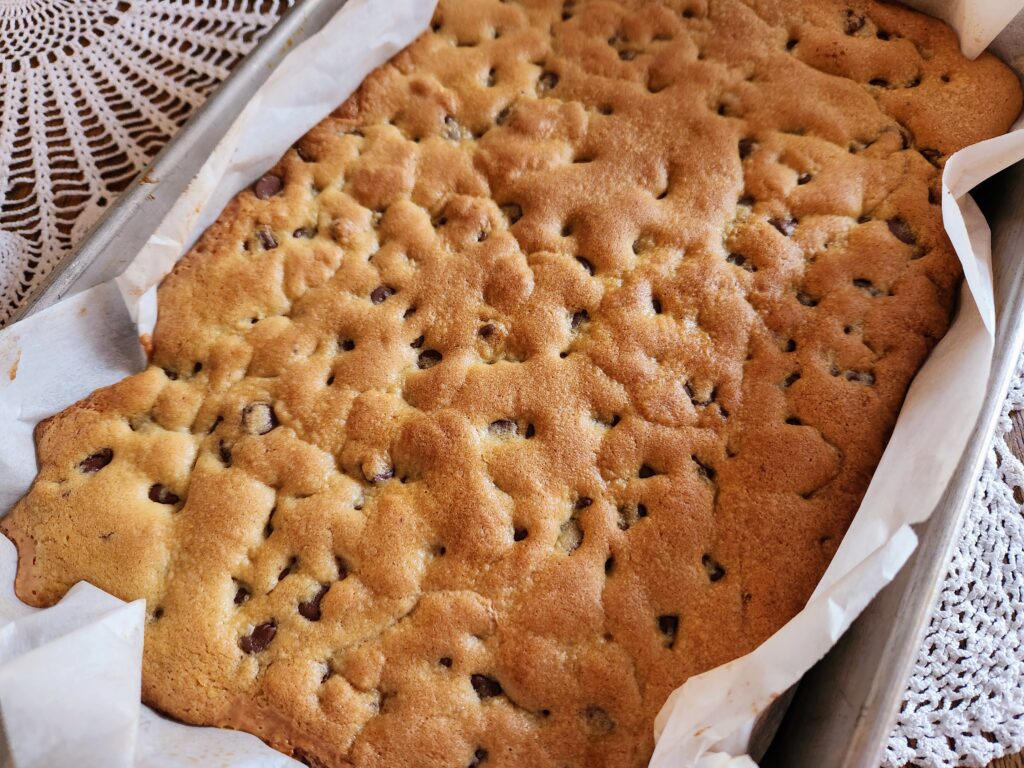
As soon as you remove the pan from the oven, sprinkle the bars with the flakey sea salt. This step is optional but the salt does add a wonderful flavor.
Allow the bars to cool on the counter for about 30 minutes and then chill in the refrigerator for a couple of hours. They will be much easier to cut after chilling but they do not need to be stored in the refrigerator. Once cut just keep them in an airtight container. They keep for days…unless you eat them up quickly…which I highly recommend.
I hope that you make these and enjoy them! Maybe you can make them for your boss. I promise that you will get brownie points….or cookie bar points in this case. Ta Ta Friends!
Ooey Gooey Salted Caramel Chocolate Chip Bars
Ingredients
Cookie Layers
- 1 cup salted butter room temperature
- 1 cup light brown sugar packed
- 1/2 cup granulated sugar
- 1 tsp vanilla
- 2 large eggs
- 1 tsp salt
- 1 tsp baking soda
- 2 1/2 cups flour
- 2 cups chocolate chips semi-sweet, milk or dark
Caramel Layer
- 1 can sweetened condensed milk 14 oz
- 10 ounces caramel bits
- 1 tsp flakey sea salt approximately
Instructions
- Preheat your oven to 350 degrees.
- Line a 9 X 13 baking pan with parchment and then spray the parchment with cooking spray.
- With your stand or hand held mixer cream the butter, brown sugar and white sugar until fluffy. This normally takes about 2 minutes. Scrape down the sides of the bowl periodically.
- Add the eggs, vanilla, salt (just the regular salt, not the sea salt) and baking soda and mix until smooth. Again, scraping the sides and bottom of the bowl as needed.
- Add the flour in increments until just combined.
- Stir in the chocolate chips.
- Press half of the dough into your prepared pan and set aside.
- Add the caramel bits and sweetened condensed milk to a medium saucepan and melt together on medium-low heat until smooth. Make sure to stir this often as caramel can burn easily.
- Remove the caramel mixture from the heat and carefully pour over the first half of cookie dough that you have pressed into the pan. Spread evenly with a spatula making sure to get the caramel all the way to the edges.
- Take small bits of the remaining dough and flatten into discs to lay on top of the caramel mixture. You will need to use slightly wet hands or spray your hands with cooking spray to keep the dough from sticking to you too much. Try to cover as much of the caramel as possible. Or, you can just drop teaspoonful size blobs of dough all over the top of the caramel.
- Bake for 25 to 30 minutes. The center should be set but still jiggly.
- Immediately, sprinkle with the flakey sea salt.
- Allow the bars to cool on the counter for about 30 minutes and then chill in the refrigerator for a couple of hours. They will be much easier to cut after chilling but they do not need to be stored in the refrigerator.