
Hi Everyone! A couple of weeks ago I told you all about the Goode family reunion. Well, we did have that event and it was very well-attended. I think that the crowd was the biggest in many years. When I was a kid I remember that it was huge but about 10 or so years ago the numbers began to dwindle. I think that the younger families were having fewer children and were busy with their kids’ activities. Or, maybe they didn’t realize the importance of keeping in touch with relatives. But, last year there were some family members there that we locals had not seen in a while and then this year there were even more. I was pleased to see my Aunt Wissy’s family and my cousin Charlene as well as many others. There was, of course, a huge amount of food. I wanted to take a picture of the buffet before everyone grabbed plates and began to pile on but I (as usual) was running behind. I just barely got there and put my contributions out before everyone began to line up. Oh well, maybe next year. There was a big pot of squirrel and noodles and a big platter of fried squirrel. There was also an abundance of fried chicken and pork chops, garden-grown veggies and lots of salads, including one of my favorites – potato salad. I told you before that I am from a farm family. We hunt and fish and cook and bake and EAT.
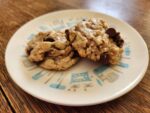
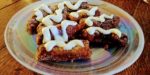
I made my often-requested Ladybug Cookies. This recipe comes from one that I read in a Gooseberry Patch cookbook when my kids were small. It was a basic box cake mix cookie recipe and I usually made chocolate cookies with it. Then, one day, for some reason that I can’t remember, I decided to try red velvet cake mix. My boys loved them. And, they dubbed them Ladybug Cookies because the finished product looks kind of like a big red ladybug. Shortly after I came up with this recipe some little girls who lived in my mother-in-law’s neighborhood set up a lemonade stand and wrote and sold a cute little cookbook. The recipes were contributions from friends and neighbors. We shared the Ladybug Cookie recipe and so it was published the first time. Years later I submitted the recipe to Gooseberry Patch and it was published in the Christmas Cookie Jar cookbook. I have always been a Gooseberry Patch cookbook junkie, so I was especially thrilled when that happened.
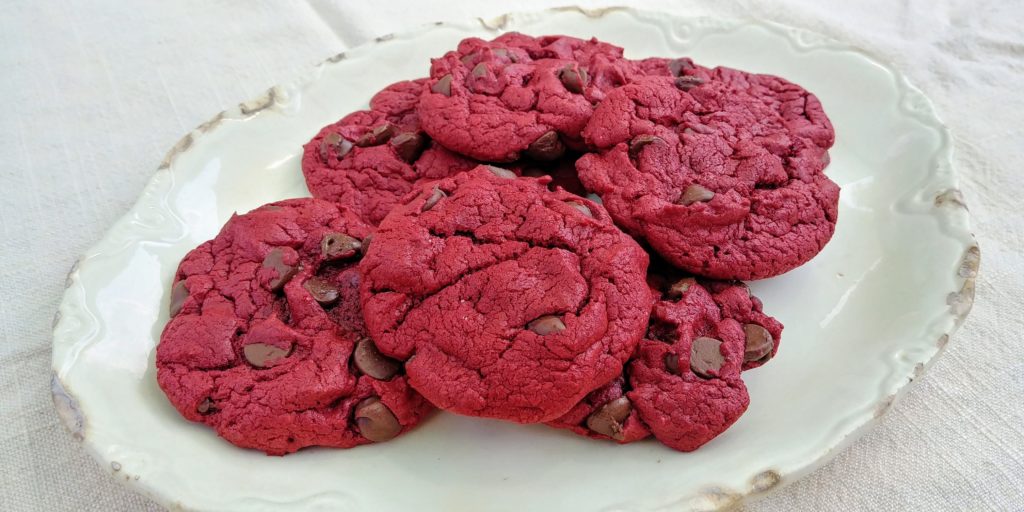
In the subsequent years, I have made these cookies hundreds of time. They are always a big hit when I take them to potlucks, holiday gatherings or to work. My kids love to have them warm from the oven any time of the year. Recently, I have tweaked the recipe just a bit. I discovered a while back that the batter had become very oily and kind of loose. The cookies flattened out more than usual too. I finally figured out that the box of cake mix had decreased in weight by a couple of ounces. That difference, though small, was affecting my finished result. I played around a bit with different ideas but ultimately decided that the addition of some flour would probably do the trick nicely and it does. I have also played with different brands of cake mix and though the cookies do turn out slightly different in color depending on the brand the taste is virtually the same. The other change that I have made is the recommendation that you let the cookie dough rest for about 15 minutes before you bake the first batch. The dough seems to tighten up a bit if you do this and your cookies will stay nice and plump. I am not a flat cookie fan. I like my cookies big and fat. I almost always double this recipe. Believe me, these cookies do not stay around long. I figure that if I am baking I might as well have enough to share with friends and family. So, I am giving you the ingredient measurements for a double batch. If you don’t need that many cookies you can easily halve everything. No biggie. Ladybug Cookies are plump and tender with that wonderful moist red velvet cake flavor and loads of melty chocolate chips. And, they are super cute!
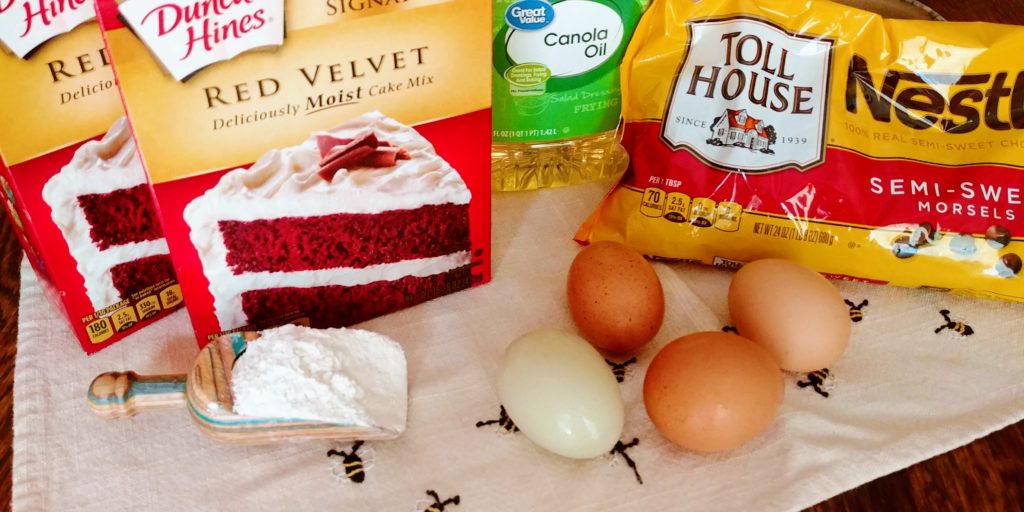
To start, you will need 2 boxes (15.25 oz. each) of red velvet cake mix (any brand), 1 cup of vegetable or canola oil, 4 eggs, ¼ cup all-purpose flour and 3 – 4 cups of semi-sweet chocolate chips.
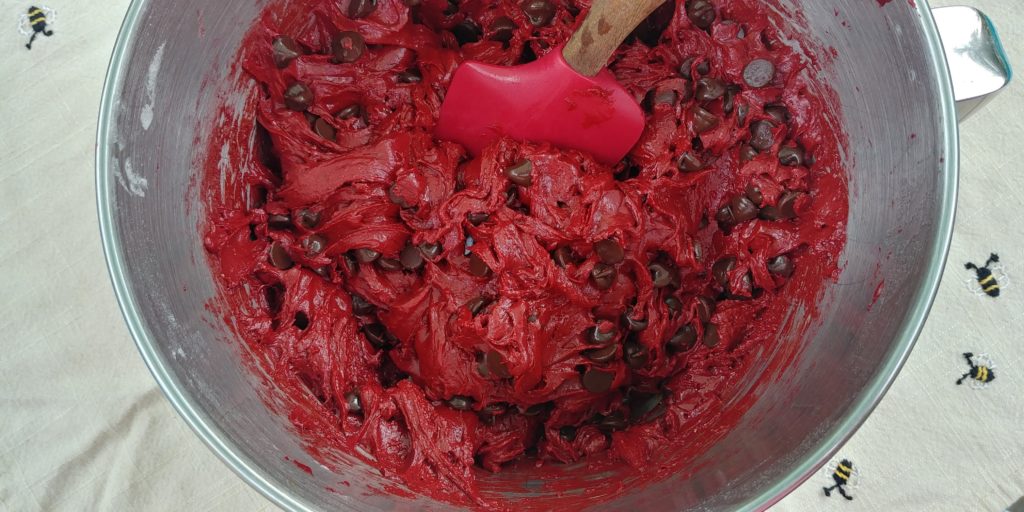
Preheat the oven to 350 degrees and line your baking sheets with parchment paper (if desired). Crack the eggs into a mixing bowl or the bowl of your stand mixer, if using one. I have to crack mine into a small bowl or measuring cup first. I am rarely able to break an egg without getting a piece of shell in it. I am lousy at it. Anyway, beat the eggs just a bit and then add the cake mix, flour, and oil. Mix until well combined, scraping the sides as needed. This will only take a minute or so. Stir in the chocolate chips and let the dough rest for about 15 minutes. I use 4 cups of chocolate chips because I am a chocoholic but you can lessen the amount if you want more cookie and less chocolate.
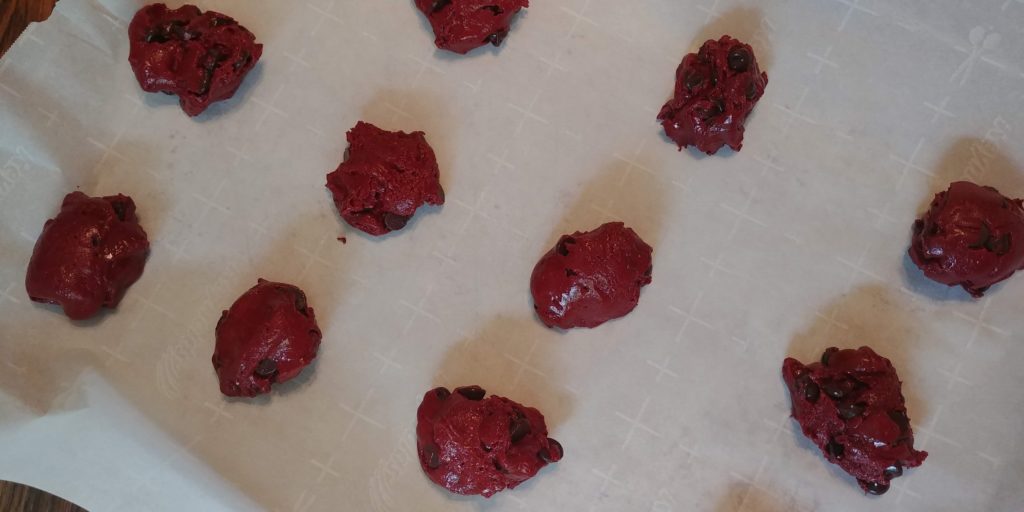
Scoop 2 tablespoon-sized mounds of dough onto the cookie sheet.
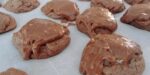
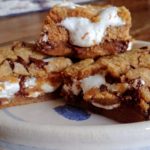
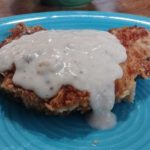
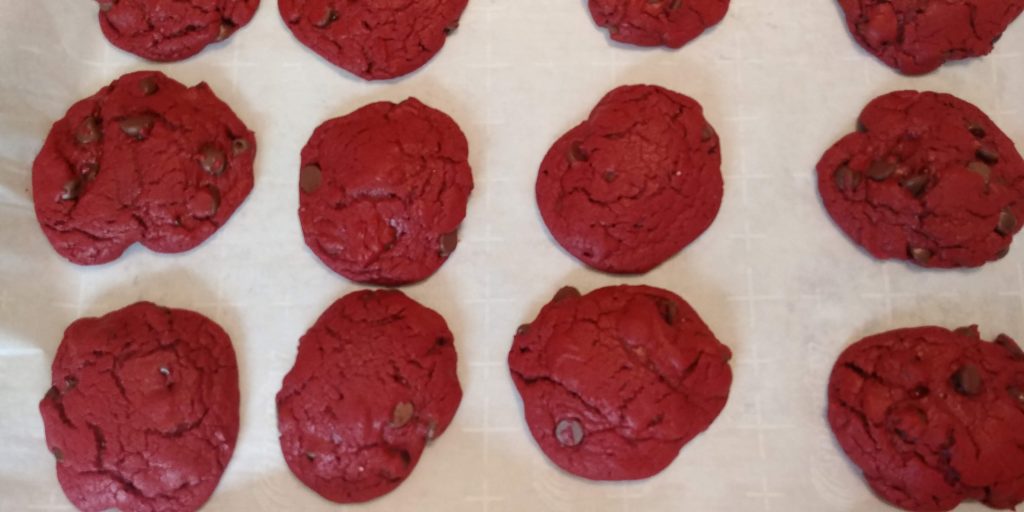
Bake for 9 – 10 minutes or until the centers are set and no longer glossy. Leave them on the cookie sheet for a couple of minutes before removing to a rack or a parchment lined surface. Please excuse the blurry picture. I think my lens had flour or cookie dough or something on it. Go figure.
See how easy that is? Anybody can do it and I guarantee that you will get oodles of compliments. Now get a big old glass of cold milk and enjoy!
Ladybug Cookies
Ladybug Cookies are plump and tender with that wonderful moist red velvet cake flavor and loads of melty chocolate chips.
Ingredients
- 2 boxes of red velvet cake mix (any brand)(15.25 oz. each)
- 1 cup canola or vegetable oil
- 1/4 cup all-purpose flour
- 4 eggs, lightly beaten
- 3 - 4 cups semi-sweet chocolate chips
Directions
- Step 1 Preheat the oven to 350 degrees and line your baking sheets with parchment paper (if desired).
- Step 2 Crack the eggs into a mixing bowl or the bowl of your stand mixer, if using one, and beat for about 1 minute.
- Step 3 Add the cake mix, flour and oil. Mix until well combined, scraping the sides as needed.
- Step 4 Stir in the chocolate chips and let the dough rest for about 15 minutes.
- Step 5 Scoop 2 tablespoon-sized mounds of dough onto the cookie sheet and bake for 9 – 10 minutes or until the centers are set and no longer glossy.
- Step 6 Leave them on the cookie sheet for a couple of minutes before removing to a rack or a parchment lined surface.