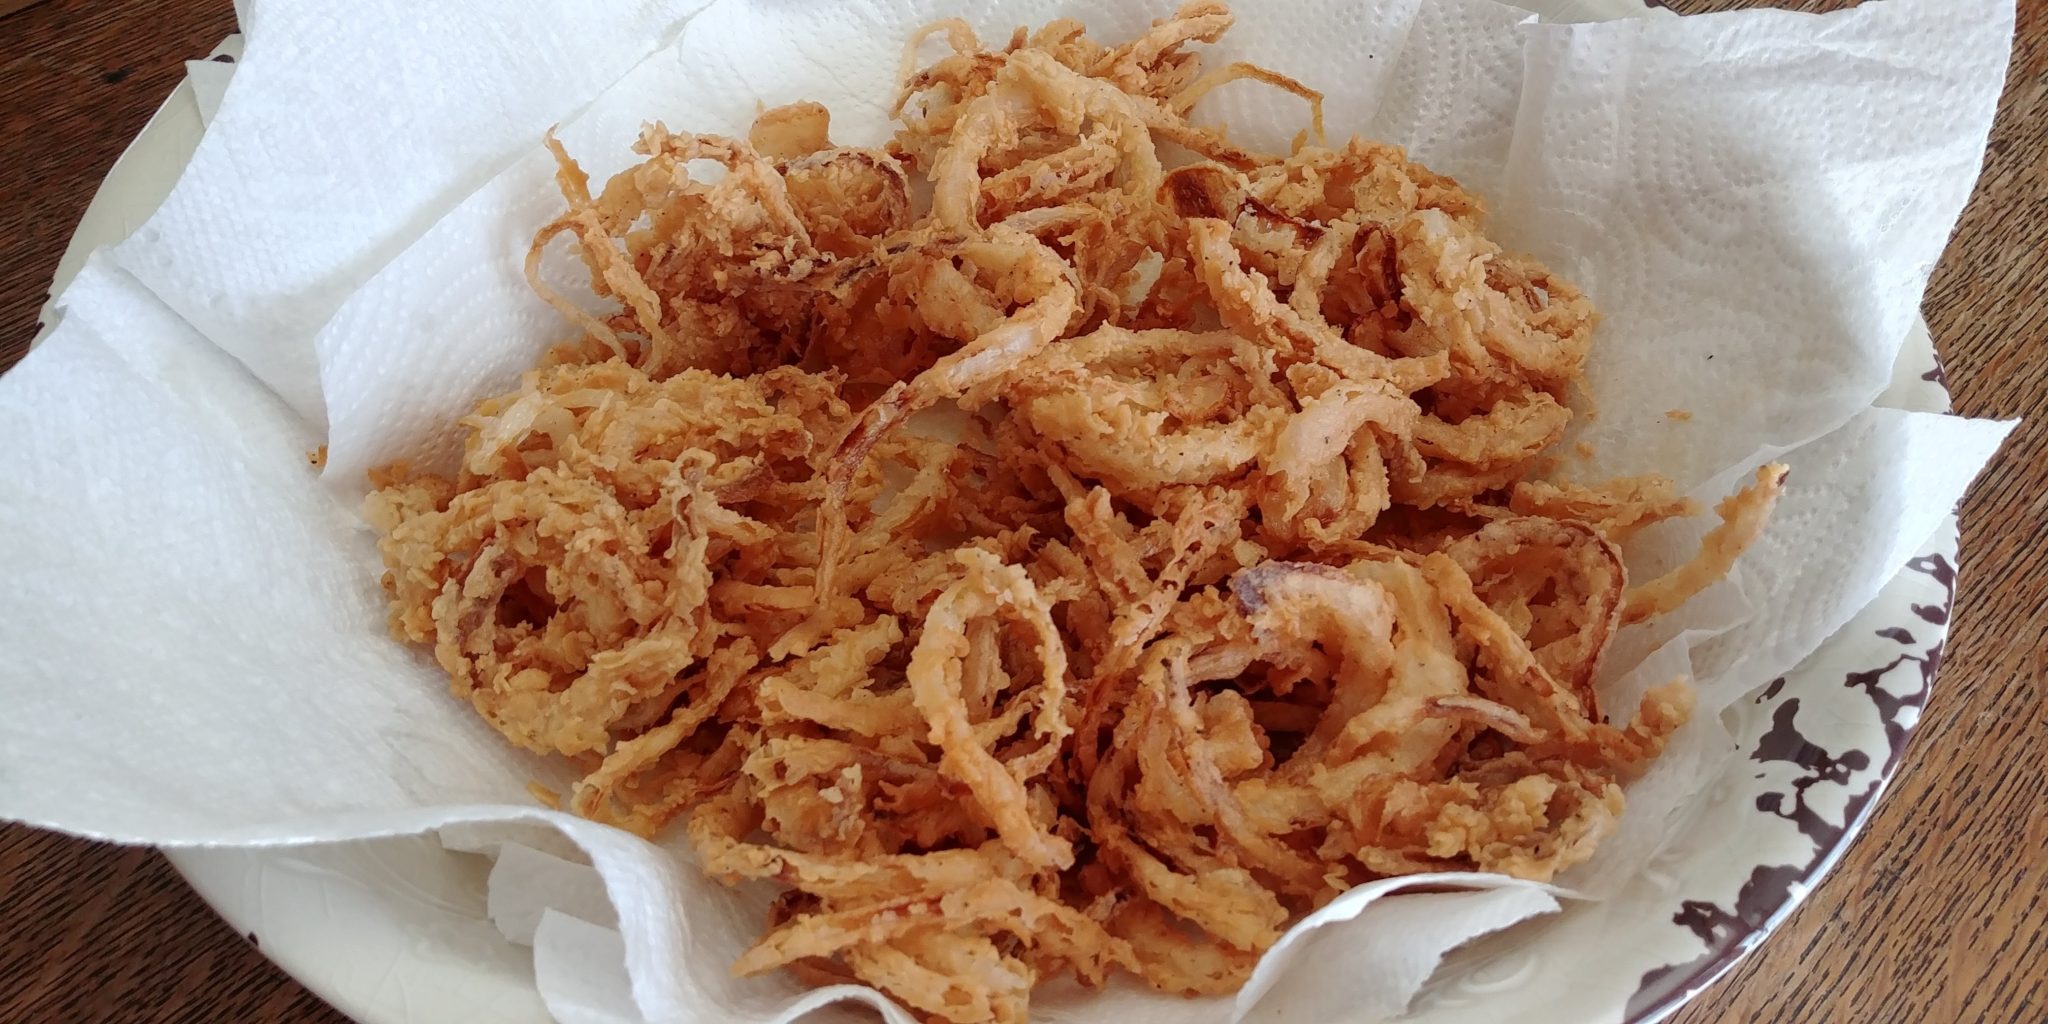
Crispy Onion Strings
I sure hope that Spring weather is on the way. I sure hope that Spring weather gets here quickly. I sure hope that I survive from now until Spring weather. Can you tell that I am super tired of winter weather? I mean, seriously, this has got to stop. I am over the snow and ice and cold. I want to open up the windows and see green grass and have cookouts. Anyone else with me on this? Can I get an “Amen”?
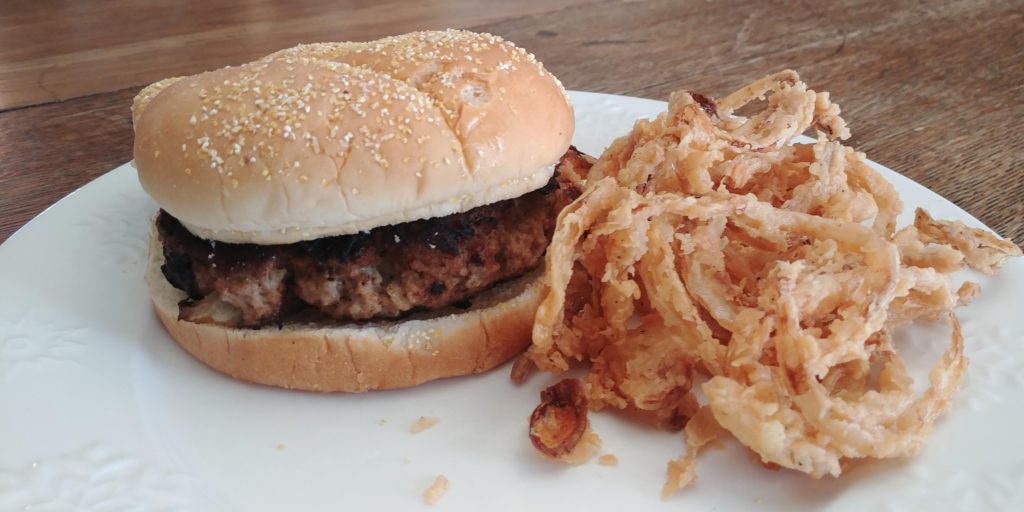
Now, don’t get me wrong? I do love the cozy fall and winter foods such as soups and chilis. But, this time of year I want to head towards BBQ and fried fish. Yum! We had been visiting a local Friday fish fry before the Pandemic made the world stop spinning. Boy is that fried catfish good stuff. I do have a weakness for fried food – much to the dismay of my thighs and butt. So when I was thinking of what to cook last weekend I totally dismissed the idea of a new homemade soup or even a nice meatloaf. I wanted something that at least pointed in the direction of Spring and Summer and warmer weather. I decided to make some turkey burgers and onion strings. Today’s post will deal with the onion strings. I promise to post the turkey burger recipe very soon.
Now, I really, really love French fries. But, once in awhile I like to make up a batch of onion strings. These crunchy and slightly sweet deep-fried bits of heaven are great as a side or can be added as a sandwich or salad topping. They fry up crisp and flavorful and the thin strings make them so versatile as an addition to so many entrees and salads. Why have raw onions on your burger or in your salad when you can have fried onions?
The trick to these onion rings being so versatile is to slice them very thin. That way they fry up quickly and are oh so crispy. They can be sprinkled over soup or salads or piled high on a burger. I have made these with several types of breading and batter. I think that this version turns out best. You get the crunch of the breading without having quite so much grease. I don’t know about you but if I try to eat too much grease-laden food I get a headache. I know that it doesn’t make sense but there it is.
Before I get into this recipe I am going to go ahead and put it out there that you might as well plan on making a mess with this. There is no way around it. There will be oil splatters and drips of breading. There will be several dishes to wash. I am not fond of cleaning up a bunch of dishes either but in this case my advice is to embrace the mess. This is a fun recipe so have a good time with it. You won’t be sorry. The dishes will get done and the spills wiped up and you will have the satisfaction of eating a delicious pile of onion strings as a reward for your efforts.
You do need to plan ahead a little bit for this one. The sliced onions need to soak in buttermilk for at least an hour. I don’t know what chemical reaction occurs during this time but it works. So, give yourself some space for that to happen.
If you don’t have buttermilk on hand, don’t fret. You can make fake buttermilk by adding a splash or two of white vinegar to whole or 2% milk (not sure if skim would work). It’s all good. I happened to have some buttermilk in the fridge that needed to be used up but I have totally made the fake kind before.
For this recipe you should use sweet onions. I love to get the big old Vidalia onions for this but my store only had the Mayan Sweets this time. They are typically a lot smaller but are just as good. You just need to adjust your quantity accordingly. The recipe normally calls for 1 or 2 large Vidalia onions. Since mine were quite small, I used 4 Mayan Sweet Onions. I probably should have used 3 because I started to run low on the dry ingredients before I was finished. Never fear though, if this happens to you, you can just quickly mix up another half or whole batch of the flour and spice combo. And, please remember that onions tend to expand outrageously when they are thinly sliced. I look at one Vidalia onion and think that it will never feed my entire family but in reality it probably would. I tend to overdo it on quantities of everything but especially onion strings. They really go a long way. So, plan accordingly.
You will need onions, flour, salt, pepper, cayenne pepper, buttermilk and cooking oil (I used canola). That’s it! Cool, huh?! Hardly any ingredients and you get a fantastic dish.

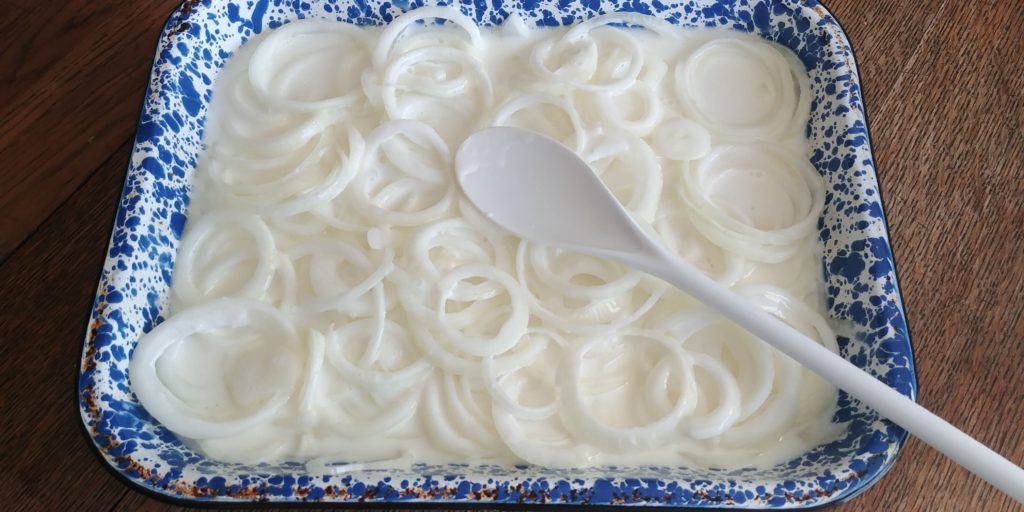
About 2 hours (or at least 1 hour) before you want to eat these babies, start off by peeling your onions and slicing them very, very thinly. I did this with a knife but you can use a mandoline if you would rather. I don’t happen to trust myself with a mandoline. I am pretty accident-prone but you do you. Separate the slices into rings and place them in a shallow pan or a large bowl.
Cover the rings with buttermilk. The amount of buttermilk will depend on the size of your container. You want for all of the onions to be somewhat submerged. I used a 9 X 13 pan and had to use a whole 1 quart carton of buttermilk. Also, you should stir the rings around once or twice during the soaking process to make sure that all of the rings get down in that buttermilk.
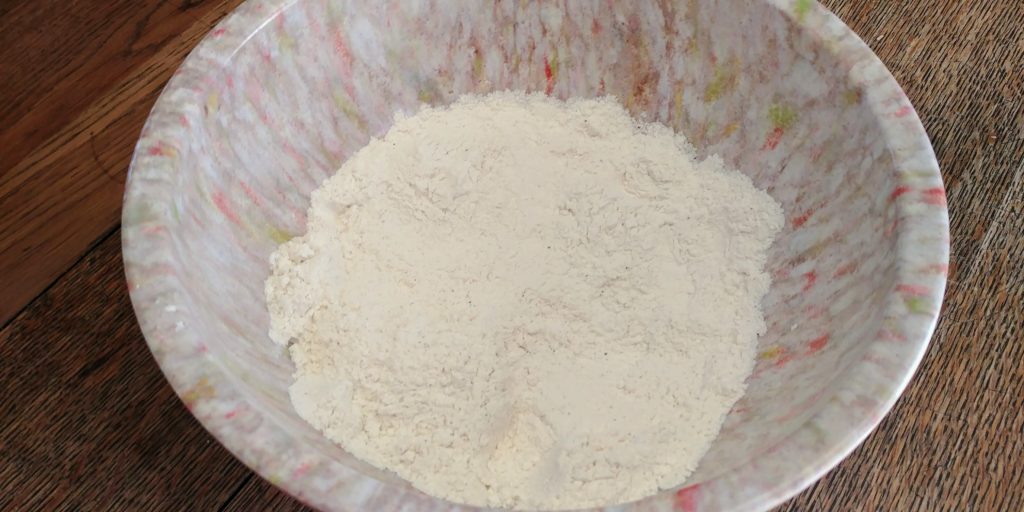
During the soaking time, you can prepare the dry ingredients. In a large, deep bowl, mix together the flour, salt, pepper and cayenne pepper. I used 1 teaspoon of cayenne this time but you can use as much as you like. You may want to start small and add more to the dry mixture after your first batch of strings comes out. Give them a taste and determine if you want more spice at that time.
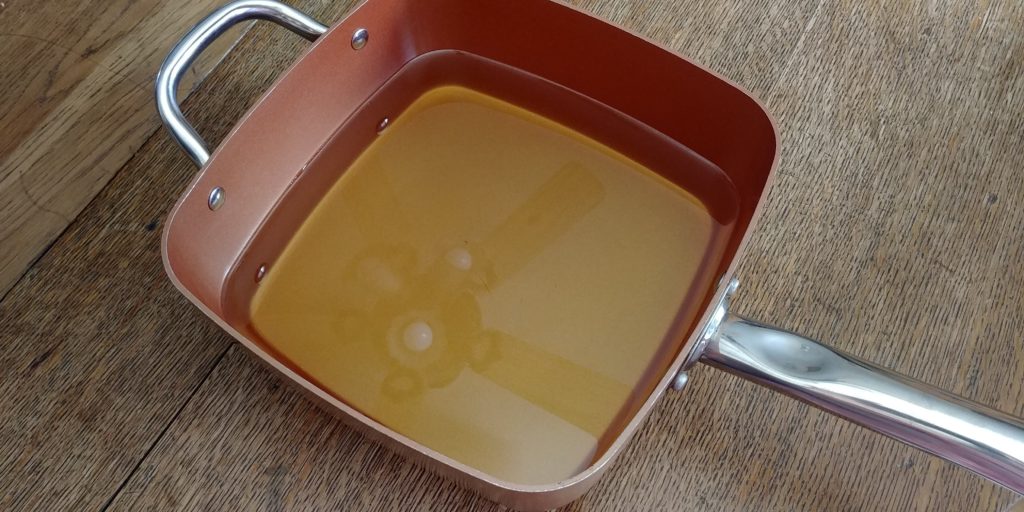
During the end of your soaking process, you can start heating the oil in a large cooking pot or deep skillet. You can use a deep fryer for this but be aware that the oil will take on the flavor of the onions. You won’t want to use that same oil for cooking milder flavored foods and will need to clean out the oil later. I saved the oil and stored it in a container marked for onion strings for later use. I had about 2 1/2 inches of oil in my pot. The onion strings will foam and bubble up when they hit the oil so make sure that your vessel is deep enough and your oil level is low enough to avoid overflow and the danger of a fire. You may also want to use an oil thermometer to make sure that you have the heat needed. If the oil is not hot enough the strings will be soggy and will take longer to fry.
Once the strings have soaked and the oil is at 375 degrees you can start the coating process. Using kitchen tongs grab some of the onion strings from the buttermilk and place them in the dry mixture. Toss them around a bit to get them all nice and coated. I used a fork for tossing so that I didn’t get the flour mixture on the buttermilk coated tongs. Grab a different set of tongs or whatever you have and remove the flour coated onion strings from the bowl. Tap them on the edge of the bowl to get rid of excess flour and carefully place them in the hot oil. Stand back in case of splatters. Use the tongs or a heat-resistant long handled spoon to stir them around a bit. If you don’t, they might all stick together and you could end up with something that resembles an onion funnel cake. It has happened to me and while it is not a bad thing it is a little difficult to eat. You will have to cook the strings in small batches. If you crowd them too much they won’t cook properly. Sorry that I don’t have pictures of every step in the frying process but you have to work quickly and there was no time to grab more shots. But, you get the idea anyway.
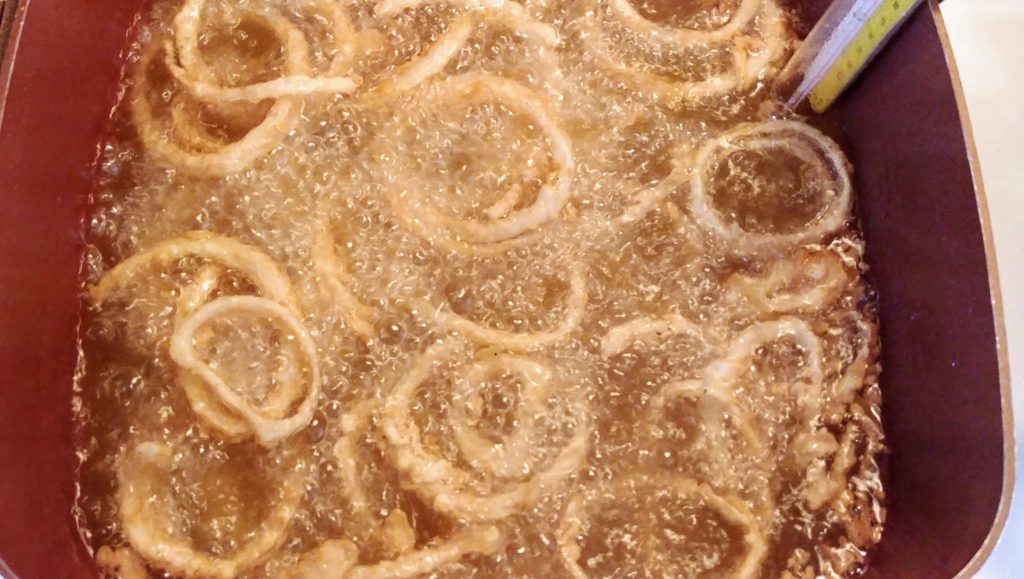
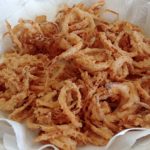
Watch the onion strings closely. If your oil is at the correct temperature they will cook in no time…well, actually, in a couple of minutes. Once they have reached a nice golden brown, remove them carefully with tongs or a slotted spoon, allowing the excess oil to drip off a bit before placing them on a platter or in a bowl that has been lined with paper towels. Give them a taste to make sure that they are salty enough and then serve. Ta-Da! Crispy, crunchy, yummy deep-fried happiness!
Crispy Onion Strings
Ingredients
- 1 – 4 sweet onions 1 if large or 3 or 4 if small
- 2 – 3 cups buttermilk
- 2 cups flour all-purpose
- 1 tsp salt
- 1 tsp black pepper
- 1/4 – 1 tsp cayenne pepper
- 2 quarts oil for frying
Instructions
- Peel and thinly slice the onions. Separate the slices into rings and place them in a shallow pan or a large bowl.
- Cover the rings with buttermilk, taking care that as many are submerged as possible. Soak for at least one hour, stirring them occasionally.
- Meanwhile, add the flour, salt, pepper and cayenne pepper to a large, deep bowl. Stir to combine.
- During the end of the soaking process, you can start heating the oil in a large cooking pot or deep skillet. The onion strings will foam and bubble up when they hit the oil so make sure that your vessel is deep enough and your oil level is low enough to avoid overflow and the danger of a fire. You may also want to use an oil thermometer to make sure that you have the heat needed. Ideally, your oil should reach 375 degrees.
- Using kitchen tongs grab some of the onion strings from the buttermilk and place them in the dry mixture. Toss the strings to coat. Tap the strings on the side of the bowl to remove any excess coating and carefully place them in the hot oil. You will have to do this in batches. Don't crowd the onion strings or they will not cook correctly.
- Stir the frying onion strings around a bit and allow to cook until golden brown. This should take only a few minutes depending on how hot your oil is.
- Remove the onion strings to a paper towel lined platter or bowl to drain. Serve hot or warm as a side or a topping.