Enchanted to serve…dinner, cookies, cakes….

Tag: cookie

Monster Cookie Energy Balls

Monster Cookie Energy Balls

Boo Everyone!  Happy Halloween!  I hope that you all have some spooky fun and plenty of your favorite treats today!  I can’t honestly say what my favorite Halloween candy would be. It would definitely be chocolate.  There would probably be some sort of peanut butter or caramel involved. I am not a huge nougat fan so I could rule that out.  Hmmm. This requires some deliberation and most likely some taste tests.

Anywho…..I wrote this post a couple of weeks ago and am just now finding the time to polish it up and smooth it out for sharing.  It seems pretty appropriate for today since it is all about Monster Cookie Energy Balls. Get it…monsters…Halloween…chuckle, chuckle?  Well, enough hilarity. On to the recipe.

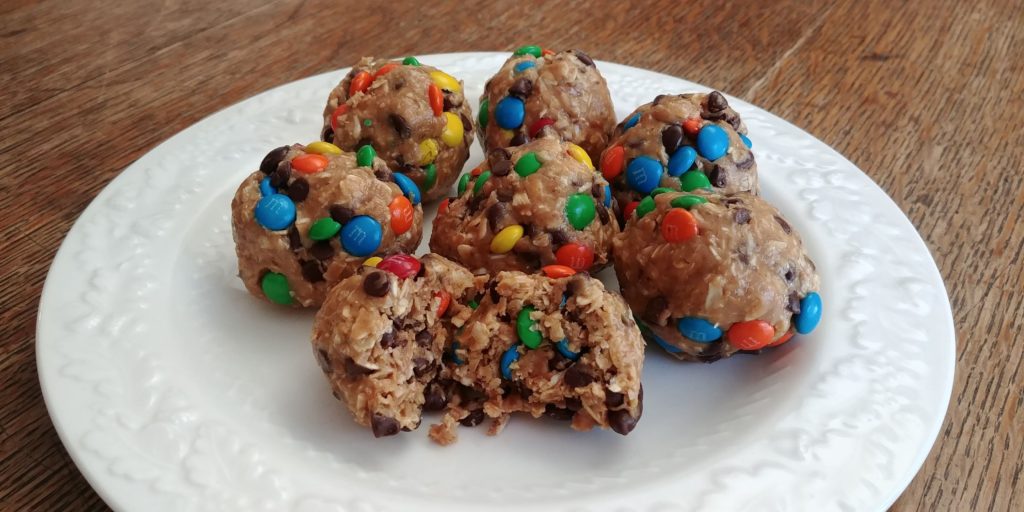
So, a couple of weeks ago I was sitting in the back seat of a campus car on my way to Chicago for a conference.  I figured that I might as well get some writing in while I was sitting there on my tush. And, I happened to have a container of Monster Cookie Energy Balls right next to me.  They were hidden in a bag so that I was not tempted to pop them in my mouth one after another. Who am I kidding? I was tempted. I could seriously eat an entire batch. You see, I love the monster cookie flavor and texture.  The combination of peanut butter and oats and chocolate in a chewy cookie is a seriously delicious force of nature. When I am trolling Pinterest and I see a recipe that has anything to do with monster cookies, I click. And, to be honest, I don’t make many of them, but I want them all just in case.  I used to limit my monster cookie fix to the once a year Christmas baking but then I decided that there is no reason not to enjoy this obsession the whole year through. One of the best decisions ever! A few years ago, I found this energy ball recipe and thought I would give it a try. To tell the truth, I was not convinced that so few ingredients could give me the monster cookie flavor that I love.  Well, I soon realized that my doubts were unfounded. These little suckers are so, so good. Monster Cookie Energy Balls are power-packed and flavor-packed. The peanut butter and honey combine in a soft and sweet base for the slightly chewy oats and little chunks of chocolate and candy-coated heaven.

There are only a few ingredients and you probably have most of them in your pantry right now.  I don’t always have the mini M&M’s and mini chocolate chips on hand which is probably a good thing.  I would be too tempted to make these more often and then eat them all. Seriously, if you make these you will love them.  If you share with others, be prepared to share the recipe too. I guarantee that you will be asked.

You will need peanut butter, old-fashioned oats, honey, vanilla extract, mini chocolate chips and mini M&M’s.  I use the mini baking M&M’s but you can also use the regular mini M&M’s.
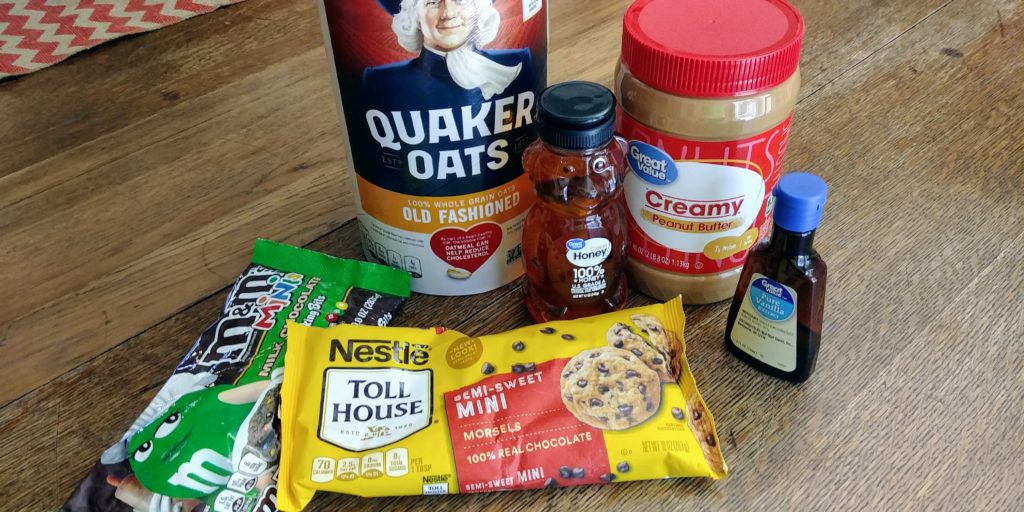
Monster Cookie Energy Balls ingredients

You do not have to use a mixer for this, but I do just so that I know everything is mixed thoroughly – and I’m lazy sometimes.  This is a no-bake recipe, but you will need a baking sheet. I cover mine in parchment just to make sure that the balls don’t stick after chilling.

Combine the peanut butter, honey, and vanilla in your mixer bowl and mix until completely combined. Mix the oats in until everything is evenly distributed.
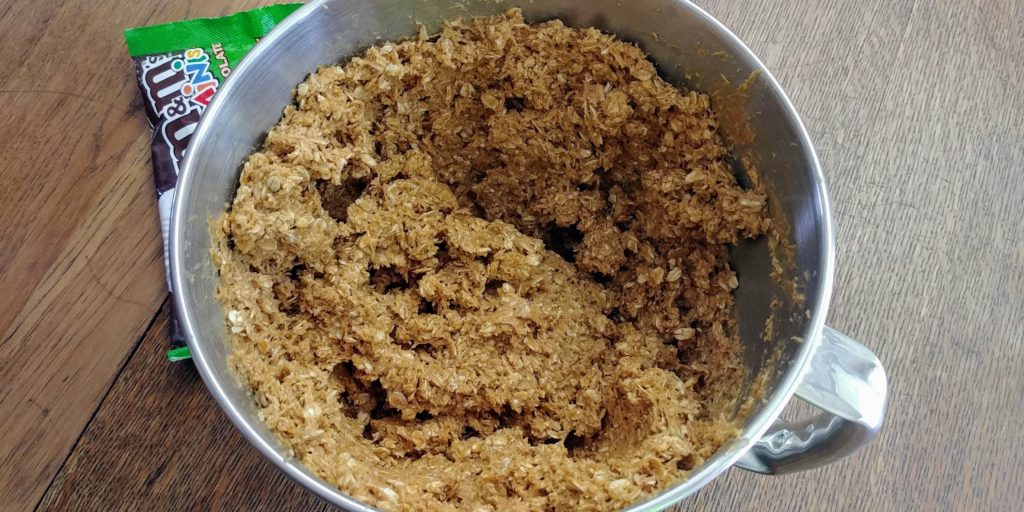
Monster Cookie Energy Balls dough without candy

Mix in the chocolate chips and M&M’s.  You can do this with the mixer on low speed or by hand.  Once mixed thoroughly, use an ice cream or cookie scoop to measure out mounds that are about 2 or 3 tablespoons full.  Roll the mounds into balls with your hands and place them on the parchment-lined baking sheet. Chill the energy balls for about 30 minutes in the refrigerator.  Enjoy these chilled or at room temperature.
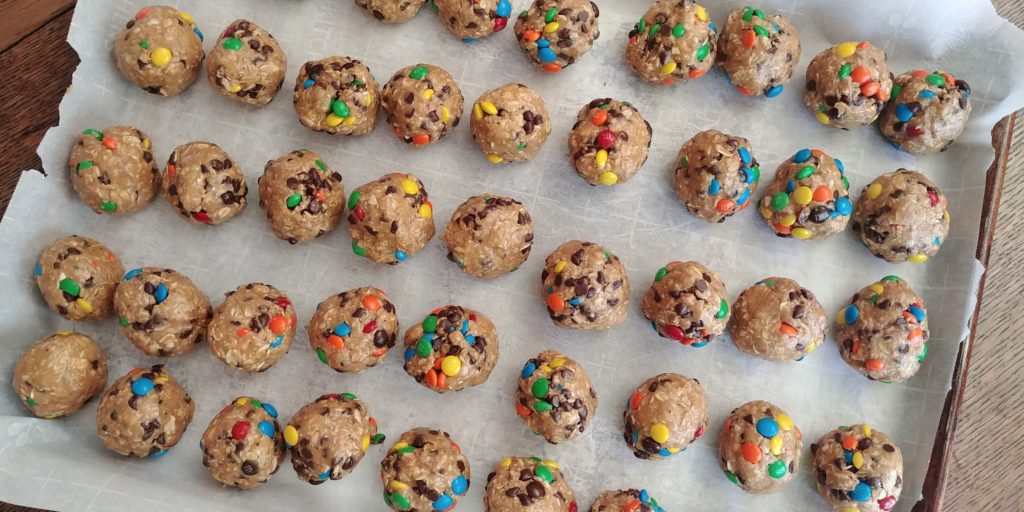
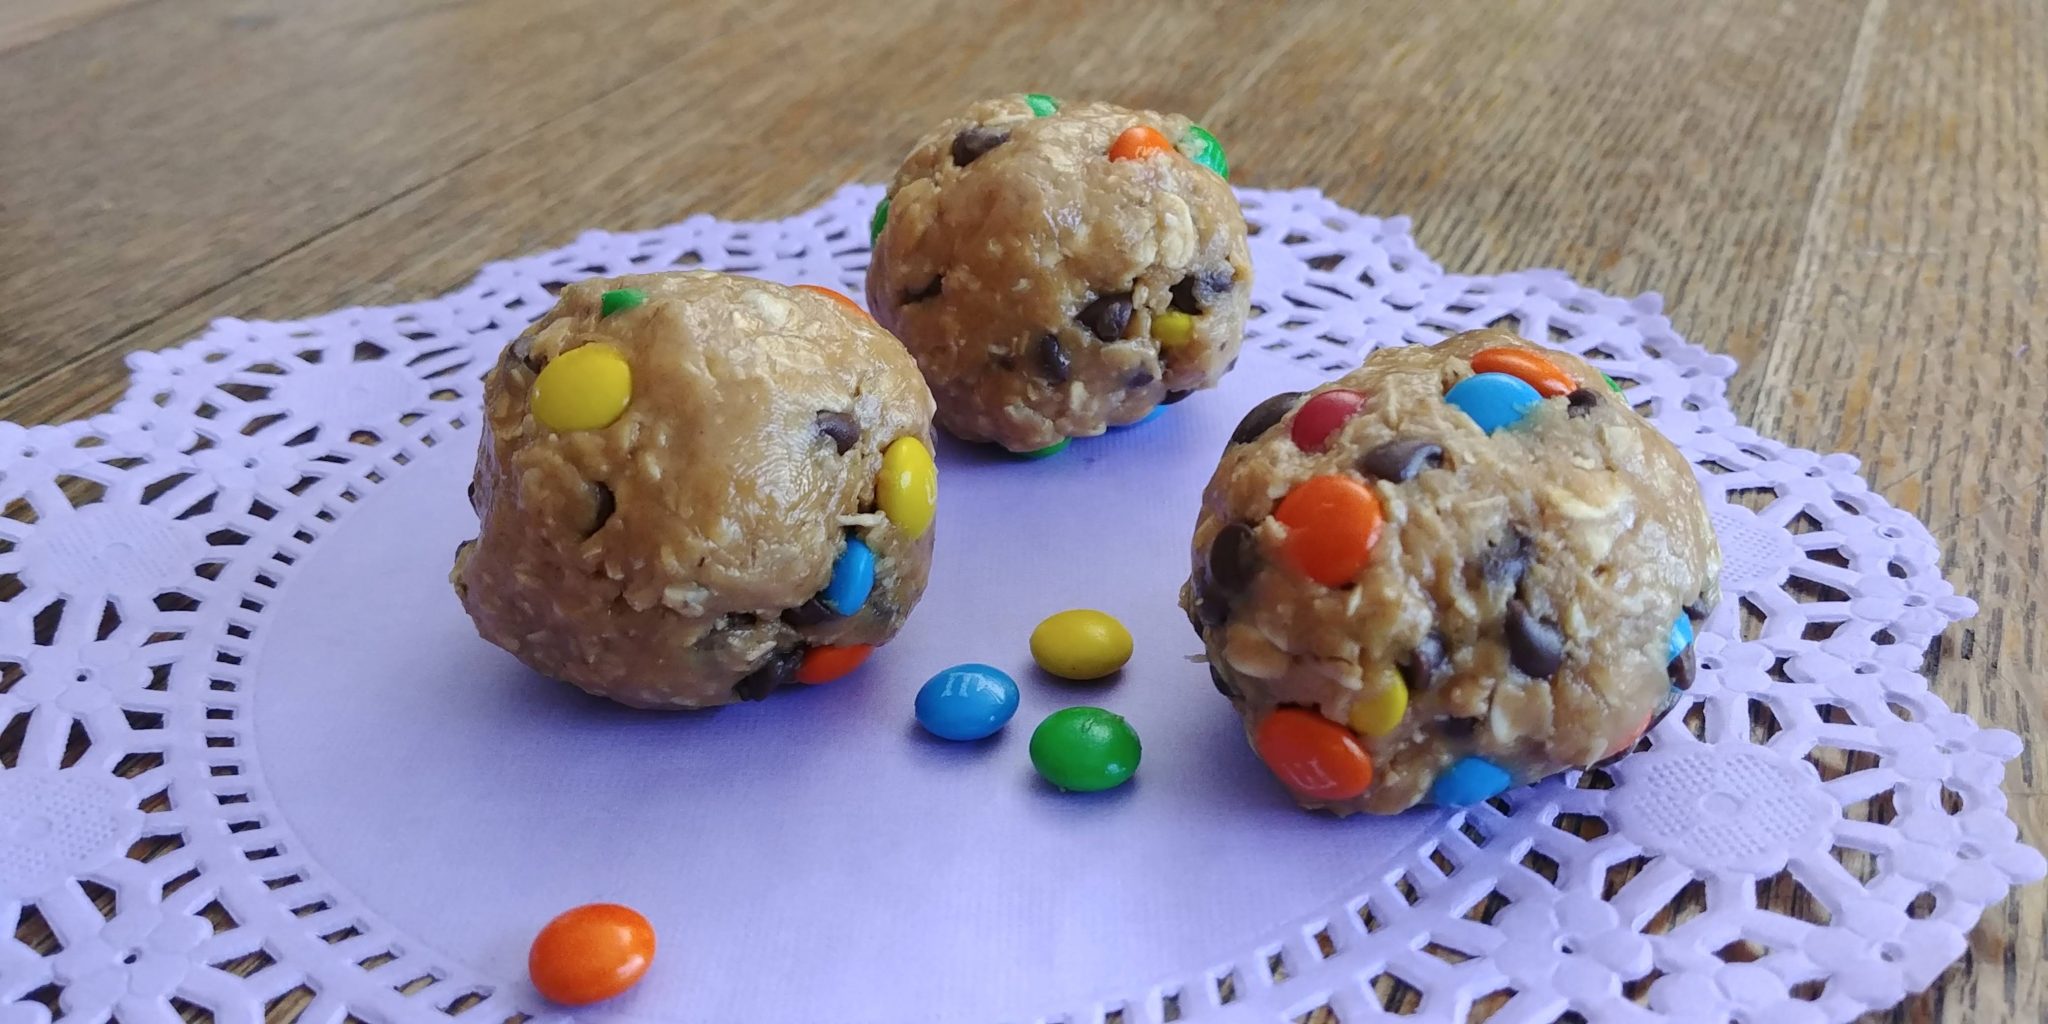
Monster Cookie Energy Balls complete on tray

These keep very well.  Since none of the ingredients are perishable you can pack them in lunch boxes or take them to a party or practice.  The peanut butter, honey, and oats provide great energy and the little bursts of chocolate are a special treat. Enjoy!
Monster Cookie Energy Balls complete 2

Monster Cookie Energy Balls

These little suckers are so, so good.  Monster Cookie Energy Balls are power-packed and flavor-packed.  The peanut butter and honey combine in a soft and sweet base for the slightly chewy oats and little chunks of chocolate and candy-coated heaven.

Prep Time15 mins
Chilling Time30 mins
Total Time45 mins
Author: Wench Sherry

Ingredients

  • 5 cups old-fashioned oats
  • 2 cups creamy peanut butter
  • 1 cup honey
  • 2 tsp vanilla extract
  • 10 oz mini chocolate chips
  • 10 oz mini M&M candies

Instructions

  • In a large bowl, combine the peanut butter, honey and vanilla until evenly mixed. I use my mixer for this but it isn't necessary.
  • Mix the oats in until everything is evenly distributed.
  • Stir in the chocolate chips and M&M's. You can do this by hand or with the mixer on low speed.
  • Use an ice cream or cookie scoop to measure out mounds that are about 2 or 3 tablespoons full.  Roll the mounds into balls with your hands and place them on the parchment-lined baking sheet.
  • Chill the energy balls for about 30 minutes in the refrigerator.  Enjoy these chilled or at room temperature.


Oatmeal Cream Pie Bars

Oatmeal Cream Pie Bars

Hi Everyone!  Well, schools have been back in session for a month or so.  Boy, the summer whizzed by. I didn’t get half of my summer projects done and the students have returned.  Halloween decorations are in the stores and the evenings are getting cooler. I guess Autumn and all the pumpkin-spiced signs of it are right around the corner.

I think that I mentioned last year that I kind of miss the back-to-school hubbub and buying school supplies. I can’t resist walking down those aisles with the pencils and notebooks and lunchboxes.  I don’t miss packing school lunches. I could never quite get the hang of that. I wanted to send foods that the boys would eat (which are mostly considered junk food) but then I felt like a terrible mom for not sending carrot sticks and apple slices.  I just knew that those things would go in the trash can or come back home all dried out and wrinkly. Then I would have to throw the produce in our trash while lamenting the money I just wasted. I didn’t get to take my lunch very often when I was a kid because my mom was a cook at our school.  If I ate her food at home, I could certainly eat it at school, after all. But there was something kind of magical about opening that lunchbox to see what treasure you might find, so those days were special. Not to mention the thrill of picking out a new lunchbox with some favorite character’s picture emblazoned on the sides.

My boys took their lunches much more often.  By the time they were in school, my mom had retired, and they complained that the cafeteria food was not very good.  It was good, I assure you, but kids have pickier taste buds than I do. I did relent and send bags of chips and snack cakes along with the peanut butter or turkey sandwich.  I would try different types of cakes so that they would not get bored. It had nothing to do with the fact that I am an impulse shopper and cannot resist trying any new food item that has a clever marketing gimmick.  Nope, nothing at all to do with that.

Snack cakes are a real problem.  I mean they are tiny cakes with all kinds of delicious fillings and coatings and cool shapes.  I might still buy a box once in a while. I might have some in a fancy cake stand on my kitchen table right now.  It’s a weakness…one of many. And, both of my guys really like snack cakes, so I am drawn to the recipes that I see that are copycat versions of those wonderful little pieces of heaven.  Because, you know, I’m a great mom. It brings back wonderful memories of those days when Cody and Alex were little guys, but I feel that the homemade versions must be better for you. I mean I make sure to leave out the preservatives that make store-bought snack cakes last forever.  That’s gotta be better, right?

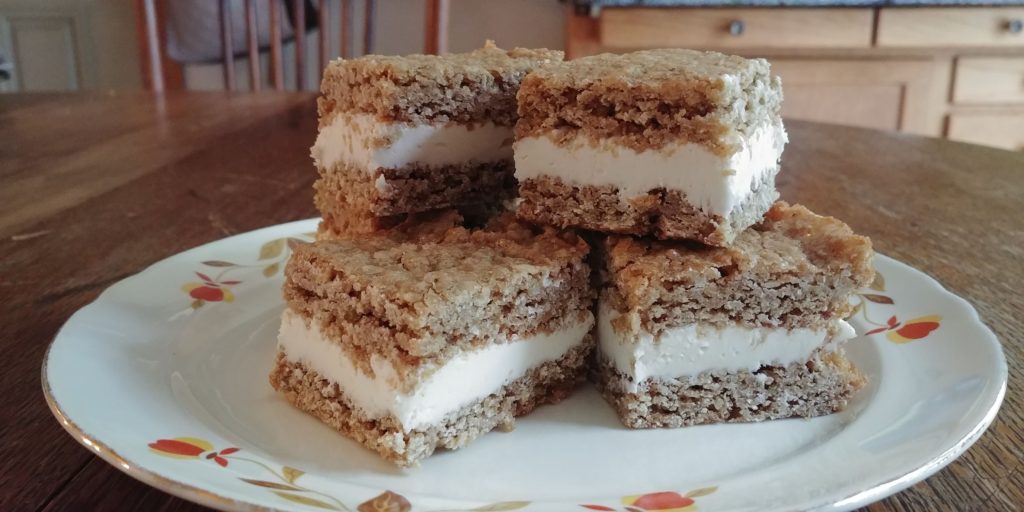
So, a couple of years ago, I saw a recipe for Oatmeal Cream Pie Bars.  I was immediately interested. After all, those cakes have always been a favorite of my guys.  And, these luscious little treats seem like a childhood favorite all grown up. These homemade Oatmeal Cream Pie bars have the great chewy oatmeal spice cake with a sweet creamy filling that you remember but are soooo much better.  The cake has just a hint of cinnamon and nutmeg. The filling has a marshmallow fluff base that creates a wonderful gooey texture. These are wonderful to take to a potluck or to your office or to pack in your kid’s lunchbox. Or pack in your own lunchbox.  Or, eat right at home while standing at the kitchen counter as soon as you cut them because you need to taste test them…just saying.

This recipe does require that you bake each layer of oatmeal cake separately.  I use two 9 X 13 pans baked at the same time but if you don’t have two you could certainly bake ½ and then put the other batter in the refrigerator for the few minutes of baking time. I also line the pans with parchment paper and spray the paper very lightly with cooking spray so that the paper peels off of the cake very easily.  Don’t let the idea of moving these layers around scare you. It is not that difficult, and I will give you a couple of tips that help me.

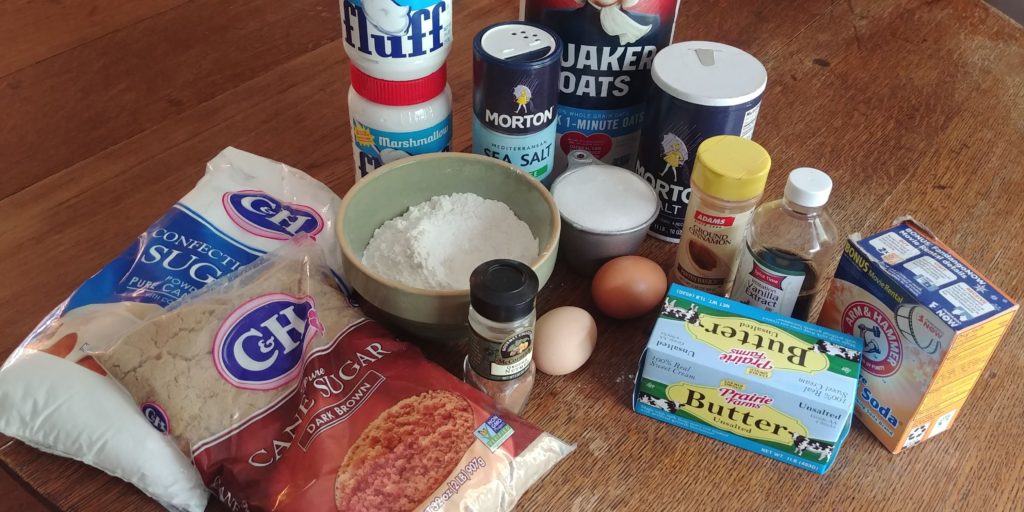
For the bars, you will need 1 ¼ cups unsalted butter, ¾ cup dark brown sugar, ½ cup granulated sugar, 2 large eggs, 1 teaspoon vanilla extract, 1 teaspoon baking soda, 1 teaspoon cinnamon, ¼ teaspoon nutmeg, ¼ teaspoon regular salt, ¼ teaspoon coarse sea salt (optional), 1 ½ cups flour, and 3 cups quick oats (dry).

For the filling, you will need 2 jars marshmallow fluff (7.5 oz or 7 oz each), 3 cups powdered sugar, ¾ cup butter (unsalted or salted), 2 teaspoons vanilla extract and 1/2 teaspoon salt.

Oatmeal Cream Pie Bars ingredients

Preheat the oven to 375 degrees.  Prepare two 9 X 13 pans by spraying with cooking spray, then lining with parchment, then spray the parchment lightly with cooking spray.  Make sure to leave a little parchment hanging over the ends of the pan to use as handles. I know this seems like a lot of steps but believe me when I say that your baking life will be much easier if you do this.

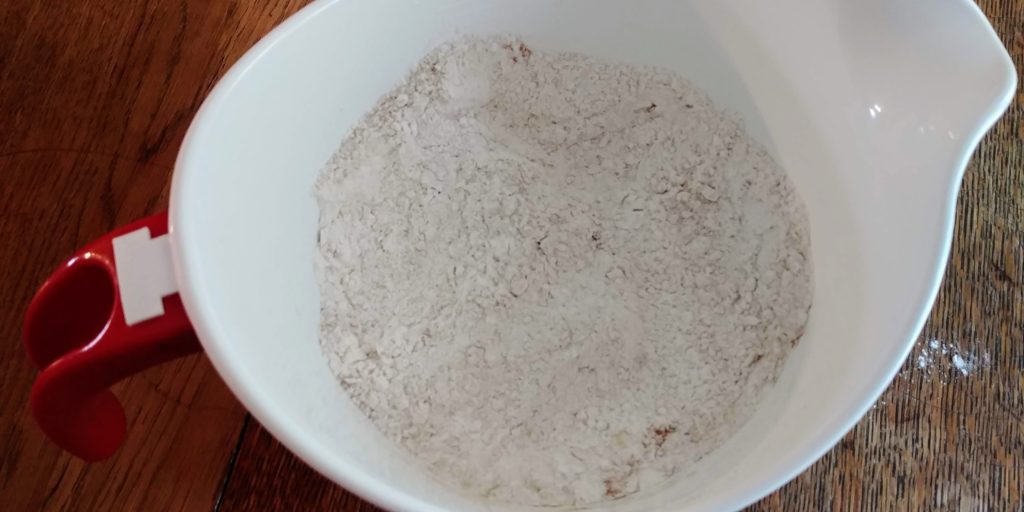
In a medium bowl, mix together the regular salt, the coarse salt (if you are using), nutmeg, baking soda, cinnamon, and flour. I like to run a whisk through my dry ingredients to fluff them up and make sure that everything is nicely mixed.

Oatmeal Cream Pie Bars dry ingredients in bowl

With your mixer, cream both sugars and the butter until fully mixed and fluffy.  Add the eggs and the vanilla and mix again until fully combined.

Add the flour mixture to the butter mixture and mix on low, only until you do not see any streaks of flour.  You can do this by hand if you want but I just let the mixer do the work.

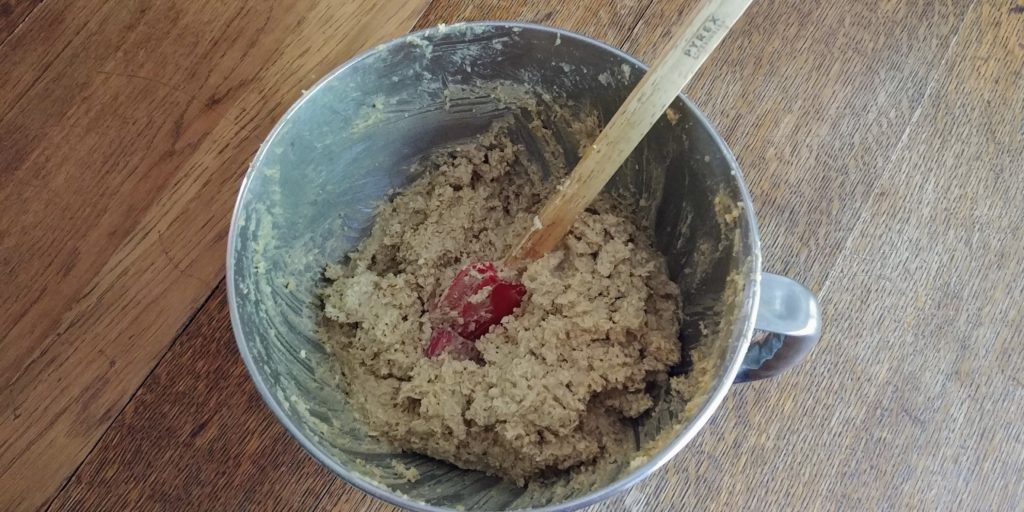
Add the oats and mix on low again just until combined.

Oatmeal Cream Pie Bars all bar ingredients in bowl

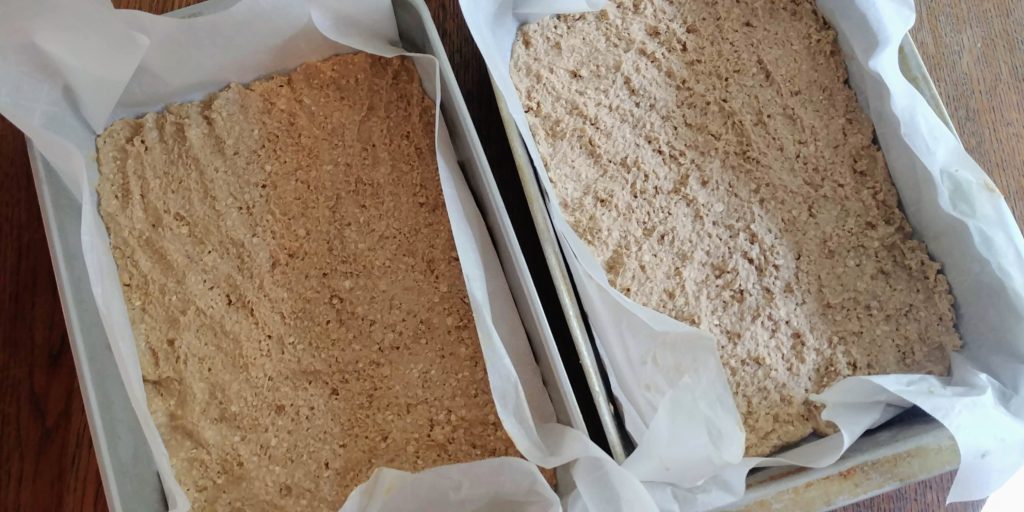
Divide the dough as equally as possible between the two prepared pans and spread to completely cover the bottom.  I usually end up using my hands for this. It helps to dip your fingers in water or spray your hands with cooking spray because this dough is sticky. 

Oatmeal Cream Pie Bars bars in pans unbaked

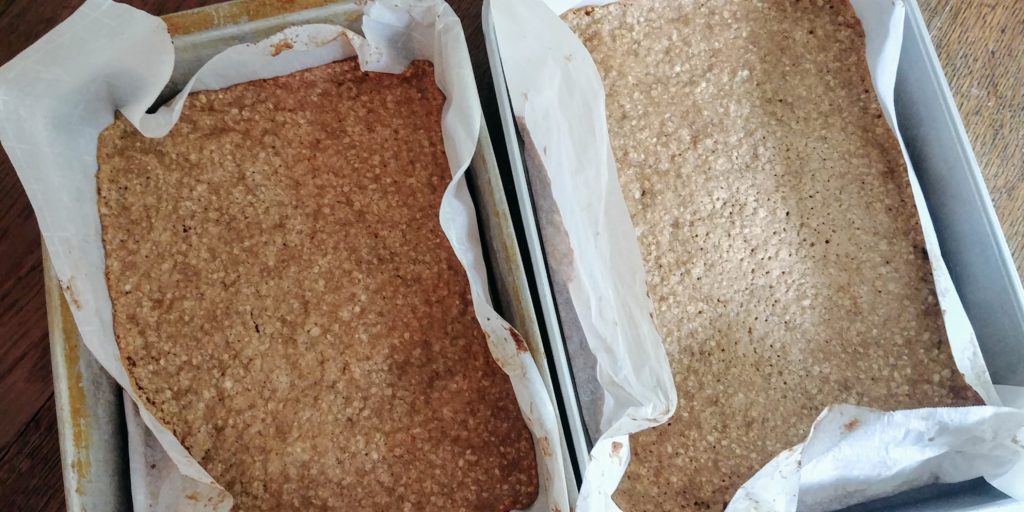
Put both pans in your oven side-by-side but not touching and bake for 10 to 12 minutes.  You want for the end result to be a light golden color with no raw spots in the middle. However, you don’t want to overbake the bars, or they will be crumbly.  I usually check them at 10 minutes and if the center seems set and not jiggly, I pull those babies out.

Oatmeal Cream Pie Bars bars in pans baked

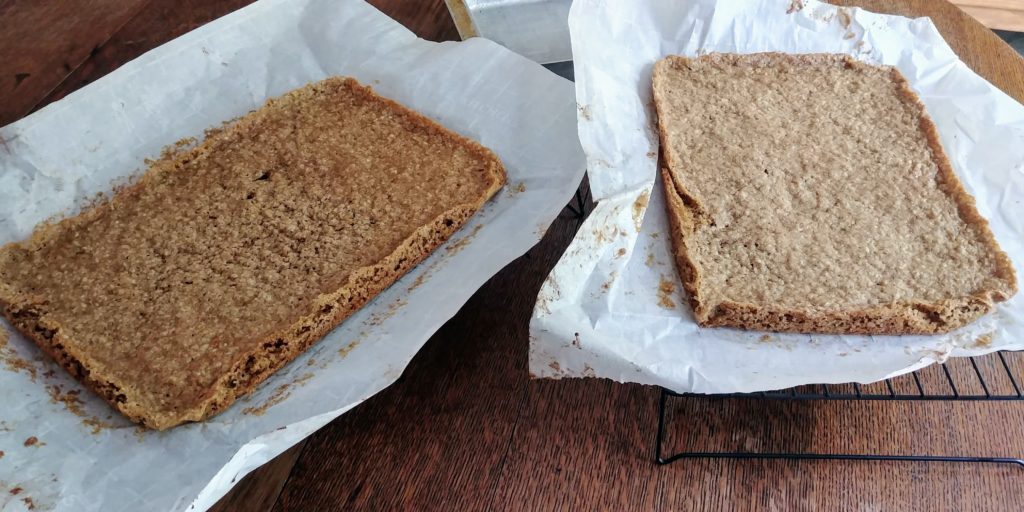
Let the bars cool in the pans for about 15 minutes and then use the parchment to lift them carefully from the pans and place them on a cooling rack.  Let them cool completely while still on the parchment paper.

Oatmeal Cream Pie Bars bars on cooling racks

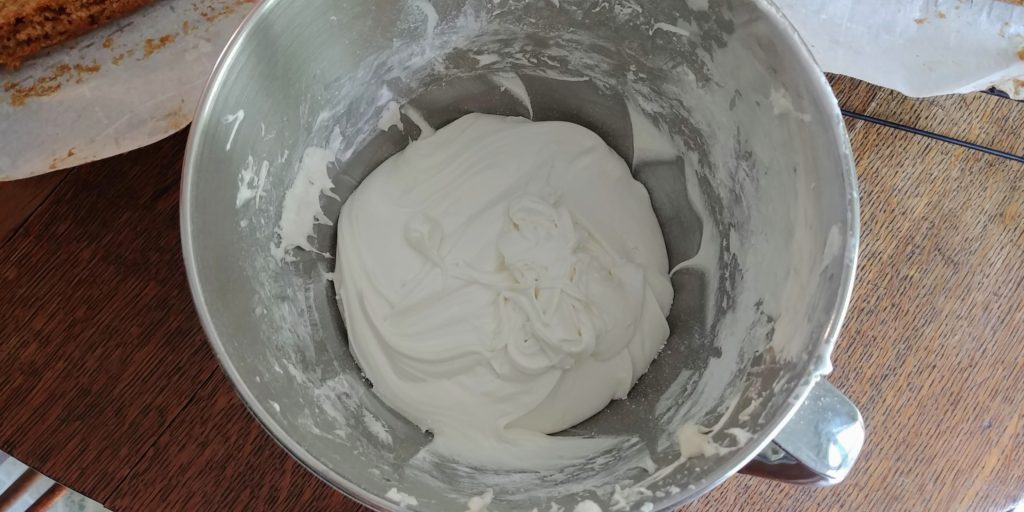
While they cool, you can make the cream filling.  With your mixer, beat the butter until nice and fluffy.  Don’t beat it too long or it will begin to melt. Add the powdered sugar slowly until it is all incorporated and then turn the mixer up to medium or high and beat until the mixture is lighter in color and smooth.  I would start with 2 cups of powdered sugar and then add more after the rest of the ingredients have been added. Add both jars of marshmallow cream, the vanilla, and salt and beat again until smooth and fully combined.  If you need more powdered sugar at this point add more in ½ cup increments. The weather tends to affect how this filling turns out. Mine never turns out to be fluffy like cake frosting. It is smoother and more like a marshmallow filling that you would find in a snack cake from the store.  You just want to make sure that it is stiff enough to stay on the bottom layer of the bars and not run off the edge.

Oatmeal Cream Pie Bars filling in bowl

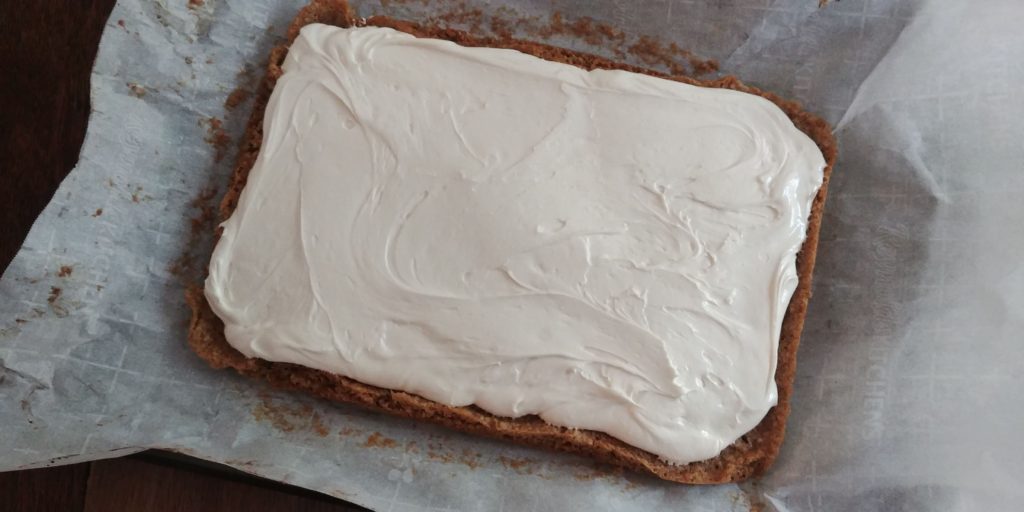
When the bars are completely cool, place a cutting board or cake board on top of one of the uncut slabs.  Flip the whole thing over as carefully as possible and peel the parchment away. Spread this slab with marshmallow filling as evenly and as close to the edges as possible.

Oatmeal Cream Pie Bars first layer and filling

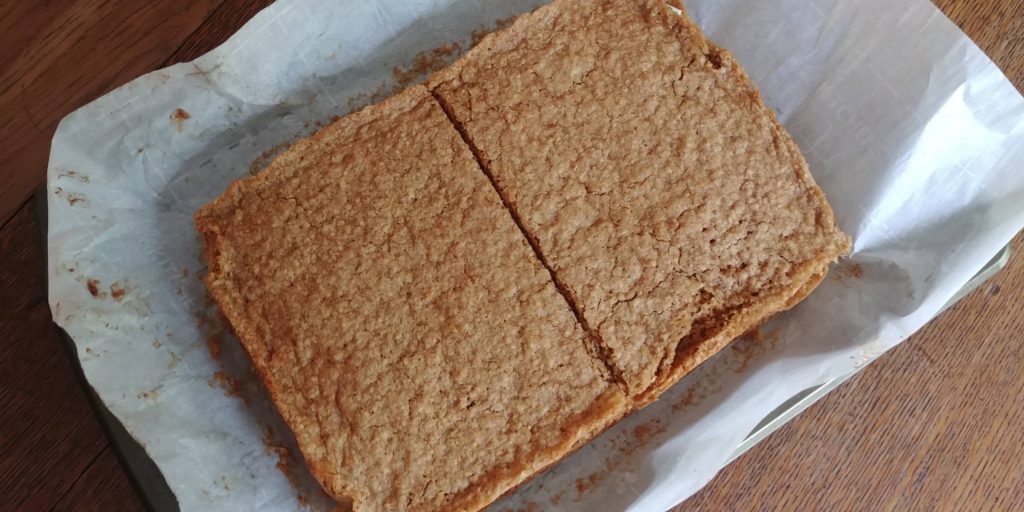
Now, if you are super coordinated you may be able to move your other uncut cookie slab over onto the top of the marshmallow filling.  I am not that coordinated. So, I cut the remaining slab in half crosswise so that I have 2 smaller rectangles. Then, I move those over and place them on top of the filling (without flipping them) with the assistance of a couple of spatulas.  You are going to end up cutting the bars anyway, so it won’t matter if you have a seam in the middle. Just try to get the 2 pieces to fit together pretty tightly.   Don’t push down on the top layer or you may squish the filling out.

Oatmeal Cream Pie Bars top layer cut

Cover the entire cutting board or cake board or whatever you used with plastic wrap or foil and place the large cookie into the freezer for about 2 hours.  Once the bars are very well chilled, you can cut them into squares easily.

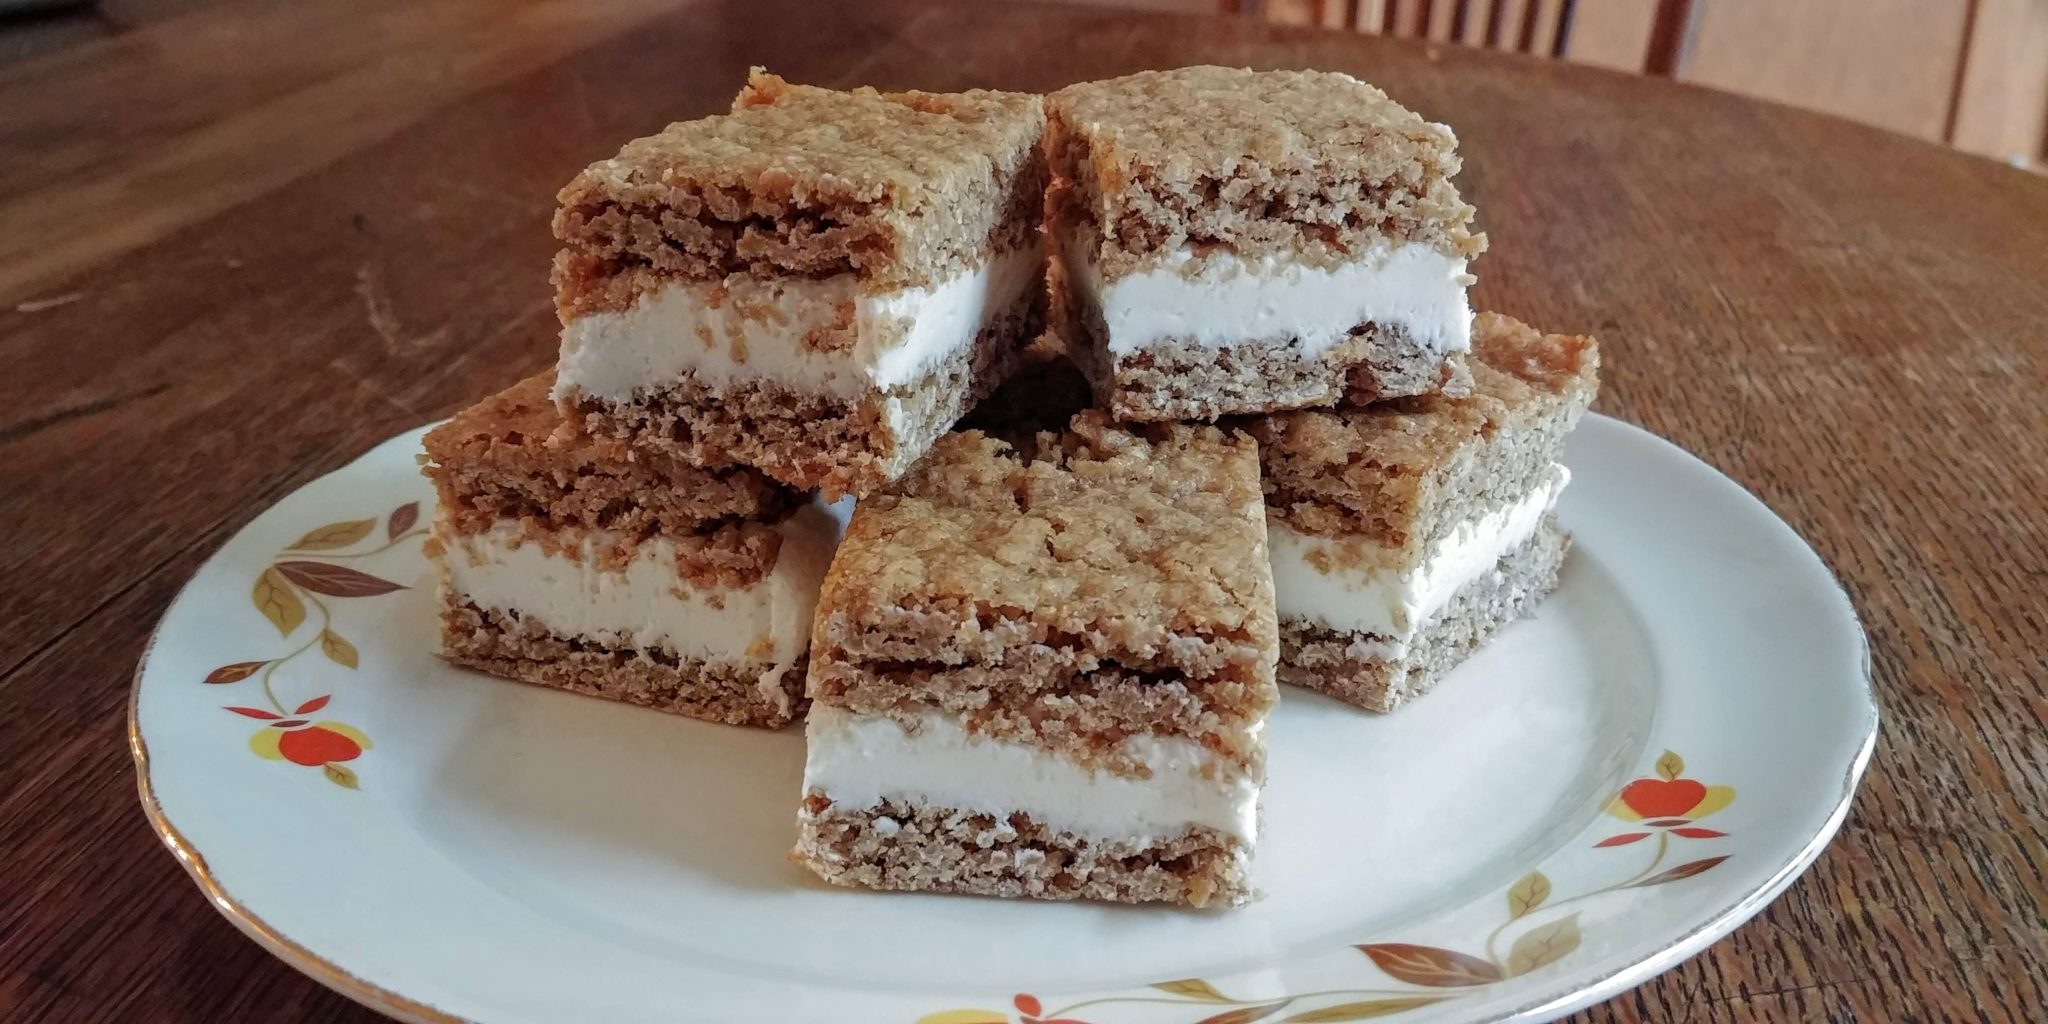
Oatmeal Cream Pie Bars complete on plate 2

These bars can be stored in the refrigerator or on the counter.  They will stay fresh a bit longer in the frig but they probably won’t last long enough to get stale anyway. Grab a glass of milk or cup of tea and enjoy!  And, don’t forget to stick one in your lunchbag. You won’t regret it.

Oatmeal Cream Pie Bars

These homemade Oatmeal Cream Pie bars have the great chewy oatmeal spice cake with a sweet creamy filling that you remember but are soooo much better.

These homemade Oatmeal Cream Pie bars have the great chewy oatmeal spice cake with a sweet creamy filling that you remember but are soooo much better.
Prep Time20 mins
Cook Time12 mins
Chilling time2 hrs
Total Time2 hrs 32 mins
Author: Wench Sherry

Ingredients

For the Bars

  • 1 1/4 cup butter unsalted
  • 3/4 cup dark brown sugar
  • 1/2 cup granulated sugar
  • 2 eggs large
  • 1 tsp vanilla extract
  • 1 tsp baking soda
  • 1 tsp cinnamon
  • 1/4 tsp nutmeg
  • 1/4 tsp salt
  • 1/4 tsp course sea salt optional
  • 1 1/2 cup flour
  • 3 cups quick oats dry

For the Filling

  • 2 jars marshmallow fluff 7.5 oz. or 7 oz. each
  • 3 cups powdered sugar divided
  • 3/4 cup butter unsalted or salted
  • 2 tsp vanilla extract
  • 1/2 tsp salt

Instructions

To Make the Bars

  • Preheat the oven to 375 degrees.  Prepare two 9 X 13 pans by spraying with cooking spray, then lining with parchment, then spray the parchment lightly with cooking spray.  Make sure to leave a little parchment hanging over the ends of the pan to use as handles. Set aside.
  • In a medium bowl, whisk together the regular salt, the coarse salt (if you are using), nutmeg, baking soda, cinnamon, and flour.
  • With your mixer, cream both sugars and the butter until fully mixed and smooth. Add the eggs and the vanilla and mix again until fully combined.
  • Add the flour mixture to the butter mixture and mix on low, only until you do not see any streaks of flour.
  • Add the oats and mix on low again just until combined.
  • Divide the dough as equally as possible between the two prepared pans and spread to completely cover the bottom. Use your hands or a spatula for this. It helps to dip your fingers in water or spray your hands with cooking spray because this dough is sticky.
  • Put both pans in your oven side-by-side but not touching and bake for 10 to 12 minutes. You want for the end result to be a light golden color with no raw spots in the middle.
  • Let the bars cool in the pans for about 15 minutes and then use the parchment to lift them carefully from the pans and place on a cooling rack. Let them cool completely while still on the parchment paper

To Make the Filling

  • With your mixer beat the butter until nice and fluffy. Don’t beat it too long or it will begin to melt.
  • Add the powdered sugar slowly until it is all incorporated and then turn the mixer up to medium or high and beat until the mixture is lighter in color and smooth. I start with 2 cups of powdered sugar and then add more after the rest of the ingredients have been added.
  • Add both jars of marshmallow cream, the vanilla and salt and beat again until smooth and fully combined. If you need more powdered sugar at this point add more in ½ cup increments. You want the end result to be a smooth and slightly gooey consistency that will stay in place between the bars. It will not be fluffy like a cake icing.
  • When the bars are completely cool, place a cutting board or cake board on top of one of the uncut slabs. Flip the whole thing over as carefully as possible and peel the parchment away.
  • Spread this slab with marshmallow filling as evenly and as close to the edges as possible.
  • Cut the remaining slab in half crosswise so that I have 2 smaller rectangles. Then, move those over and place them on top of the filling (without flipping them) with the assistance of a couple of spatulas.
  • Try to get the 2 pieces to fit together pretty tightly and don’t push down on the top layer or you may squish the filling out.
  • Cover the entire cutting board or cake board or whatever you used with plastic wrap or foil and place the large cookie into the freezer for about 2 hours.
  • Once the bars are very well chilled, you can cut them into squares.