Enchanted to serve…dinner, cookies, cakes….

Recent Posts

World’s Best Special K Bars

World’s Best Special K Bars


Hi Everyone!  In my last post I talked about the Goode Family Reunion and some of the very special recipes that make that day memorable for all of us that attend.  Some are must-haves and many of those were introduced to us by the elder members of the family.  The picture below shows my Grandma and Grandpa Goode and their 10 children taken many years ago at Union Hall.  
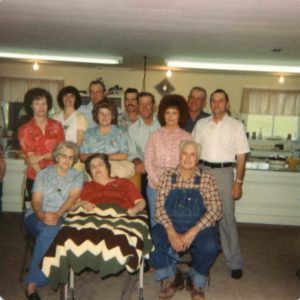
Goode Family
Goode Family


Sadly, eventually, those loved ones pass on or become incapable of attending.  We still share memories of those people and, happily, some of the recipes that are associated with them are carried on by younger family members. My mom can no longer attend the reunions but, to me, it always feels like I should still see her standing in that big kitchen at Union Hall, unpacking the picnic basket and laughing with my aunts and cousins.

Mom would always bring her signature Special K Bars.  I have a handwritten copy of this recipe and it states that she got the recipe from Barb Young (a very dear friend of hers) and that they were very good (total understatement, if you ask me).  The recipe is titled K-Peanut Bars, but I never, ever heard her refer to them by any name other than Special K Bars. She also always doubled the recipe and put it in a 9 X 13-inch glass baking dish.  I am going to give you the measurements for the doubled recipe but feel free to halve it if you don’t want to make as many. BUT, I think that you will want the larger pan once you have tasted them. They are incredibly addicting.  The Special K cereal and peanut butter help me to justify the calories. I mean, they must be healthy with those ingredients, right?

Now, I am not the family member who has been honored with keeping this tradition.  My beautiful and wonderful niece, Elizabeth, has been given this task. She made them once after my mom could no longer get the recipe correct and she did such a fantastic job that she gets to make them every year.  I don’t think that she minds too much.

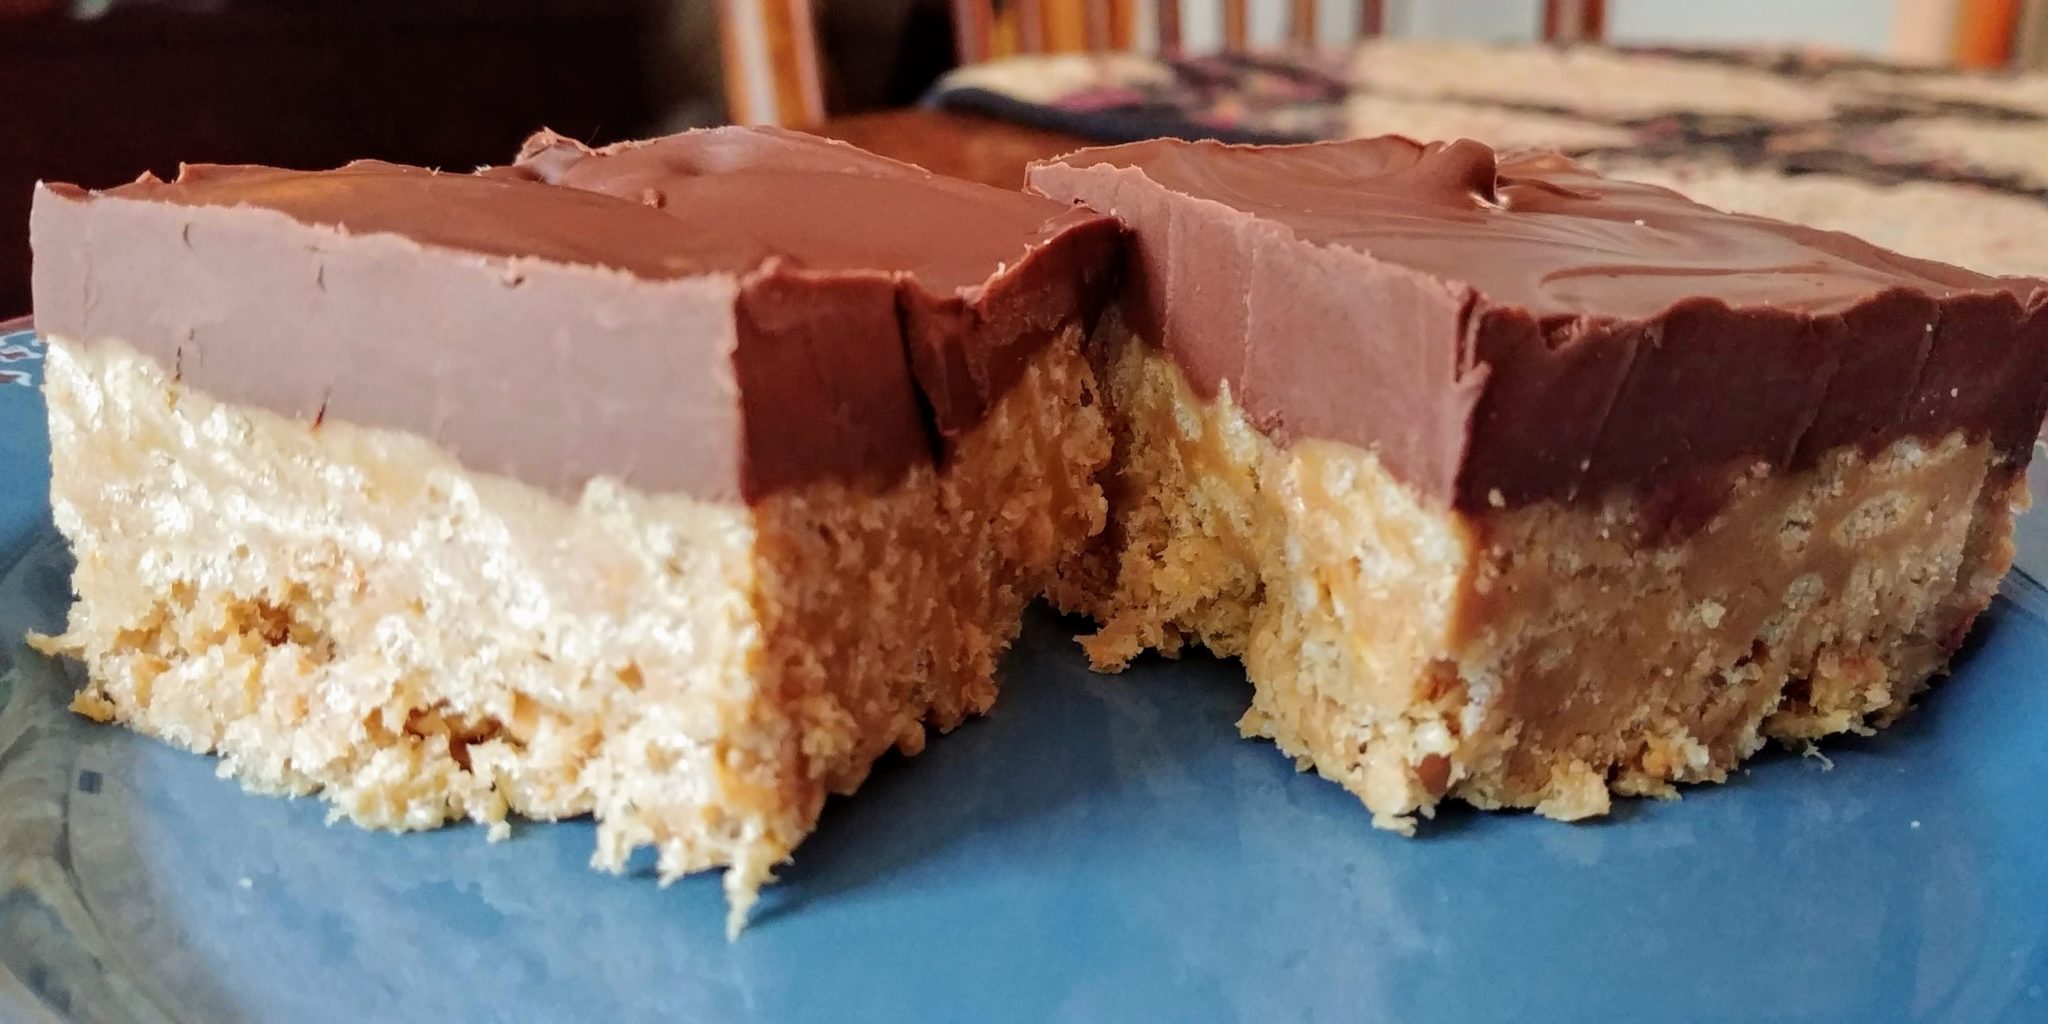
This dish is super easy to make and is pretty quick if you don’t count the time that the bars take to set up.  Depending on the weather it may take a while for the chocolate mixture on the top to get solid. There are only a few ingredients and you may already have them in your kitchen.  The bars are great for dessert but superb for a snack or a potluck dish. I took some of the bars that I made for this post to work and they didn’t last any time at all. These bars are everything wonderful.  The bottom layer of the Special K Bars is peanut buttery and chewy with a little bit of crunch. The top layer is smooth, sweet and chocolatey deliciousness. The combination is truly heaven. My mom knew a good chocolate recipe and this one does not disappoint.  Every time I have one (or even just smell them) I think of her. I think that she would be happy that one of her favorites is also a favorite of so many family members.

(more…)

Mini Onion Burger Bundles

Mini Onion Burger Bundles

Hi Everyone!  August is fast approaching.  August is the month for our annual Goode family reunion.  I’m sure that I have mentioned before that I come from a very large family.  This is especially true on my dad’s side. Every August many, many of us get together at a small community hall near where we all live for a potluck.  It is called Union Hall and it way out in the country. There are several family members, including my Grandma and Grandpa Goode, that are buried in the little cemetery that lies just across the gravel road from the hall.  As years pass and some younger members of the family move away, and some older ones leave us, there is talk of discontinuing the reunion. My Uncle Richard has made it clear that we will continue to have it for as long as he is around.  He promised my Grandma that we would carry on the tradition. I am sincerely glad that he made that promise. I realize that it is a hassle to make food to carry there and we must give up most of a Sunday, but it is so important to keep contact with family members, near and far.  We always have a good time, eating wonderful food, talking, laughing and playing bingo. The kids can play ball out in the yard with cousins that they only see once a year. The adults can catch up on what has happened in their immediate families and reconnect.

There is also a lot of recipe swapping that occurs because of this reunion.  There are some recipes that are perennial favorites and expected to make an appearance on those long countertops.  If they do not, there are good-natured complaints. My family are country folk and as such, they have hunted and farmed for years.  Some of the dishes that are shared contain garden-raised produce or wild game. Yes, we do eat squirrel. It is a common dish in these parts.  Most of the time it is fried and that does show up at the Goode reunion on occasion if the squirrel hunting has been good. Another is squirrel and noodles.  That dish never lasts long. By the time the poor people that are at the end of the food line reach that pan, it is gone. Fried chicken, taco salad, green beans and ham, fresh yeast rolls all grace the countertop.  I, myself, have a group of dishes that are standards for the family reunion. If I don’t walk through that screen door with Ladybug Cookies I hear grumbles. That recipe is coming your way soon.

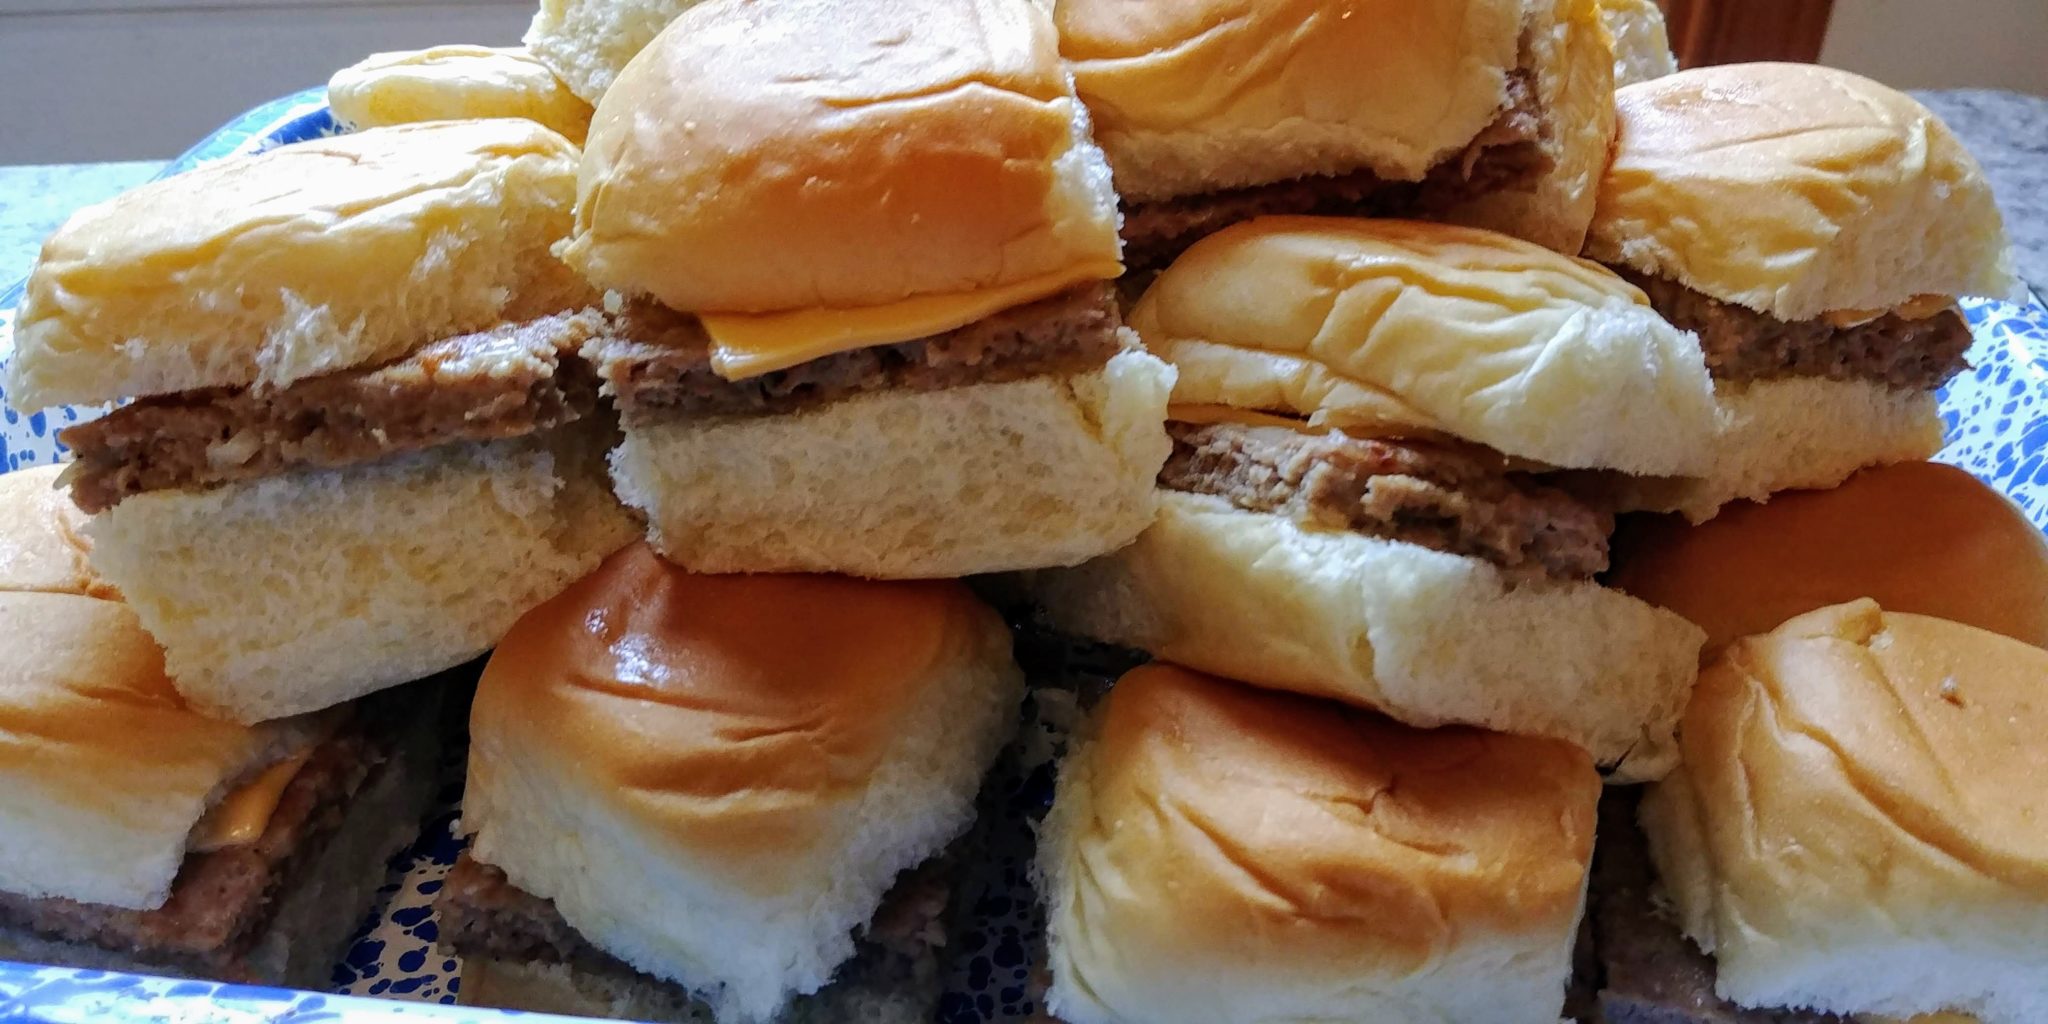
Another main dish that I have shared several times is a large platter of Mini Onion Burger Bundles.  These luscious little sliders are super easy and reminiscent of White Castle Burgers, but better. They are meaty with a definite onion flavor served on soft rolls.  The burgers can be easily personalized with the addition of toppings. These are very good when they are piping hot but are just as good at room temperature, making them an ideal candidate for a potluck.  I close mine up in a plastic container with a tight lid and they stay warm for quite a while anyway. The burgers are also really good as leftovers. They can be easily reheated in the microwave or in the oven.

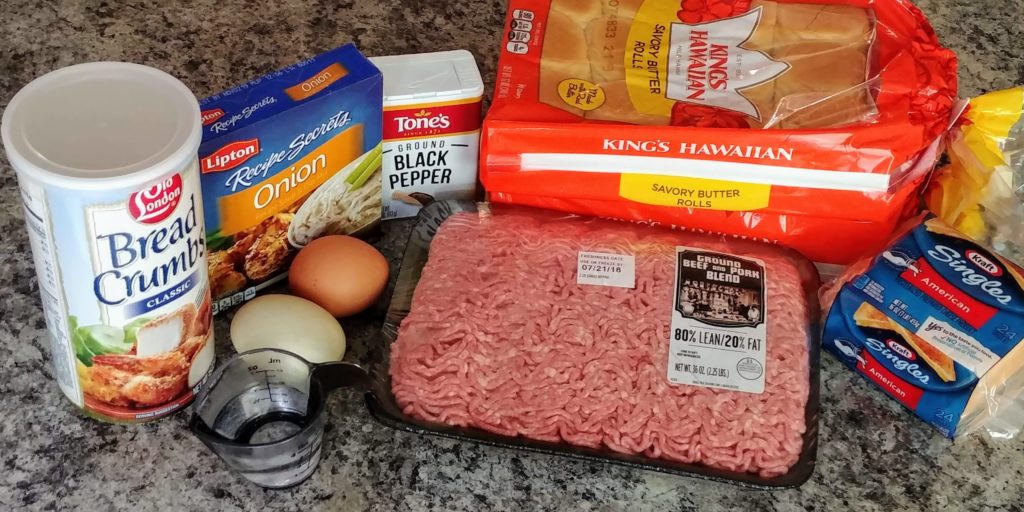
Mini Onion Burger Bundles Ingredients

(more…)

Wedding Cake Cookies

Wedding Cake Cookies

Hey Everyone!  It must be wedding season.  I know of several weddings coming up and have been invited to two, myself.  In fact, I have been given the honor of attending one in September as honorary mother-of-the-bride.  You don’t even know how excited and special this makes me feel. The bride is my “adopted daughter” which means that she is a very good friend of my older son, Cody, and she is the daughter that I never had but wish that I did.  Cody had a group of friends in high school that were so very close, and they spent many a day and night at my home. They all became my kids and I wouldn’t have traded it for anything in the world. Marissa became one of my adopted daughters and we have remained close ever since.  I knew that both of my sons were part of her wedding but was totally surprised when she asked my husband to walk her down the aisle and told me that I would be honorary mom. So sweet! I’m sure that I will be talking more about that wedding in days to come.

This past weekend I was honored to receive a bridal shower invitation for the fiancé of the son of my college roommate.  Ali and I were best friends throughout college and shared a room during our senior year. She also invited another of our bff’s from good old Illinois College, Rena.  I had not seen Rena in many, many years so it was a special day for the attendees as well as the bride. It was a very nice shower with delicious, simple food and decorations.  This picture shows me (left), Ali (middle, because she is short, lol), and Rena (right).

Me, Ali and Rena 2
Me, Ali and Rena 2


We commented on the peculiar fact that all of us (and one other of our bff’s) have two sons and no daughters.  Ali is the first one of us to have a son marry. Rena and I were anxiously curious about what the responsibilities are currently for the groom’s family.  It seems that this has changed dramatically since we were all married back in the 1980’s.

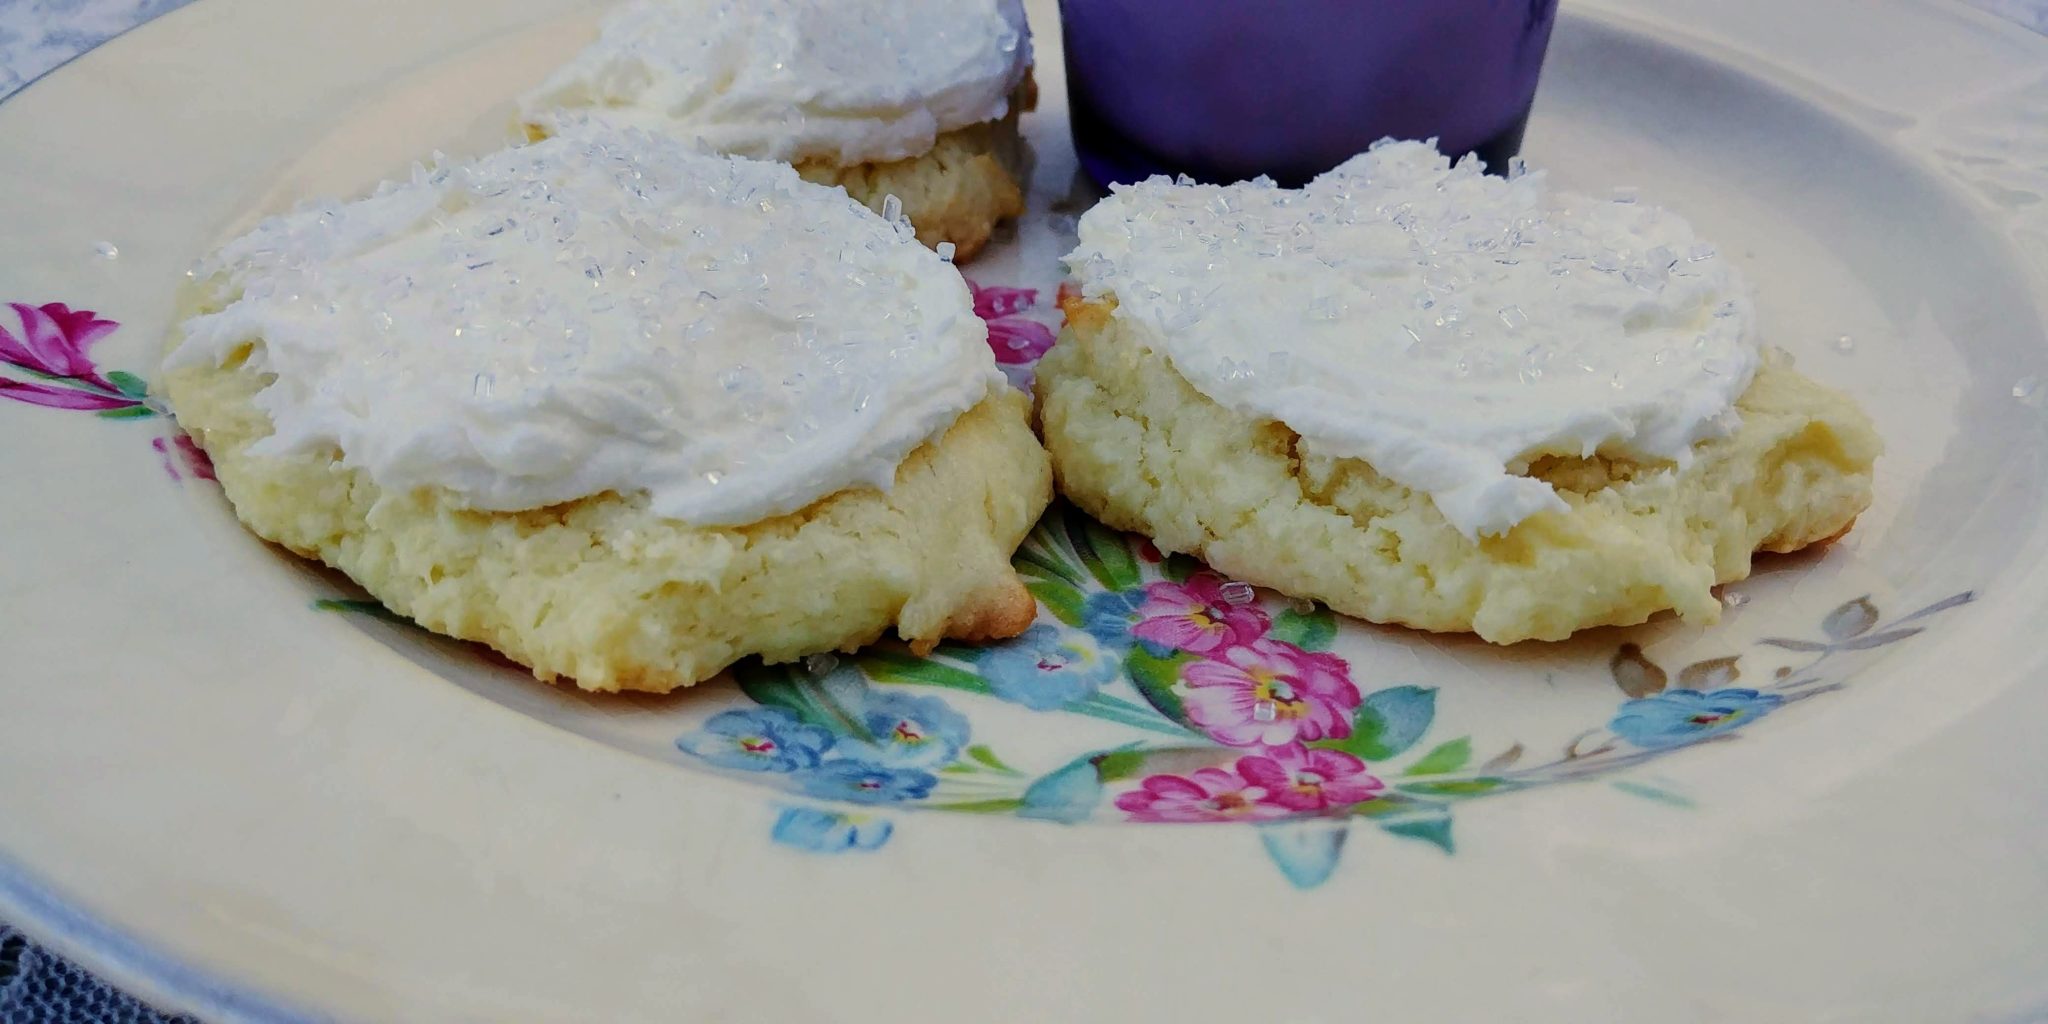
So, anyway, I went to this shower for Matthew and Jacqui and then next weekend I am going to one for Marissa and Austin.  This reminded me of a recipe that I definitely want to share with all of you. Wedding Cake Cookies not only remind you of the flavor of a beautiful wedding cake but are so pretty that they would be welcome at any bridal shower.  I made mine all white this time, but they are easily personalized by the addition of color to the frosting and/or the sprinkles. The possibilities are pretty well endless. You could even add food coloring to the cookie dough if you would like.  I used the sparkly white sugar sprinkles because I think that they look elegant. I am huuuuuuuuuge fan of anything sparkly. My boss can attest to this, much to his dismay. My office space looks like a unicorn sneezed a rainbow of glitter all over the place.  I love the philosophy that you should leave a little sparkle wherever you go. So, these cookies speak to me. Not only are they soft, buttery and delicious with a nice almond flavor but they sparkle too. And, most importantly, they are super easy. With only a few ingredients you can make these beauties.  

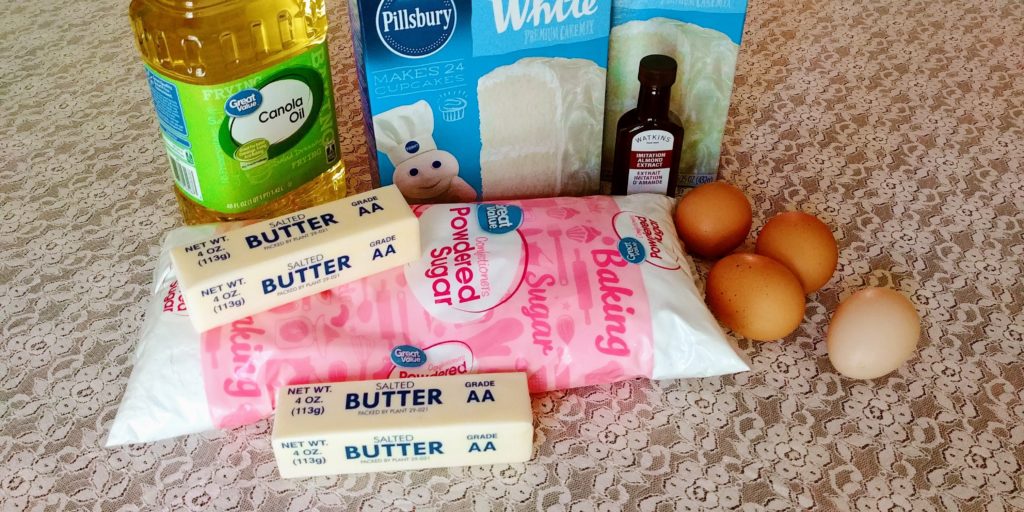
Wedding Cake Cookies ingredients

(more…)

Heirloom Bread Pudding with Vanilla Sauce

Heirloom Bread Pudding with Vanilla Sauce

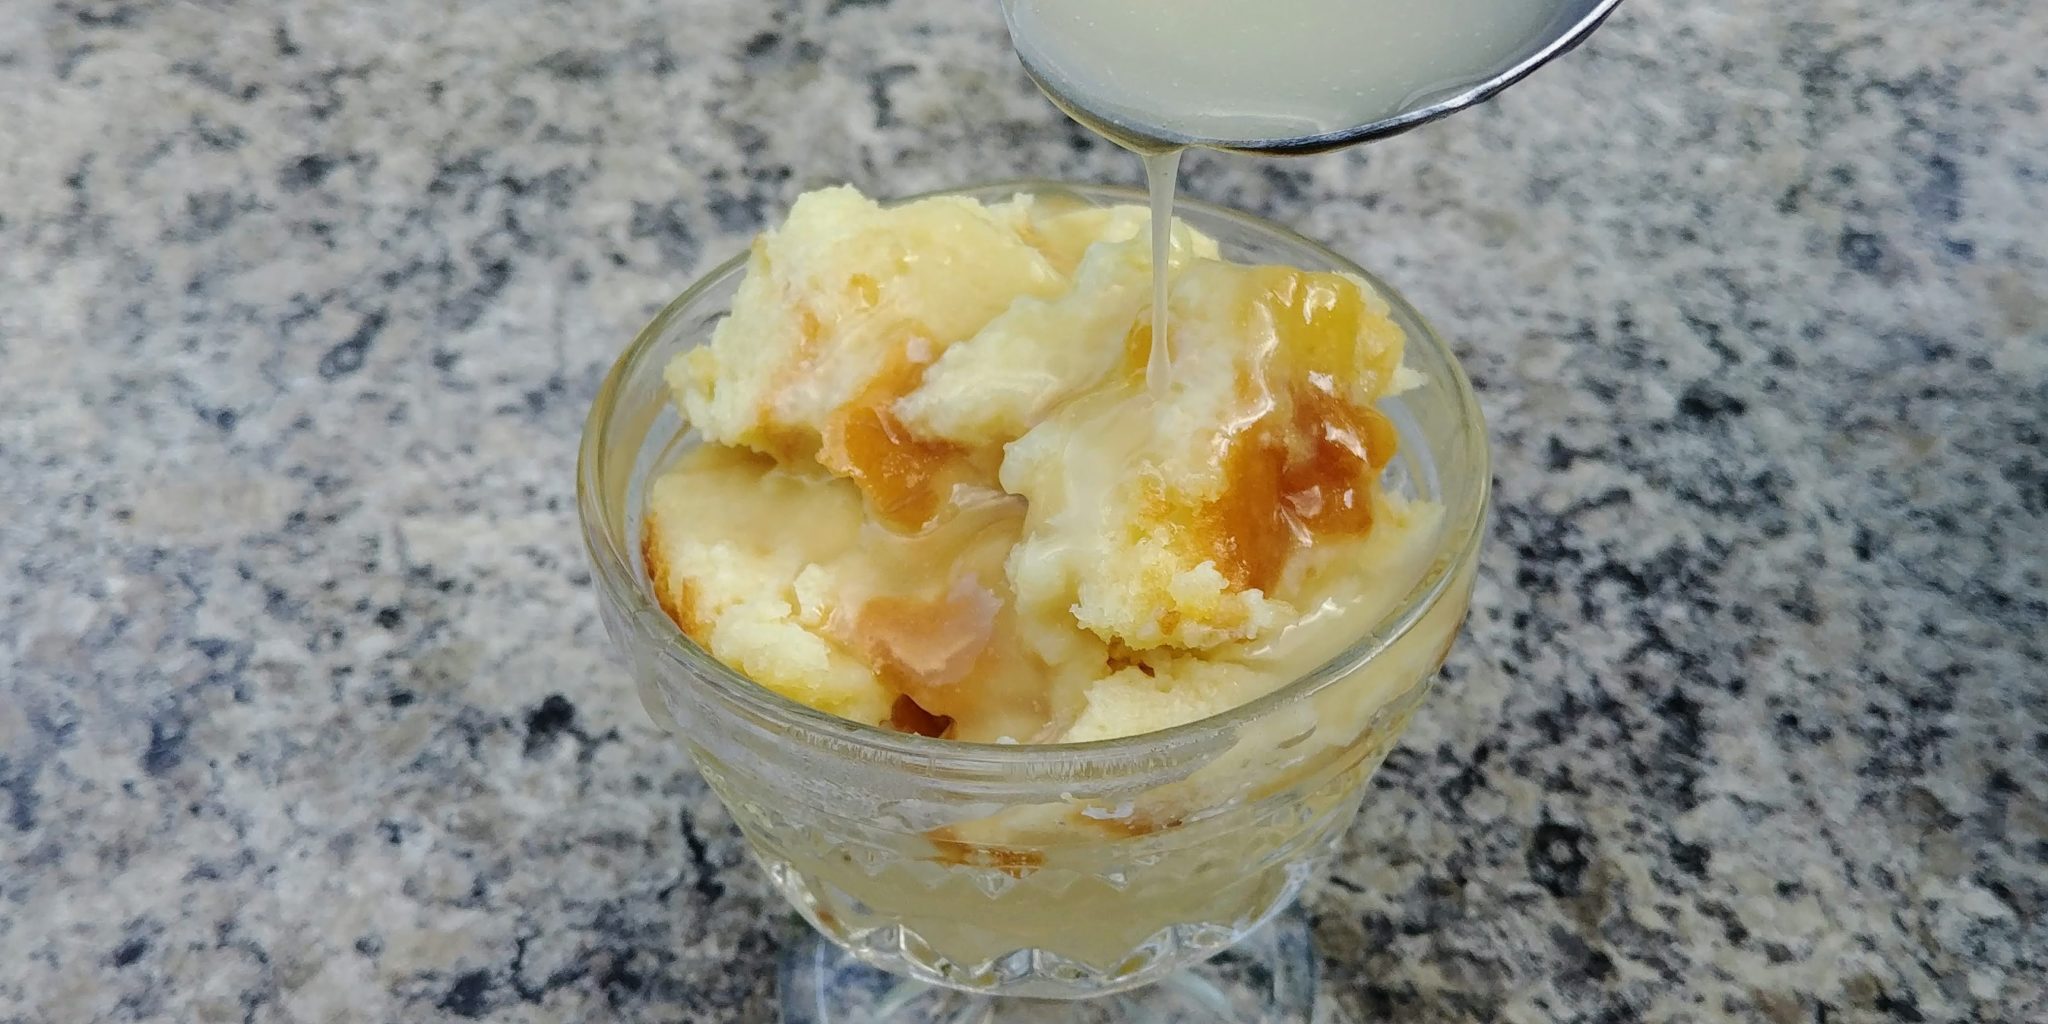
Hi Everyone!  The Kitchen Wench is at it again.  I am sharing a closely-guarded family secret recipe.  There are only a few people that have this recipe. I may be disowned for sharing such precious information.  Actually, that is not entirely true. Ok, it is not even remotely true. This particular bread pudding recipe is my variation of the one that my mom used and that my sisters use.  Mom got the recipe from a friend and I believe that it has been published in a community cookbook at some time. Soooo, I guess that quite a few people have the base recipe. But, my point is that this is a family favorite and is much requested at holiday gatherings and potlucks.  It feels like it belongs to our family. It is requested a lot, but it seems so much more special if you don’t make it all the time. But, you totally could make it frequently. I know that I could because I always seem to have leftover breads or rolls lying around (my thighs love carbs of all kinds).  I stow them away in the frig (the bread, not my thighs) and think that I will use them to make bread pudding. I usually don’t, and they end up being consumed by our chickens. I just feel better knowing that I could make this wonderful dessert any time that I want. It is only moderately time-consuming, and you probably have most of the ingredients at your home already.  Heirloom bread pudding is a creamy custard-style pudding that is slightly sweet with a lovely vanilla flavor. The addition of the vanilla sauce makes it even more delicious, especially when served warm.

The difference between my version of this recipe and the original is that I add more bread chunks which makes a more solid pudding.  It is still very custardy and moist, but my kids and husband prefer less jiggle and more of the velvety feel of the bread soaked in the custard. 

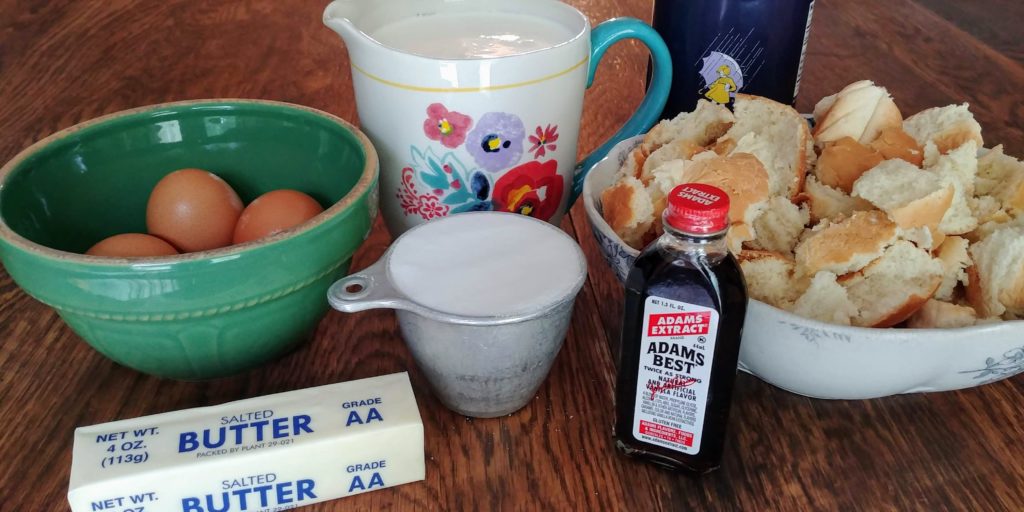
You will need some leftover bread.  You can use pretty much anything that is not flavored with garlic, onion or cheese.  You could use a sweet bread flavored with fruit or chocolate. Just don’t use a savory bread, for obvious reasons.  I like to use yeast rolls, Hawaiian rolls, sandwich bread, croissants or brioche. This time I used yeast rolls and Hawaiian rolls mixed.  If the bread is not already stale you should tear it into small chunks and lay it out on a cookie sheet. Let this sit on the counter uncovered for a couple of hours or overnight to get good and dry.  The dry bread will soak up more of the custard than if it were still soft. If you don’t have a couple of hours, then just put it in the oven on a very low temp for about 15 minutes.

You will also need some whole milk, sugar, salt, butter, eggs and vanilla for the bread pudding.

Heirloom Bread Pudding with Vanilla Sauce Ingredients


Preheat the oven to 325 degrees.  Butter or lightly coat with cooking spray a 2-quart glass baking dish.  You will also need a larger pan that the 2-quart dish can fit into with a little space around the edges.  This time I used a large disposable foil pan that my baking dish fit in with about an inch or so to spare.  I sat the foil pan on a large cookie sheet for stability. Now this all seems kind of complicated, but it isn’t really.  The bread pudding needs to bake in a water bath. That simply means that water needs to surround the pan during the baking process so that a custard forms from the liquid and everything stays nice and moist.  If you don’t do this, you will have something more like a cake than a custard. Put 6 cups of bread chunks in the greased baking dish. Press them down slightly to make room for the custard mixture. Set all of this aside while you prepare the custard.

(more…)

Jumbo Turkey and Spinach Meatballs

Jumbo Turkey and Spinach Meatballs

Hi Everyone! Want to know a secret about the Kitchen Wench?  Ok, here goes. I love me some Italian Food. I could probably eat it 5 out of the 7 days a week and be happy (I would want burgers the other two days).  Unfortunately, my thighs love it too much and don’t want to let it go. So, when I make Italian I want to have my favorite flavors and textures so that it feels like the calories are justified.  I find that I favor white sauces over red. My older son, Cody, also favors white but my husband and younger son, Alex, favor red. We are a family divided when it comes to sauce. I usually go ahead and do red sauce or maybe prepare both and let everyone choose their favorite.  The recipe that I share today is normally prepared with a white sauce and, in fact, I will include the sauce recipe as well.

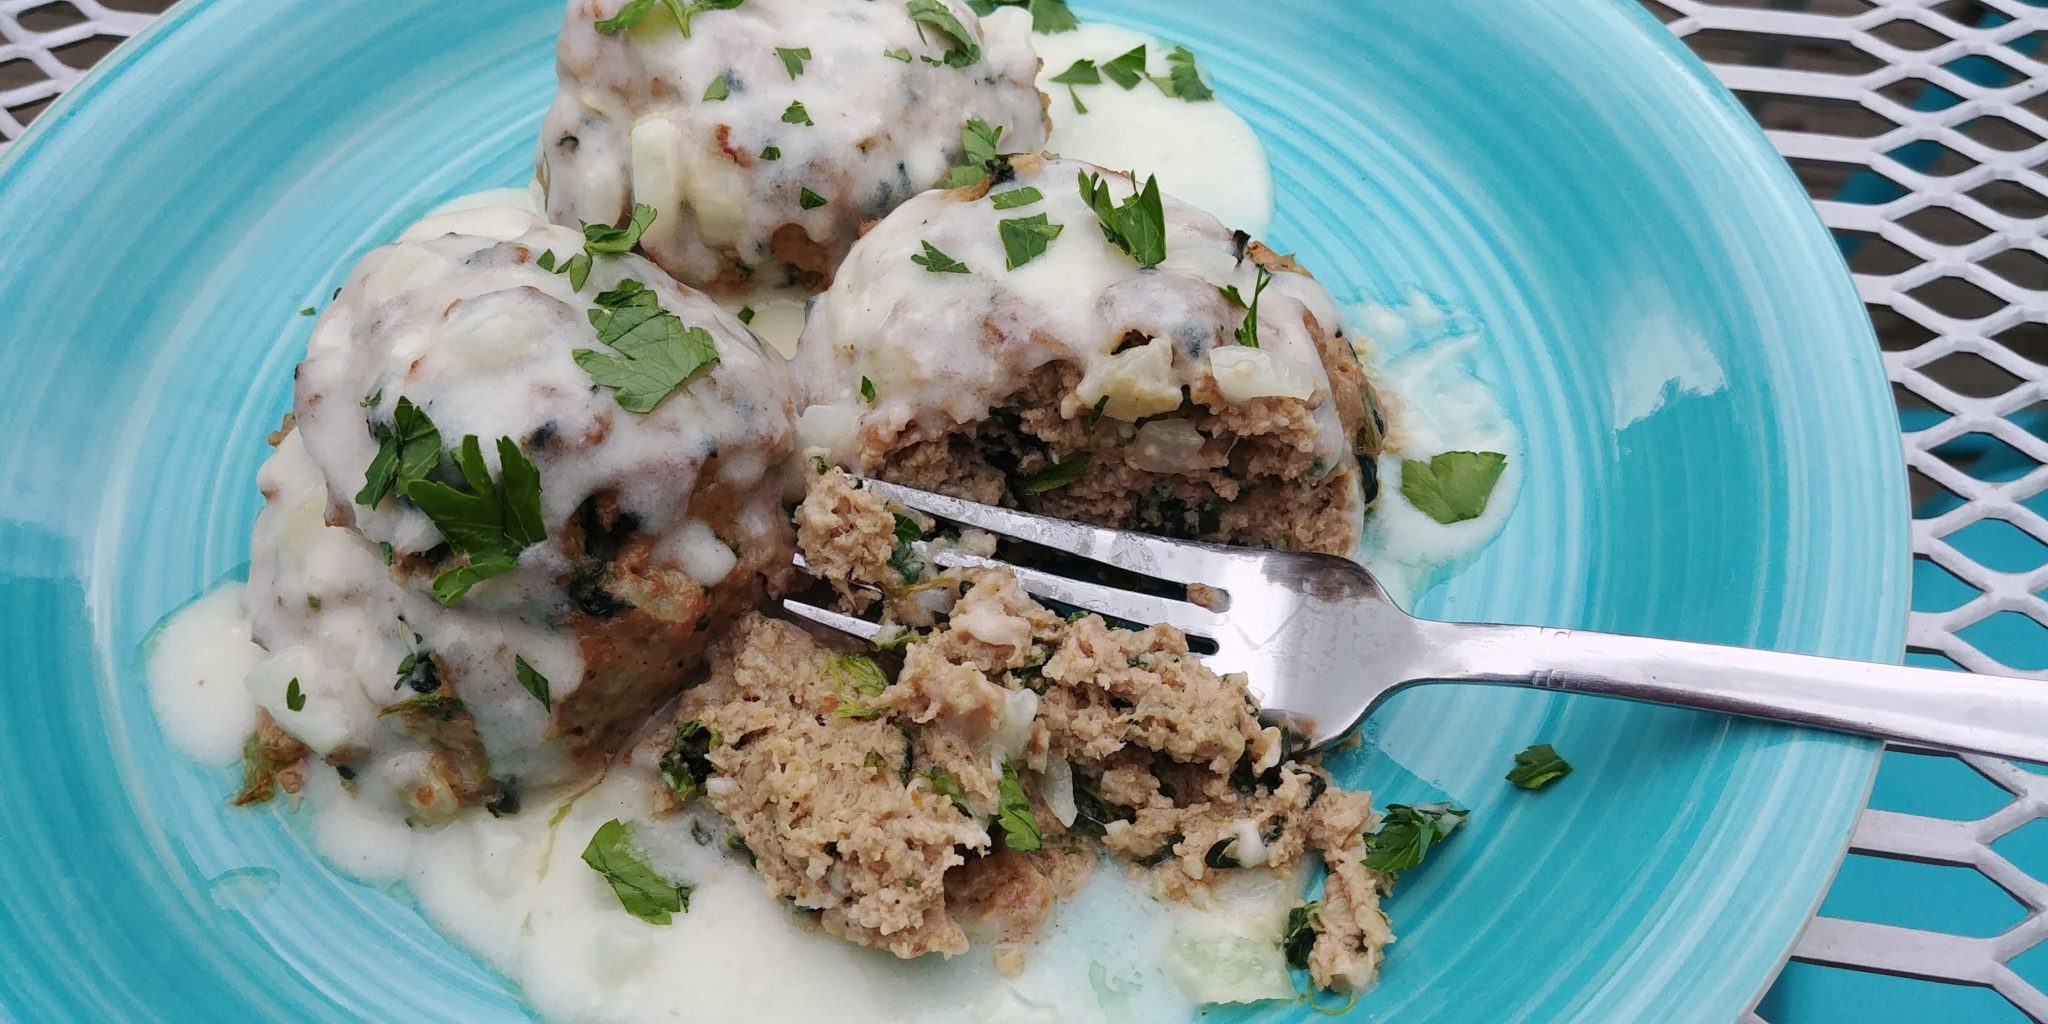
I also love cooking with ground turkey.  It is such a versatile option to ground beef.  These giant meatballs are very juicy and flavorful. The addition of spinach adds color and nutrients. The addition of cheese adds a wonderful flavor and creaminess. The white sauce is smooth and cheesy, a perfect complement to the turkey.

This recipe makes a lot.  If you make the meatballs jumbo you will get twelve.  You can make them regular size and get 24. I have not done that, but I suspect that you would bake them about 15 – 20 minutes rather than 25.  They are really good as leftovers as well so don’t be afraid to make the whole batch.

I normally serve these over pastas, but you don’t have to at all.  They can certainly be eaten all by themselves. You won’t walk away from the table feeling unsatisfied, I guarantee.  

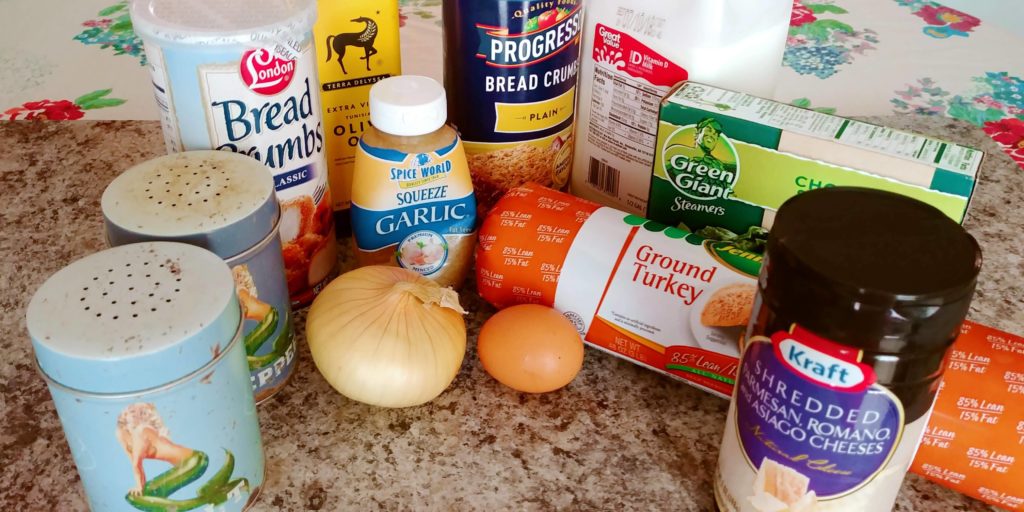
You will want to buy some ground turkey.  I use the prepackaged kind in the rolls and it turns out just great.  If your store carries the 3-pound package, get that one. If not, just buy 3 of the smaller rolls.  For the meatballs, you will also need ½ cup finely chopped sweet onion, 1 9-ounce package of frozen spinach, some grated parmesan or parmesan, romano and asiago cheese blend, 1 egg, plain bread crumbs, milk (any kind), some minced garlic, olive oil and a smidge of salt and pepper.  I realized after I took this picture that I had 2 kinds of breadcrumbs out. I don’t know why. But, don’t be confused by that. You don’t need 2 kinds of breadcrumbs. I just need to pay more attention when I am taking pictures. Sheeeesh.

Jumbo Turkey Meatballs Ingredients

Preheat the oven to 400 degrees.  Thaw the spinach and wring as much liquid out as you can.  I usually put mine in a colander and squeeze it until it is pretty dry.  I have to admit that I hate wringing out spinach. You end up with a small ball of green stuff that really doesn’t look all that appetizing. However, you want to use it in this recipe.  It really does add something special.

Remove the ground turkey from the roll and put in a large bowl.  Make a well in the middle. Add the remaining meatball ingredients.

(more…)

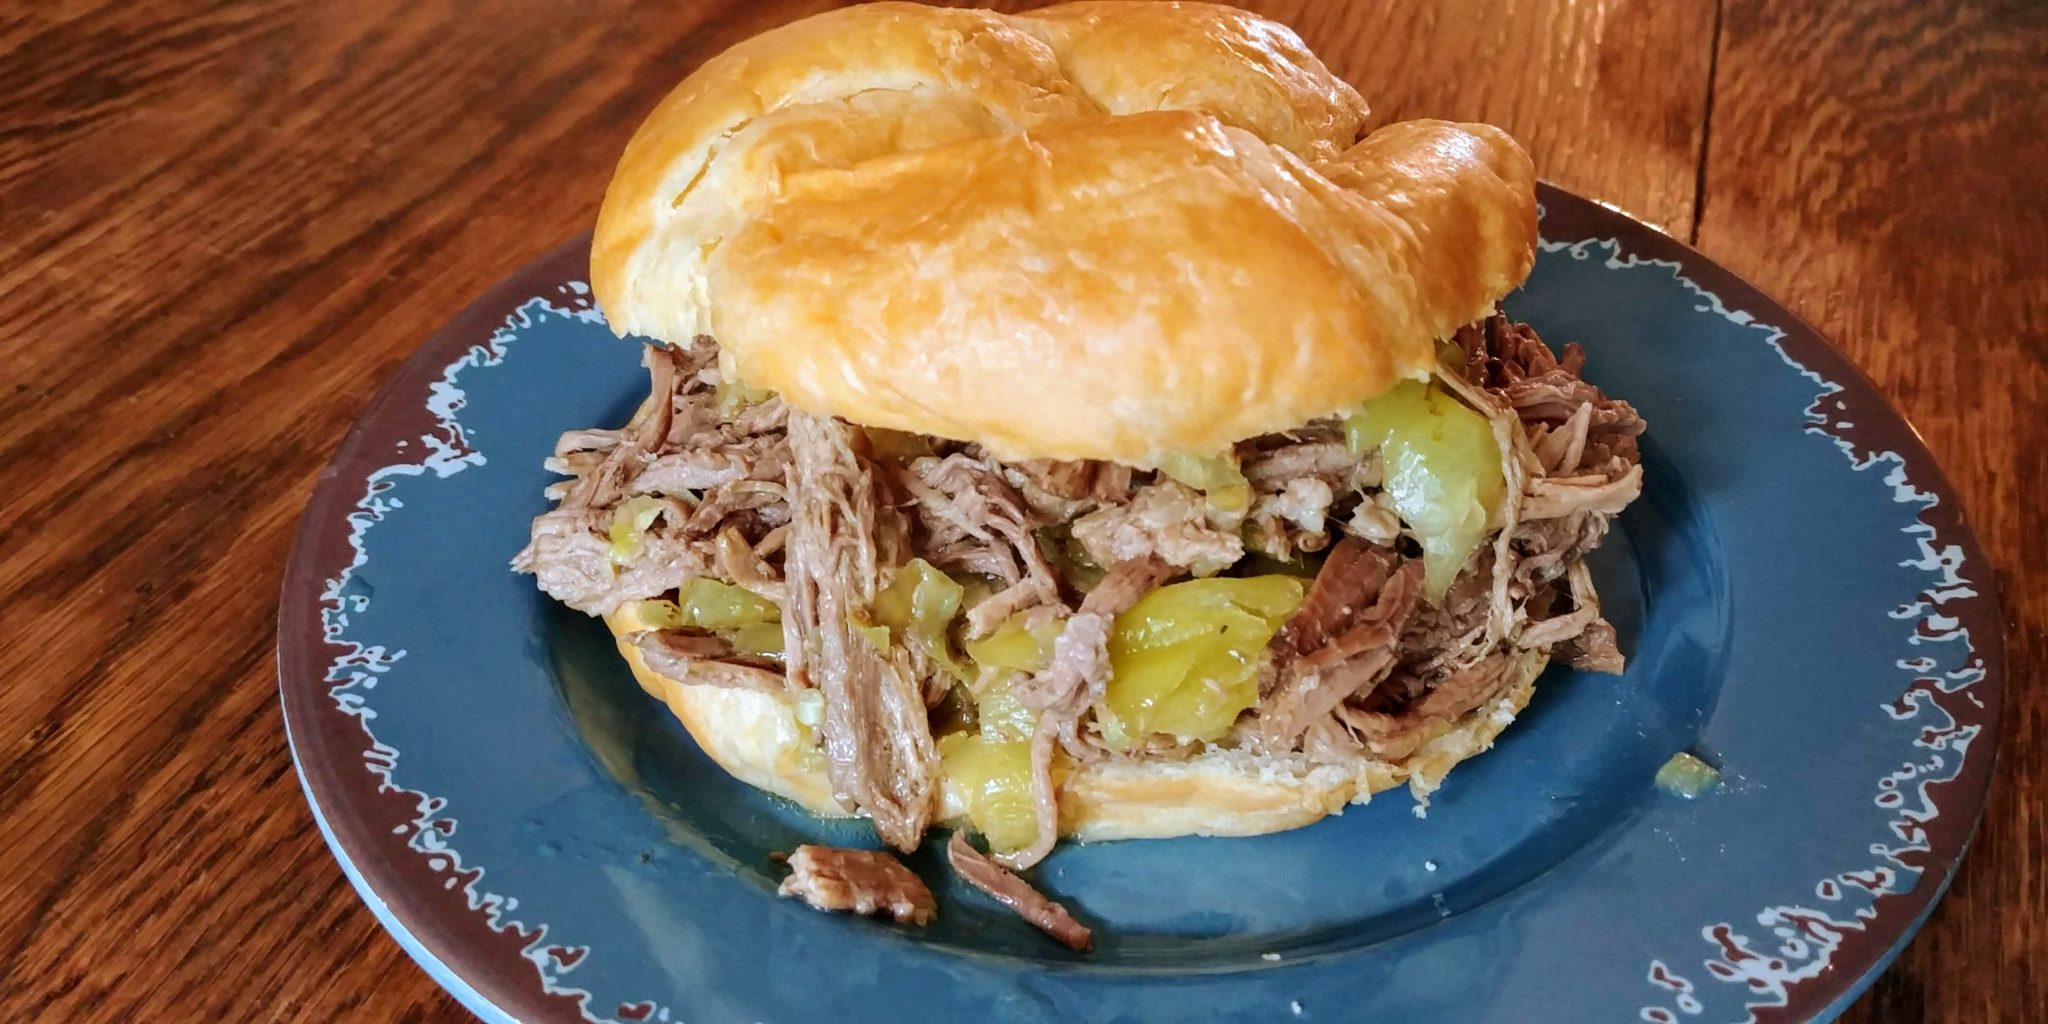
Crockpot Pepperoncini Beef

Crockpot Pepperoncini Beef

Hi Everyone!  The Kitchen Wench here to give you a great, easy, delicious recipe.  I mean, this is sooooo easy that I am a bit embarrassed to post it. But, it is also so very good that I would be ashamed of myself if I didn’t share it with my friends.  This is a family favorite that makes a delicious weeknight or weekend supper. It also makes one of the very best dishes to grace a potluck table. Seriously, take this to a potluck.  You will definitely be asked for the recipe. I love recipes like this that can even make a beginning cook look like a pro.

I decided this past weekend to make crockpot pepperoncini beef sandwiches for supper on Sunday.  I asked my older son, Cody, if he would stay for supper. He didn’t think that he would until he heard what we were having.  Needless to say, he stayed and even took some leftovers home. Oh yeah, and to head off any comments about the spelling of pepperoncini, I know that some brands spell it peperoncini.  I just think it is easier to type with two p’s and it is apparently acceptable both ways. Go figure.  Anywho, I wonder if part of the charm of this recipe for Cody is that I used to make it a lot when he and his brother played high school football.  On game nights, I would have this ready for a quick bite before heading to the field and then there would be leftovers for a late night snack afterward.  

Nearly everyone loves sandwiches or sliders made with this beef.  It is so incredibly easy and pretty low budget too. Since the beef cooks along for several hours in the crockpot you don’t have to buy an expensive beef roast.  You can get a cheaper one and it will still turn out tender and flavorful. You use jarred pepperoncini which are not costly at all. They are also not spicy-hot which is preferable for some of us, especially if you are feeding little ones.  I like to use the pepperoncini that are already sliced but you can totally use the whole ones. I used to only use the whole ones but as my boys got older and developed a real liking for the peppers I started to use the sliced ones so that you get pickled pepper flavor in each bite.  This dish only has 4 ingredients for the meat mixture (and that includes water) and then whatever type of bun or bread that you choose. Talk about versatility. You can use this meat for sliders, sandwiches, on toasted crusty bread for an appetizer or on tortillas. Yum! I really like to use sliced croissants or ciabatta rolls.   The croissants soak up the juice and create a soft, doughy, buttery world of wonder. The ciabatta rolls are a bit sturdier but just as delicious. The juice can collect in all those little ciabatta hollows. Gosh, I am such a texture nerd. You should use whatever you and your family love. Perhaps, you will come up with an even better idea.  I hope you do and let me know what it is!

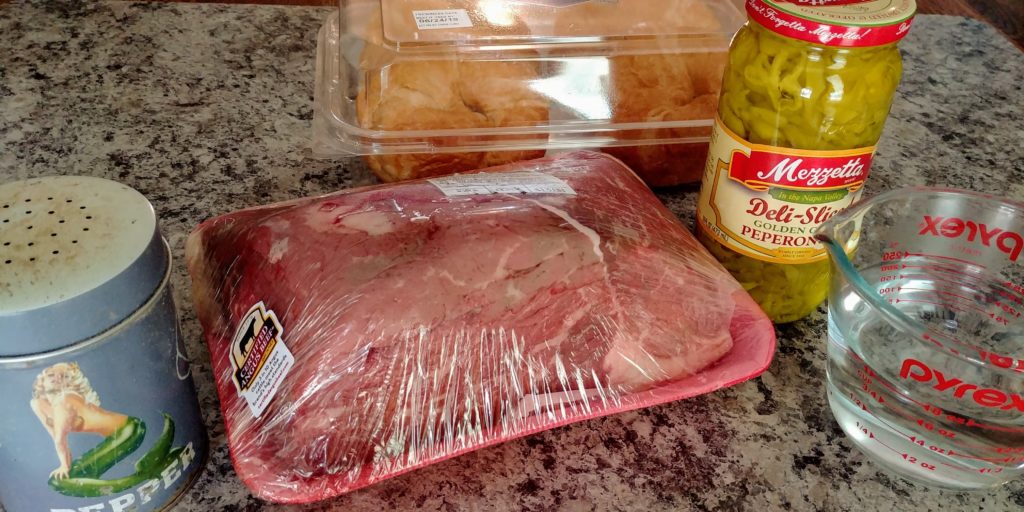
Crockpot Pepperoncini Beef Ingredients

You will start off with a nice beef roast.  As I said before, it does not have to be expensive.  I prefer one that doesn’t have too much fat. The one I purchased this time had a pretty thick fat cap on the underside when I unwrapped it. I just used a sharp knife to shave that off and discard it.  I don’t like to have a lot of fat floating on the top. I will say that if you refrigerate the leftovers (if you have any) you can remove any hardened fat from the top very easily before you reheat. I gauge the size of my beef roast by the number of people that I want to feed.  This time I got one that was around 4 lbs. to feed four of us and have plenty left over. If I am going to a potluck I will purchase whatever size will fit in my crockpot with room for a bit of water and the pepperoncini. Just use your best judgement. This is a very flexible recipe.  I have a larger crockpot and so can have a beef roast up to about 8 pounds and still be ok.

(more…)

Dreamy White Chocolate Brownies

Dreamy White Chocolate Brownies

Hey Everybody!  Hot enough for ya?  Yikes, it is sooooo hot here in the Midwest right now.  I mean, like, gross hot. Like the kind of sticky, humid hot that punches you in the face when you open the door.  And, you know it is hot when I complain about it. I’m the kind of person who actually likes a little warmth in the summer months.  My favorite temperature range is 80 to 82 degrees, but this humidity is just disgusting. Our poor air conditioner is working overtime.  I feel like I should take it a beach umbrella and a popsicle. Hmmmm….a popsicle sounds pretty good right now. But, I digress. I have been thinking a lot about the weather because we have had so many parties and events outside lately.  There are still a couple coming up. One of them is a Battle of The Bands in Louisiana, Missouri in about 2 weeks. I don’t think that I have had the opportunity yet to say that my husband (Elliott) is in a cover band.  I didn’t make this picture very big because it was grainy and big grainy looks worse than small grainy.  

The band is called Professional Misconduct and consist of some local and some not so local business people.  They play at bars and events in our area and in the St. Louis/Metro East area. Recently, they were asked to play at this Battle of The Bands and it is outdoors. Uuuugh. Elliott said that I didn’t have to go but I still feel bad for them playing in the heat.

They were supposed to have a practice tonight and I normally send some sort of baked treat to share.  I decided what to make and bought the ingredients and then found out that the practice was canceled. The recipe is one that I wanted to share on thekitchenwench.com anyway so I made them up just for you.  I know I shouldn’t have but I love you guys so much that I couldn’t help myself. I guess that I will have to make them again for the band. Darn the luck!

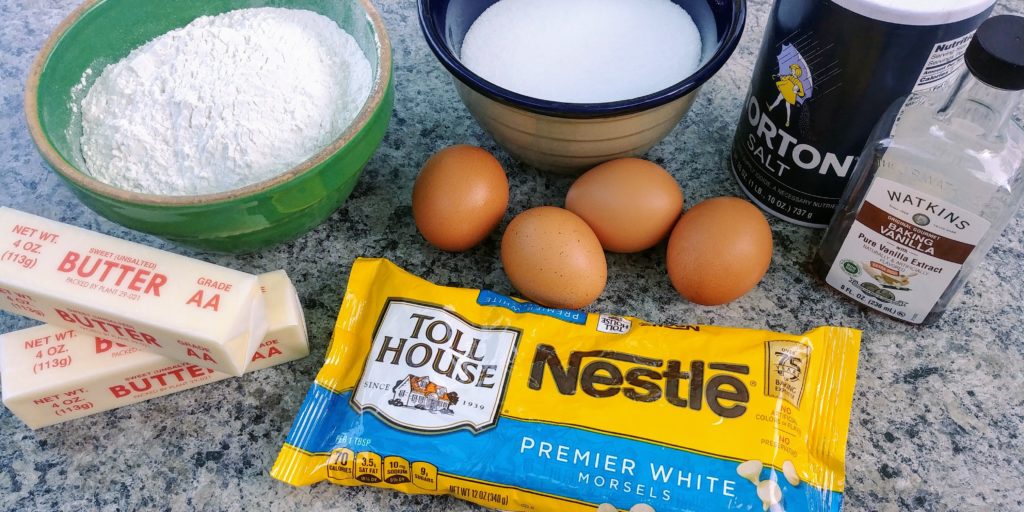
Dreamy White Chocolate Brownies Ingredients

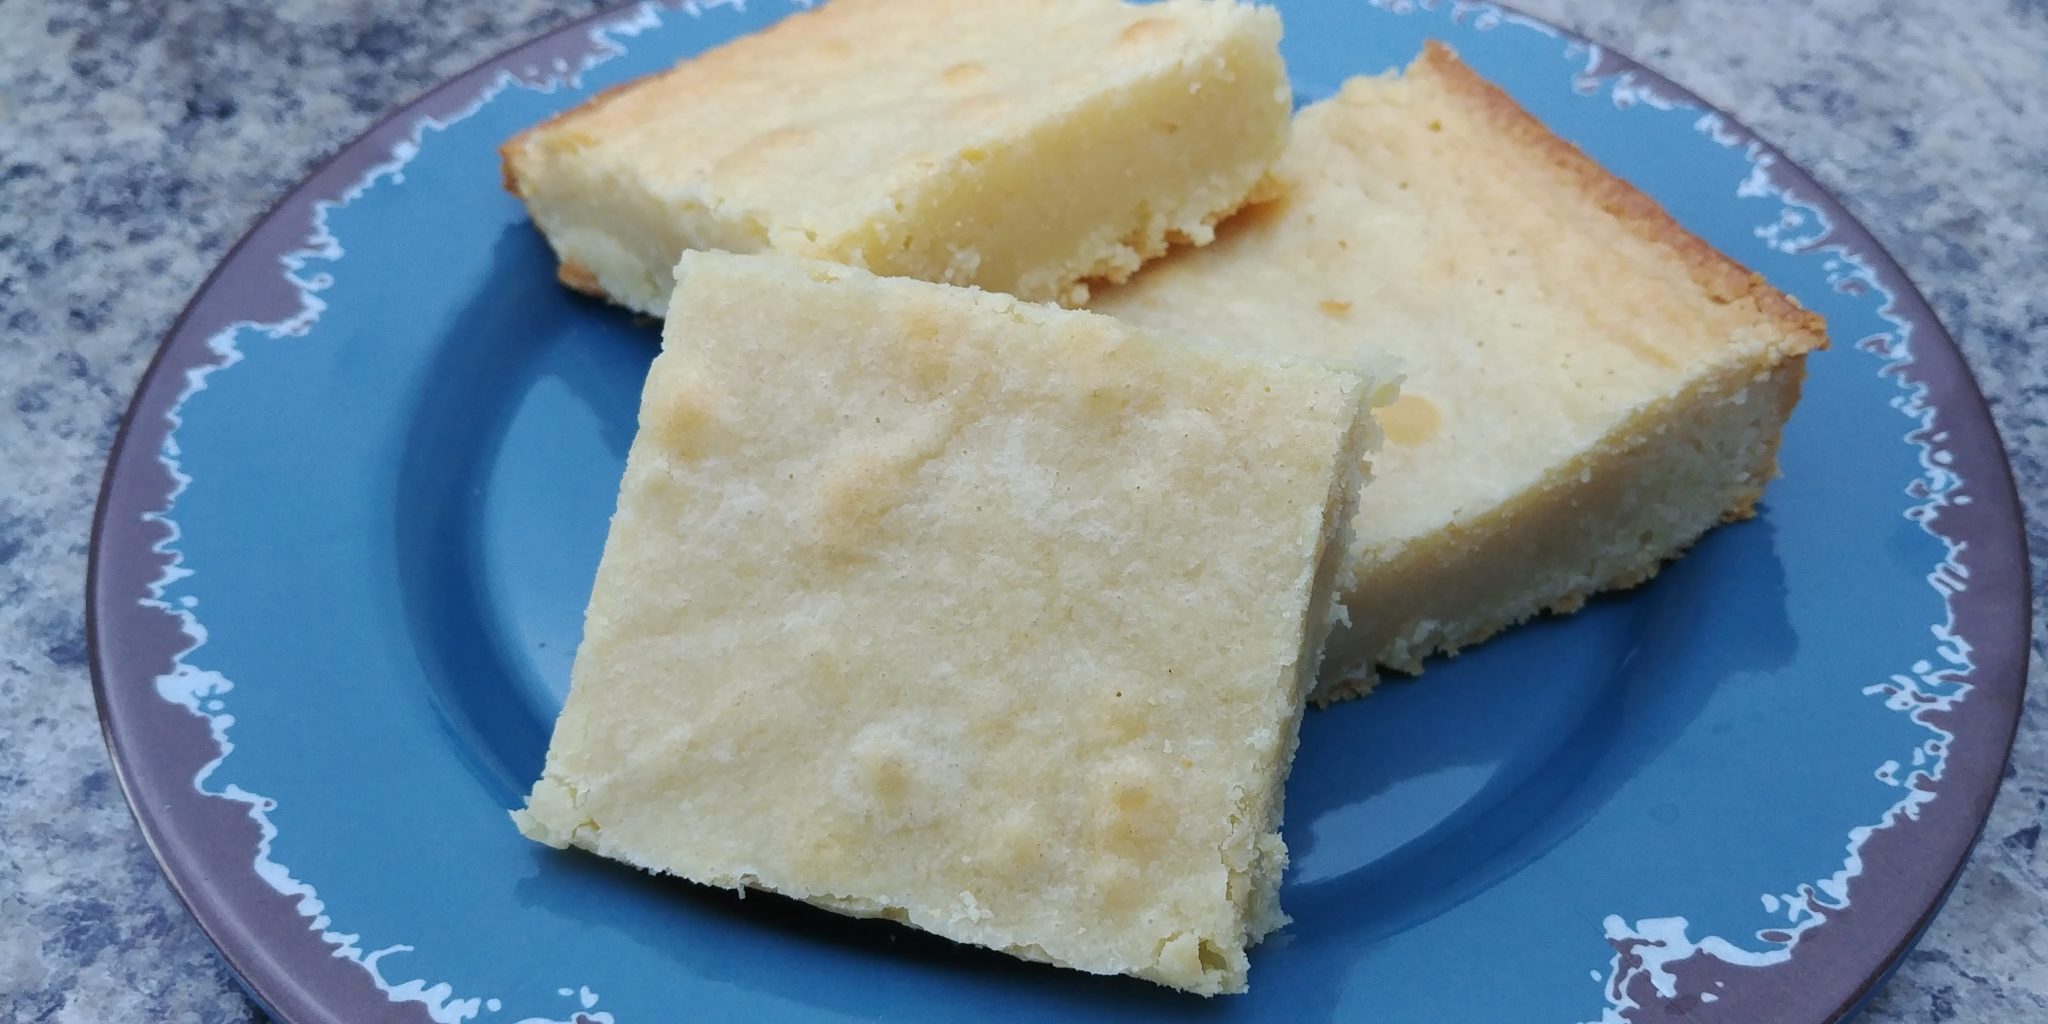
Prepare to be amazed!  These are Dreamy White Chocolate Brownies.  I know that right now you may be thinking that brownies are not white.  They are brown, hence the name. Well, these babies are made with white chocolate chips or bars and boy are they delicious.  It seems strange to say that something that isn’t a traditional brownie is fudgy, but they definitely are. These bars are fudgy, moist and sweet with an elegant appearance that is perfect for parties.  Don’t get me wrong. I am a life-long chocoholic and I do love a dark chocolate brownie. But, these are too delicious to ignore. Give them a try! You won’t be disappointed!

You will need 1 cup (2 sticks of unsalted butter).  If you don’t have unsalted, go ahead and use the salted but omit the extra salt from the batter.  Chunk up your butter and put it in a large glass measuring cup or medium glass bowl that can be microwaved.  Add in 12 oz. of white chocolate baking chips or 12 oz. of your favorite white chocolate baking bar, broken into small pieces.  Microwave this in 30-second increments, stirring often. Continue this process until all the butter and chocolate are melted and are beginning to combine.  Now, at this point, depending on your chocolate, you might think that this mixture is never going to come together and be smooth. That is because the white chocolate has so much oil in it and it does not want to mix with the butterfat.  Snob.

(more…)

The Best Funfetti Cheesecake Bars

The Best Funfetti Cheesecake Bars

Hi All!  Well, we are still in celebration mode here.  There are a couple of birthday parties and Father’s Day coming up.  A few days ago, we hosted a graduation party for my son, Alex, too! It seems like there is so much to celebrate right now!  There are hopes for the future and thankfulness for past successes. There are also lots of birthday candles being wished upon.  I hope that everyone gets their birthday wish! I had a birthday a couple of weeks ago myself, but I forgot to stick a candle in my bowl of ice cream.  So sad! I had some family members over and with all the hostess duties I totally forgot that it was my birthday celebration and I should have a candle.  So, to make up for it I am wishing on all the first stars that I see in the evening. Heck, I might even start wishing when I blow out the scented candles in my home every night.  Might work…might not. But, all that I will be out is a little bit of breath.

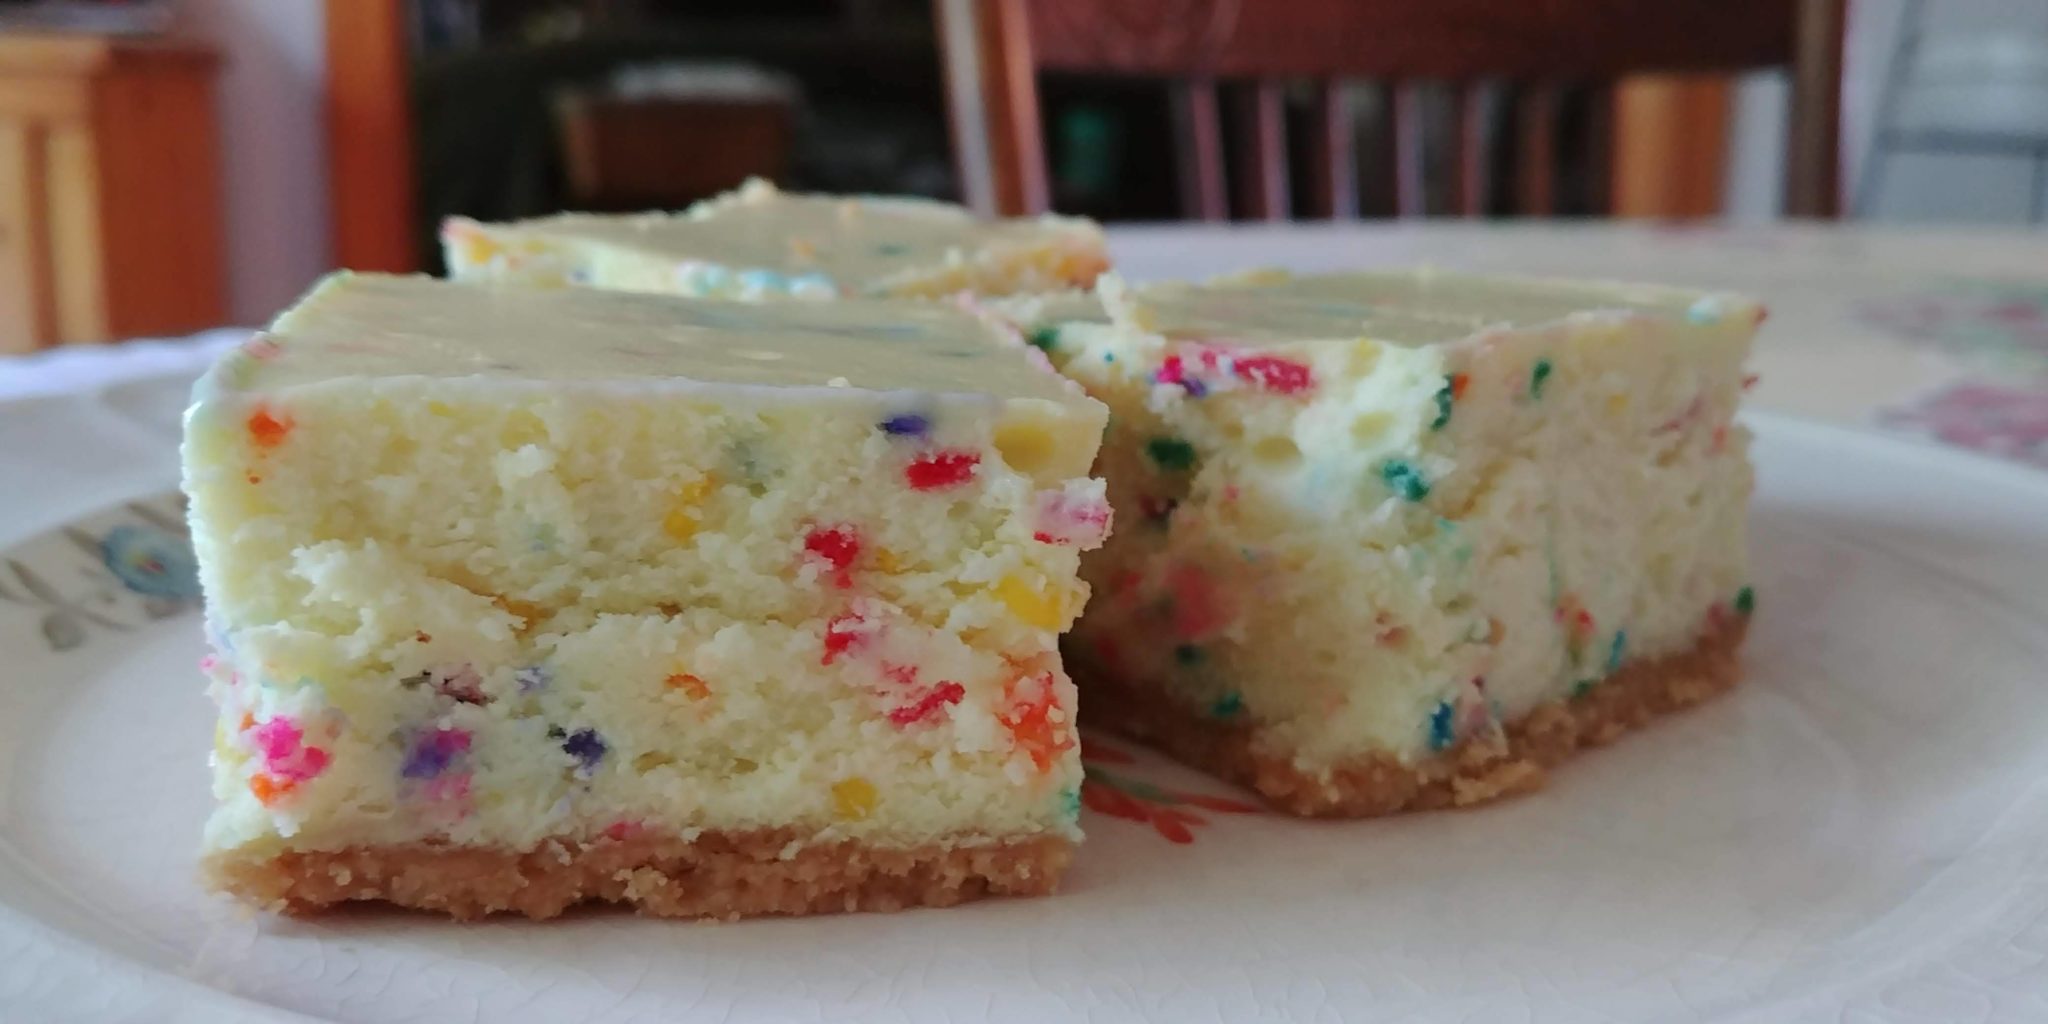
In my house, we have favorite birthday celebration treats. Well, actually, I have recipes for all kinds of celebrations. You know, like holidays, anniversaries, Groundhog Day, trash day, cleaning day, or any time I darn well feel like making something yummy.  If you stick with me, you will see many of those recipes on this blog. They are too good to keep to myself! One of our very favorite and most festive recipes is for funfetti cheesecake bars. These bars are so creamy and delicious with loads of sprinkles and cake batter flavor!  They look so cute with all the pretty colors. You can personalize them with any color of sprinkles that you like. Just make sure to use the jimmie kind so that they kind of melt into the cheesecake and aren’t crunchy. You know, the ones that are kind of oblong and skinny and not round little balls.

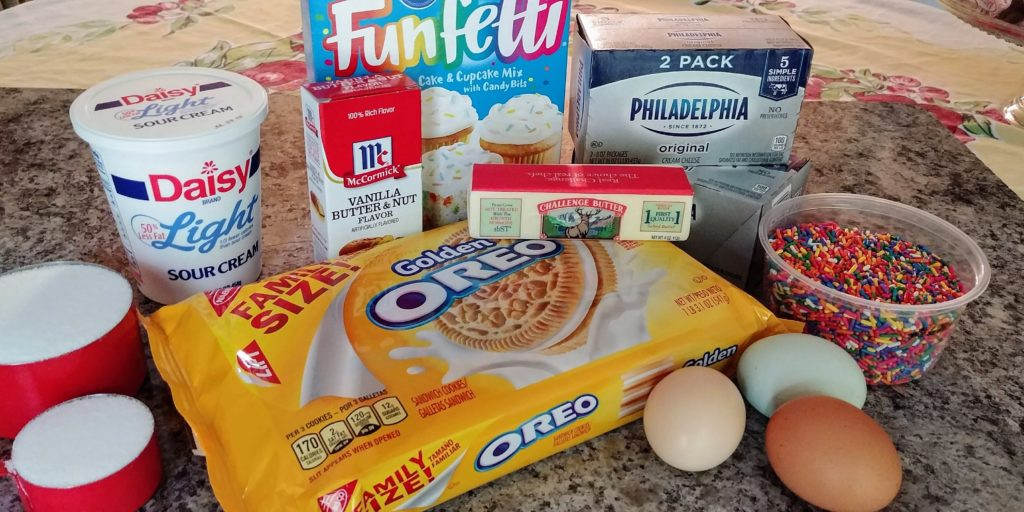
Funfetti Cheesecake Bars Ingredients

You are going to need some Golden Oreos for this dessert.  I buy the family size package and use 30 of them. I like to say exactly how many cookies to use because the manufacturers of many of our baking staples keep changing package sizes.  Have you noticed that? That really ticks me off. I have a couple of recipes that I am working on adjusting because cake mixes are no longer the same number of ounces that they used to be.  What the heck!? Why would they do that? Well, I know why but, come on! Help a girl out here! Quit messing around with my cake mixes and Oreos! Ok, rant over. Anyway, use 30 Golden Oreos.  Grind them up in a food processor or put them in a zipper plastic bag and crush them up with a rolling pin. Oh hey! You could take out your frustration over package sizes. Just saying.

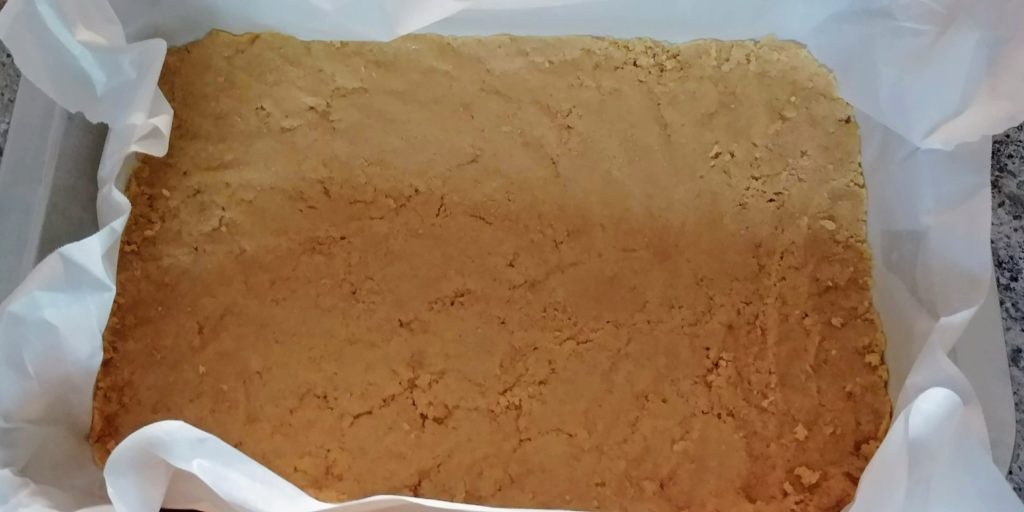
Melt 6 Tablespoons of butter and stir into the crushed Oreos with a fork until all the crumbs are moistened.  Press this mixture into a 13 X 9 inch metal pan. I always spray a little cooking spray into the bottom of the pan and then line it with parchment paper letting the paper hang over the ends of the pan just a bit.  The spray helps the paper stick to the pan. Set this aside. Begin preheating your oven to 350 degrees.

Funfetti Cheesecake Bars Crust

(more…)

Ravioli Lasagna

Ravioli Lasagna

I’m so sorry that I haven’t posted in a while.  Life has been crazy busy for me. We have had graduations and parties and birthdays.  Work has been super hectic and to top it all off,  I am attending a conference this week in Nashville, TN.  My head is spinning.


When I was a kid, I watched Bewitched and I so wanted to be able to twitch my nose and make magic happen.  I used to practice nose twitching all the time just in case I acquired that magical ability.  It never happened…sigh. If I could do that now I would twitch and make the world around me stand still for a few hours (or weeks) just so that I could catch up.  

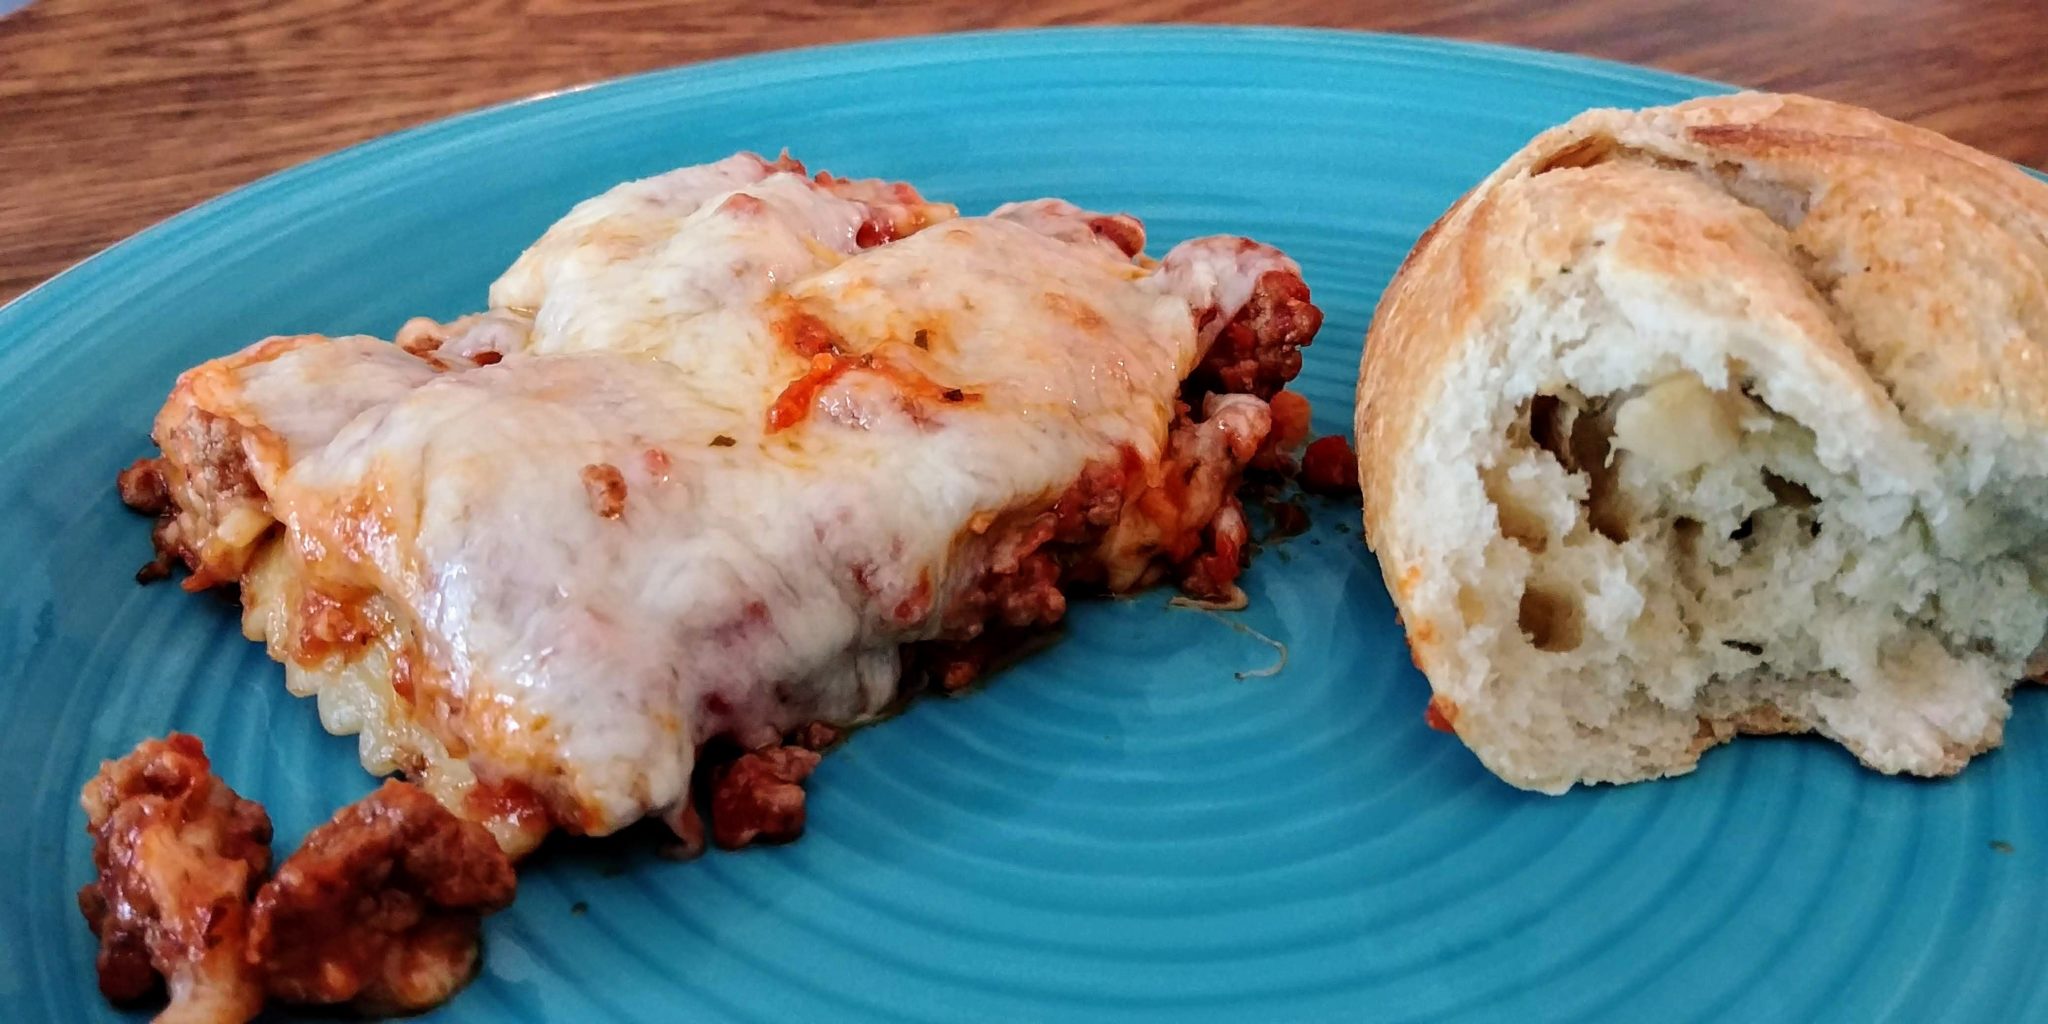
Since I can’t do that I have selected a recipe to share that you (and me) can use on a super busy day.  My family loves Italian food but tire of plain old pasta with sauce. Occasionally we want lasagna. Now, my older son, Cody, makes fantastic lasagna.  However, it is a real time commitment because it is totally from scratch. On days when I just don’t have the time or energy for that I make ravioli lasagna.  Rather than lasagna noodles you use frozen ravioli. You don’t even have to boil it! I hate waiting for water to boil. What a time sucker! Just me? Oh well.  I like to use one layer of meat ravioli and one layer of cheese ravioli. The cheese ravioli is a good substitute for the ricotta layer in a from-scratch recipe. I do also use jarred sauce, but you can totally use a homemade sauce if you have the time.  Perhaps you even have some in your freezer. Lucky you if that is the case! Someday I will find the time to make up a bunch of sauce and freeze it for future use. Some day. But not today. Or this week. Or this month.

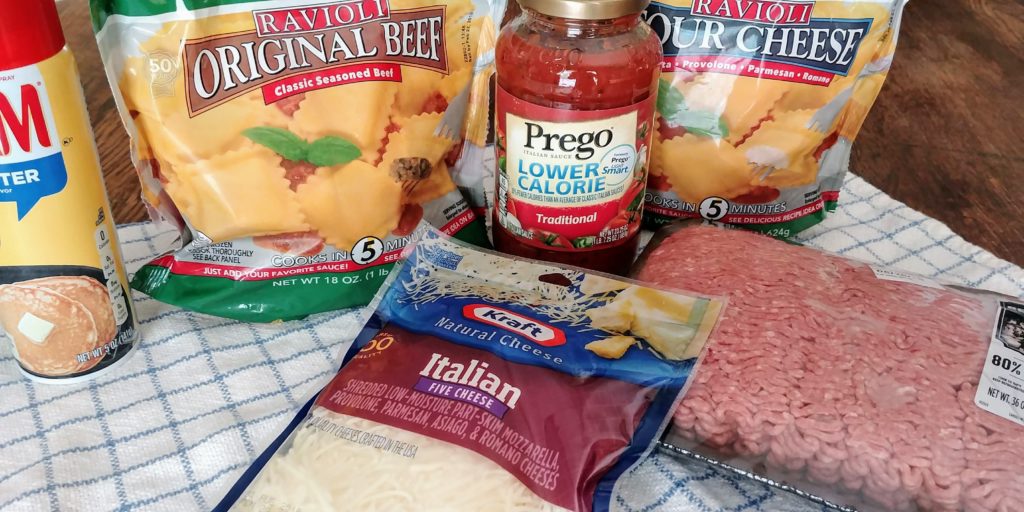
Ravioli Lasagna ingredients

For this recipe you will need frozen ravioli.  One bag each of meat and cheese filled. There will be leftover raviolis unless you add more than 2 layers.  You can do that, but you will also need to increase the amounts of sauce and ground beef and cheese, so plan accordingly.  I only used one regular sized jar (23.25 oz.) of sauce and it worked out perfectly. If you like more sauce, then get the bigger jar and use most of it.  I used bagged shredded cheese (2 cup bag) which works out perfectly fine. If you feel the need to shred your own, then shred away. Use any type of mozzarella or Italian blend that you like or that you have in the frig already.  I used ground beef/pork blend. You can use plain ground beef, ground sausage or even ground turkey. All are delicious.

Preheat the oven to 425 degrees and spray your casserole dish or baking pan (9 X 13) with cooking spray.  Brown the ground meat and then drain.

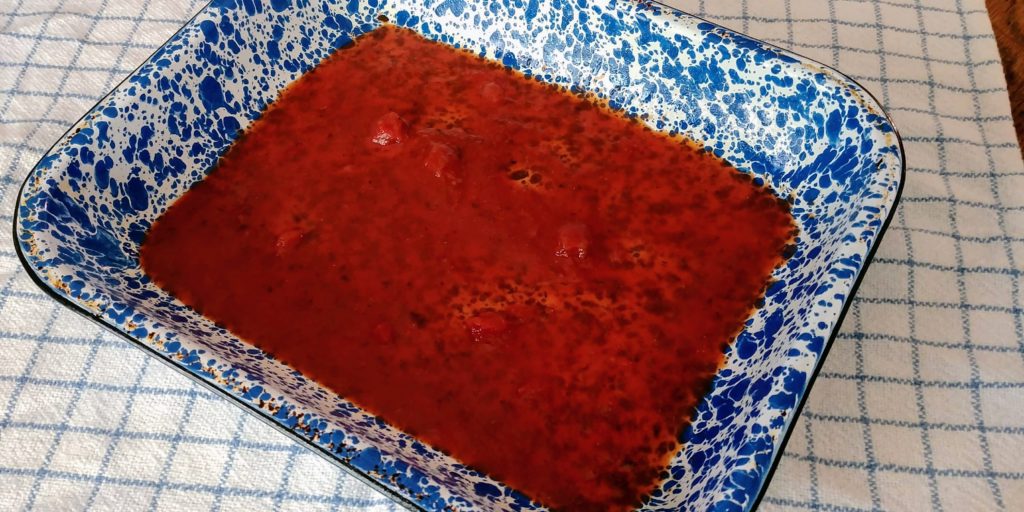
Spoon 1 cup of sauce into the bottom of the sprayed pan and spread as well as you can to the edges.

Ravioli Lasagna sauce in pan

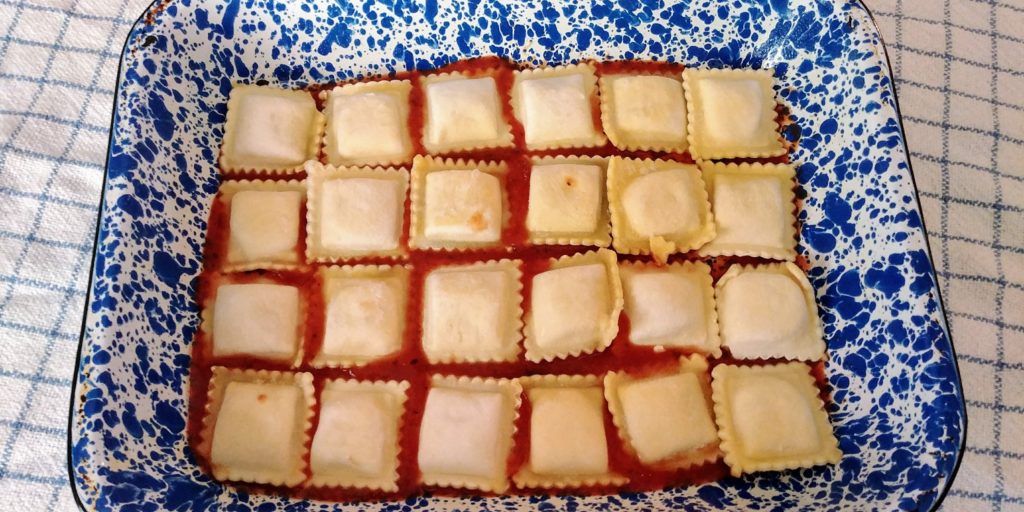
Layer the frozen cheese ravioli on top of the sauce covering as much of the surface as possible.

Ravioli Lasagna 1st level of ravioli

(more…)

Celebration Beef and Chicken Kabobs

Celebration Beef and Chicken Kabobs


Hey Everyone!  Today I have a few things to tell you.  First of all, a little housekeeping. If you have signed up for my newsletters and have not received them in your inbox, please check your SPAM folder.  This tends to happen when you use a service connected to a hosting site like I am using. Anyway, just mark it as “NOT SPAM” please and you should be good to go.  I certainly do not want to lose contact with anyone. The more the merrier!

Secondly, I am so excited to say that my younger son, Alex, graduated from St. Louis University Law School this week!!!!!!!!  Yay! We attended a ceremony on Thursday where he received a “hood” that signifies his Juris Doctorate. It is actually more like a very large satin and velvet collar that hangs down the back of his graduation gown than a real hood but that is the name, so we went to a hooding ceremony.  

Alex graduation hood

Alex has worked so hard for this and I know that the 3 years spent in law school seemed like an eternity to him but to me, it went by in a flash. The past 25 years have gone by in a flash. He can’t be all grown up yet. I still see that same tiny boy with the huge brown eyes and hair standing on end when I look at Alex.  But, as you can see in the pictures he is now a very tall and handsome young man with big brown eyes. I am so proud of him! He will now spend the summer studying for the Missouri Bar Exam. Yikes! I plan to make lots of cookies to help him through the next few months. I feel that cookies can make most things better, don’t you?

Alex graduation cropped

So, the recipe that I am sharing today relates to Alex in a big way.  It is a recipe that he developed and allowed me to share with all of you.  You see, every year after his last final exam for the summer we make kabobs for a celebratory meal.  It kind of kicks off summer for him. He made up the marinade recipe for the beef and chicken a few years ago.  It is so easy and adds just the right amount of flavor to the meat. I find that some marinades can be overwhelming and salty.  This one is perfect!

You will need to purchase a nice beef roast.  I usually use a chuck roast that has some fat marbled through it.  Lean pieces of meat can be a bit tough when prepared this way because they do not cook very long at all.  You will also need 1 ½ – 2 pounds of chicken breasts and a package of smoked sausage of your choice. I always use the Butterball turkey smoked sausage.  I really like the mild flavor and it is slightly healthier. Although, who are we kidding? I am not into health food as a rule. Ha! The Pina Colada song just popped into my head.  “Yes, I like Pina Coladas, and getting caught in the rain.  I´m not much into health food, I am into champagne.” I wonder how long that will replay in there?

You will also need some peppers, 2 green, 1 yellow, 1 orange and 1 red.  Now, obviously, you do not have to follow that recommendation. Just make sure that you have 5 peppers total.  You will need 2 medium onions. Alex normally uses red, but I would probably choose a sweet onion, myself. You should also have 1 package of cherry tomatoes and 1 pineapple.  Some years we also add whole mushrooms. Just add whatever tickles your fancy and can withstand being skewered and grilled.

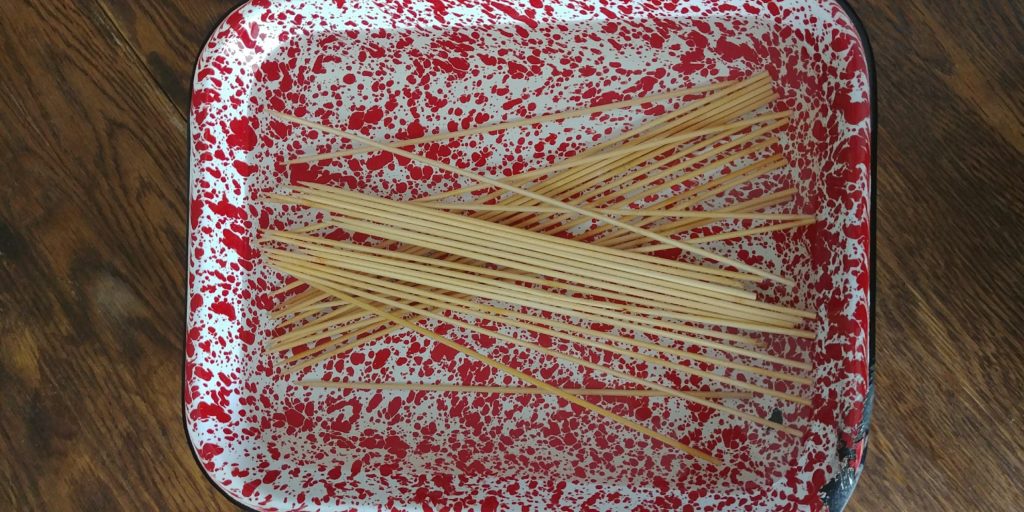
If you are using wooden skewers you will need to soak them in water for a couple of hours so that they don’t catch on fire.  This recipe makes a lot of kabobs so make sure to soak plenty.

Celebration Beef and Chicken Kabobs soaking skewers

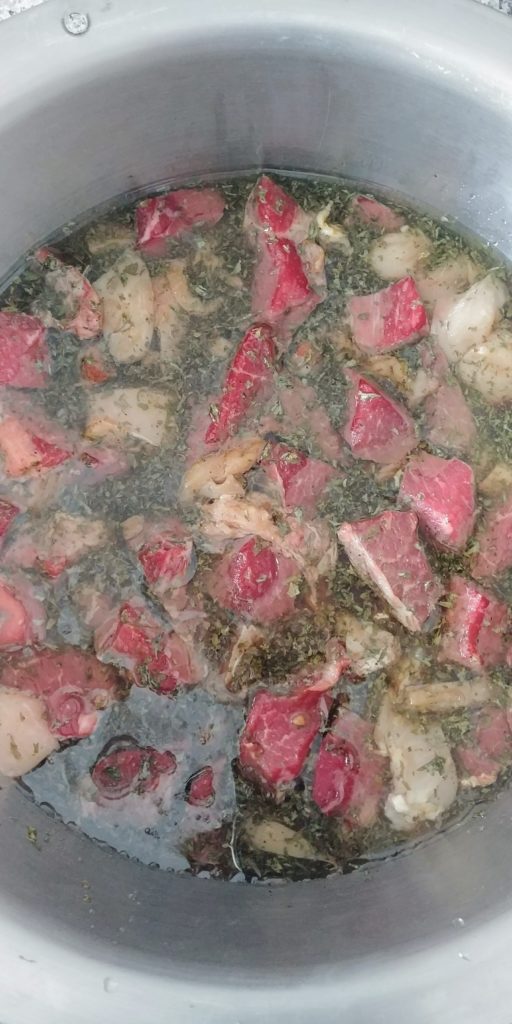
Cube the beef and chicken anywhere from 1 – 4 hours ahead of time and place in a large bowl.  Mix all the marinade ingredients together in a large mixing cup or medium bowl and pour over the meats in the large bowl.  Cover with plastic wrap and refrigerate until you are ready to grill. You can also do this in a large Ziploc bag.

Celebration Beef and Chicken Kabobs marinating meat

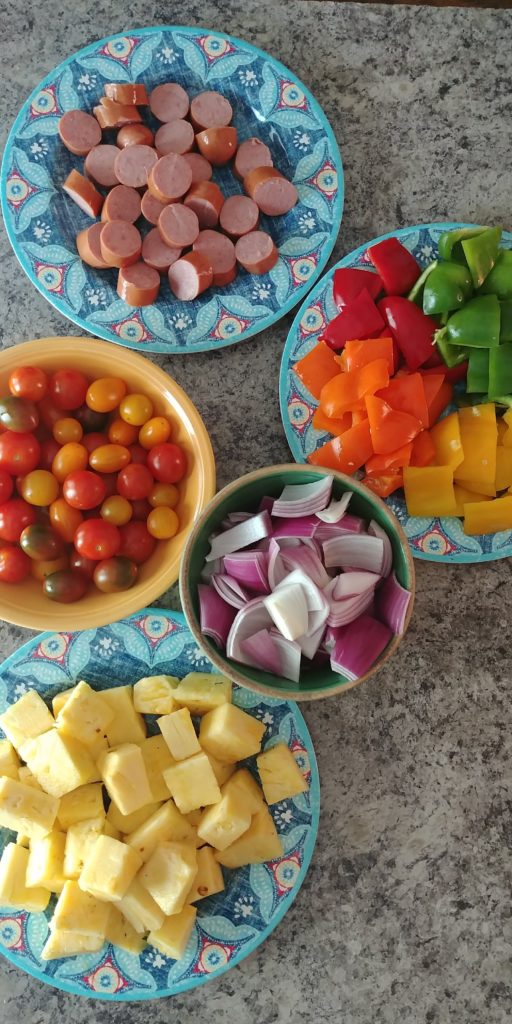
About an hour before you want to eat your kabobs. Begin chopping your onions, peppers, sausage and pineapple into large chunks.  If you go too small they will fall apart when the skewer goes through.

Celebration Beef and Chicken Kabobs chopped ingredients

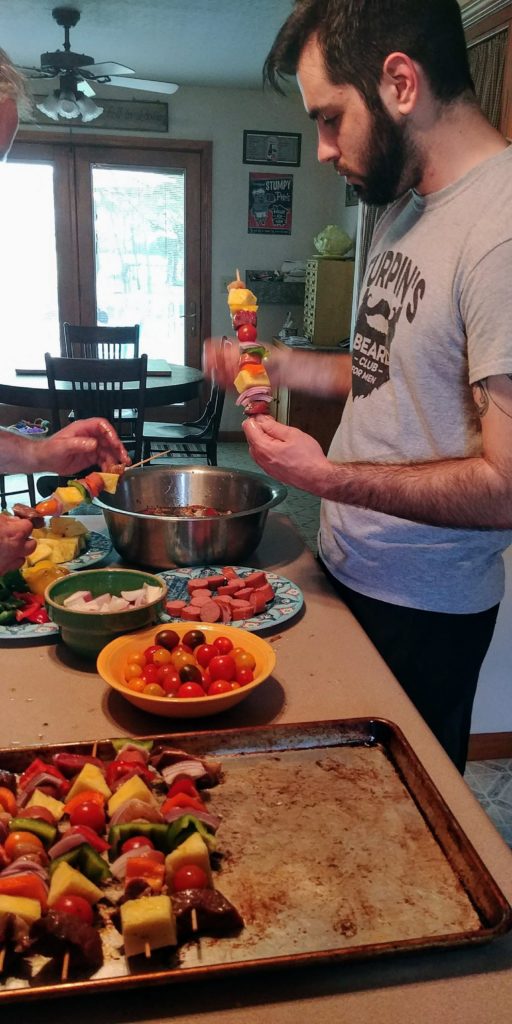
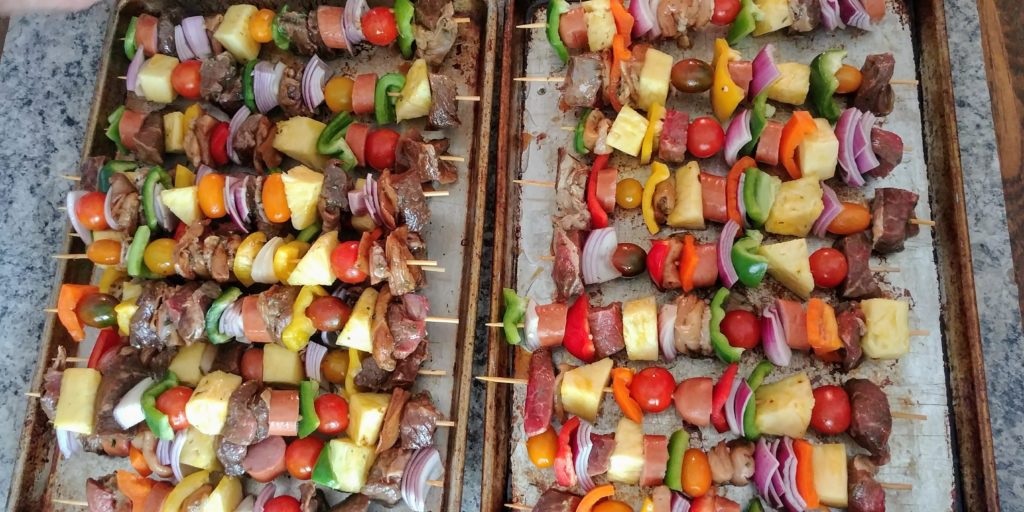
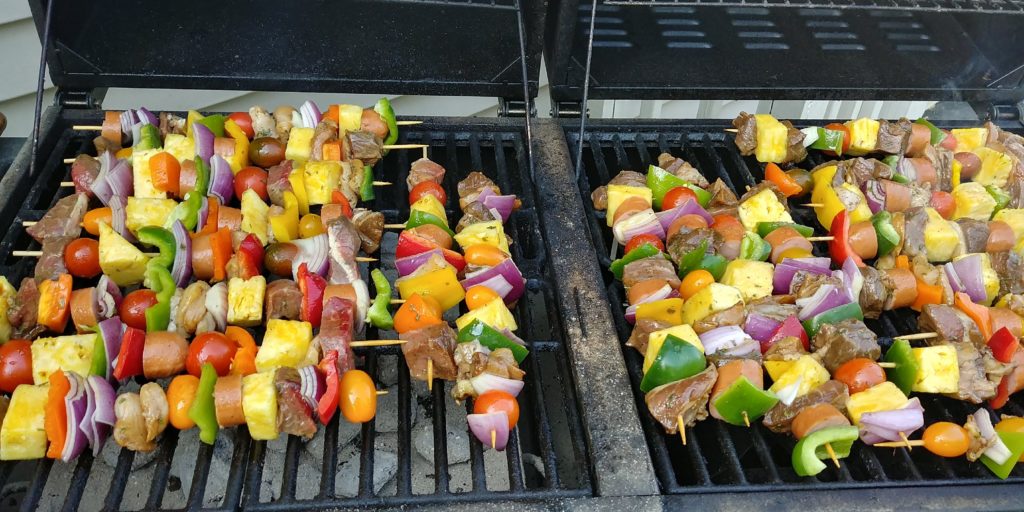
Heat your grill at this time too.  You can use either gas or charcoal.  We actually used both this year. Our grill happens to have both side-by-side.  We can cook all the kabobs at one time if we use charcoal and gas. Gather all your chopped ingredients, the tomatoes, the marinated meats and whatever else you wish to skewer.  Begin assembling your kabobs by skewering all your meats and veggies and fruit in varying order so that you don’t have 2 of the same item next to one another.

Celebration Beef and Chicken Kabobs Alex skewering

This is a messy business.  You can drain the marinated meats to cut down on some drips but reserve the liquid for basting.  Once you have all your kabobs assembled brush them with the reserved liquid.

Celebration Beef and Chicken Kabobs assembled uncooked

Place the kabobs on your heated grill and cook, turning once, for 10 to 15 minutes or until the veggies are tender and the chicken is no longer pink in the middle.

Celebration Beef and Chicken Kabobs on grill

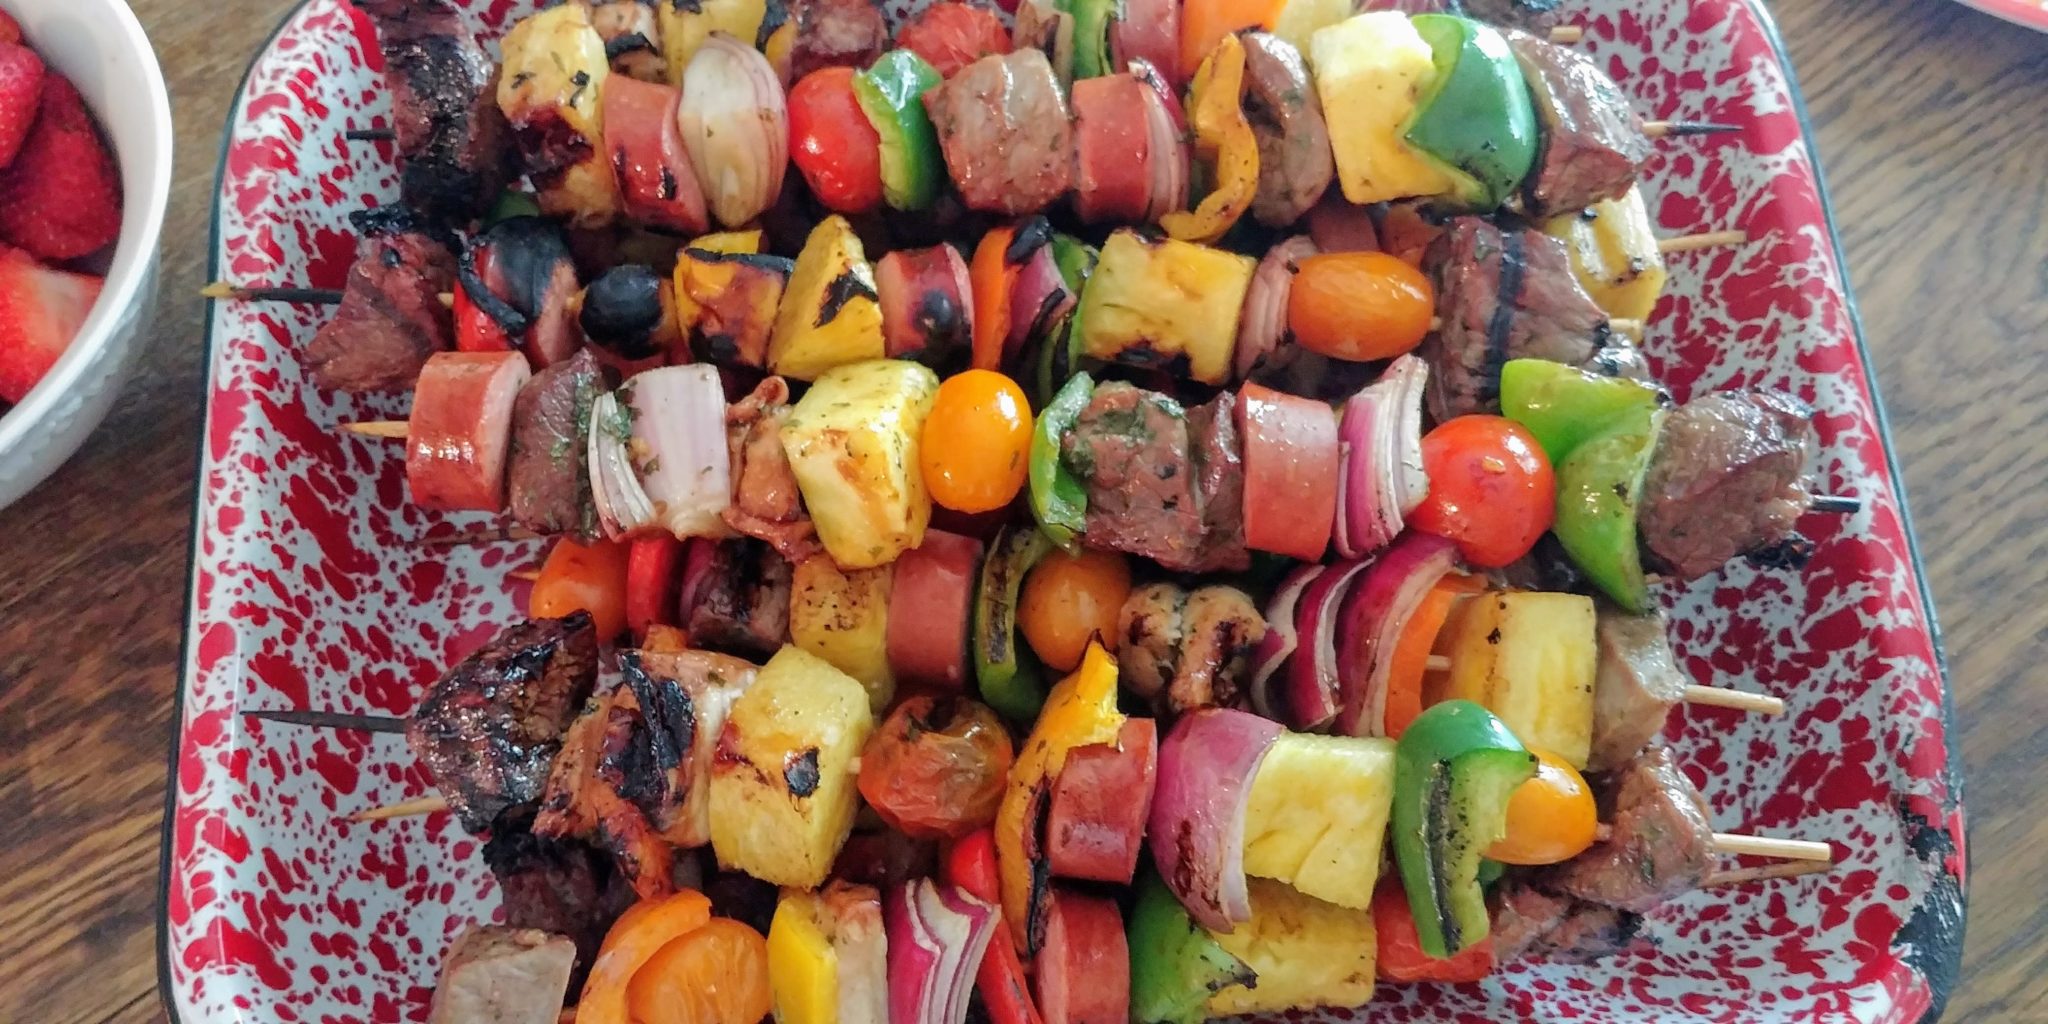
Remove from the grill and serve.  The kabobs have such a wonderful mixture of flavors and textures.  Everyone is sure to enjoy this dish and it is such a fun meal. Break out the patio furniture and eat outside for a real treat.

Celebration Beef and Chicken Kabobs

May 20, 2018
: Easy

These kabobs have such a wonderful mixture of flavors and textures. Everyone is sure to enjoy this dish and it is such a fun meal. Break out the patio furniture and eat outside for a real treat.

By:

Ingredients
  • For the kabobs:
  • 3 lbs. beef roast
  • 1 1/2 lbs. chicken breasts
  • 5 bell peppers, a mixture of green, yellow, orange and red
  • 2 red onions
  • 1 lb. smoked sausage
  • 1 whole pineapple
  • 1 package of cherry or grape tomatoes
  • For the marinade:
  • 1 1/2 cup canola oil (or vegetable oil)
  • 3/4 cup soy sauce (low sodium is preferable)
  • 1/4 cup Worcestershire sauce
  • 2 Tbs. parsley flakes
  • 1 tsp. black pepper
  • 1/2 cup red or white wine vinegar
  • 1 - 2 Tbs. minced garlic (depending how garlicky you like things)
  • 1/3 cup teriyaki sauce
  • 1/2 cup honey
Directions
  • Step 1 Cube the beef and chicken 1 – 4 hours ahead of time and place in a large bowl.
  • Step 2 Mix all the marinade ingredients together in a large mixing cup or medium bowl and pour over the meats in the large bowl. Cover with plastic wrap and refrigerate until you are ready to grill. You can also do this in a large Ziploc bag.
  • Step 3 About an hour before you want to eat your kabobs preheat your grill.
  • Step 4 Then, begin chopping your onions, peppers, sausage and pineapple into large chunks.
  • Step 5 Gather all your chopped ingredients, the tomatoes, the marinated meats and whatever else you wish to skewer. Begin assembling your kabobs by skewering all your meats and veggies and fruit in varying order so that you don’t have 2 of the same items next to one another.
  • Step 6 Once you have all your kabobs assembled, brush them with the reserved liquid.
  • Step 7 Place the kabobs on your heated grill and cook, turning once, for 10 to 15 minutes or until the veggies are tender and the chicken is no longer pink in the middle.
  • Step 8 Remove from the grill and serve.