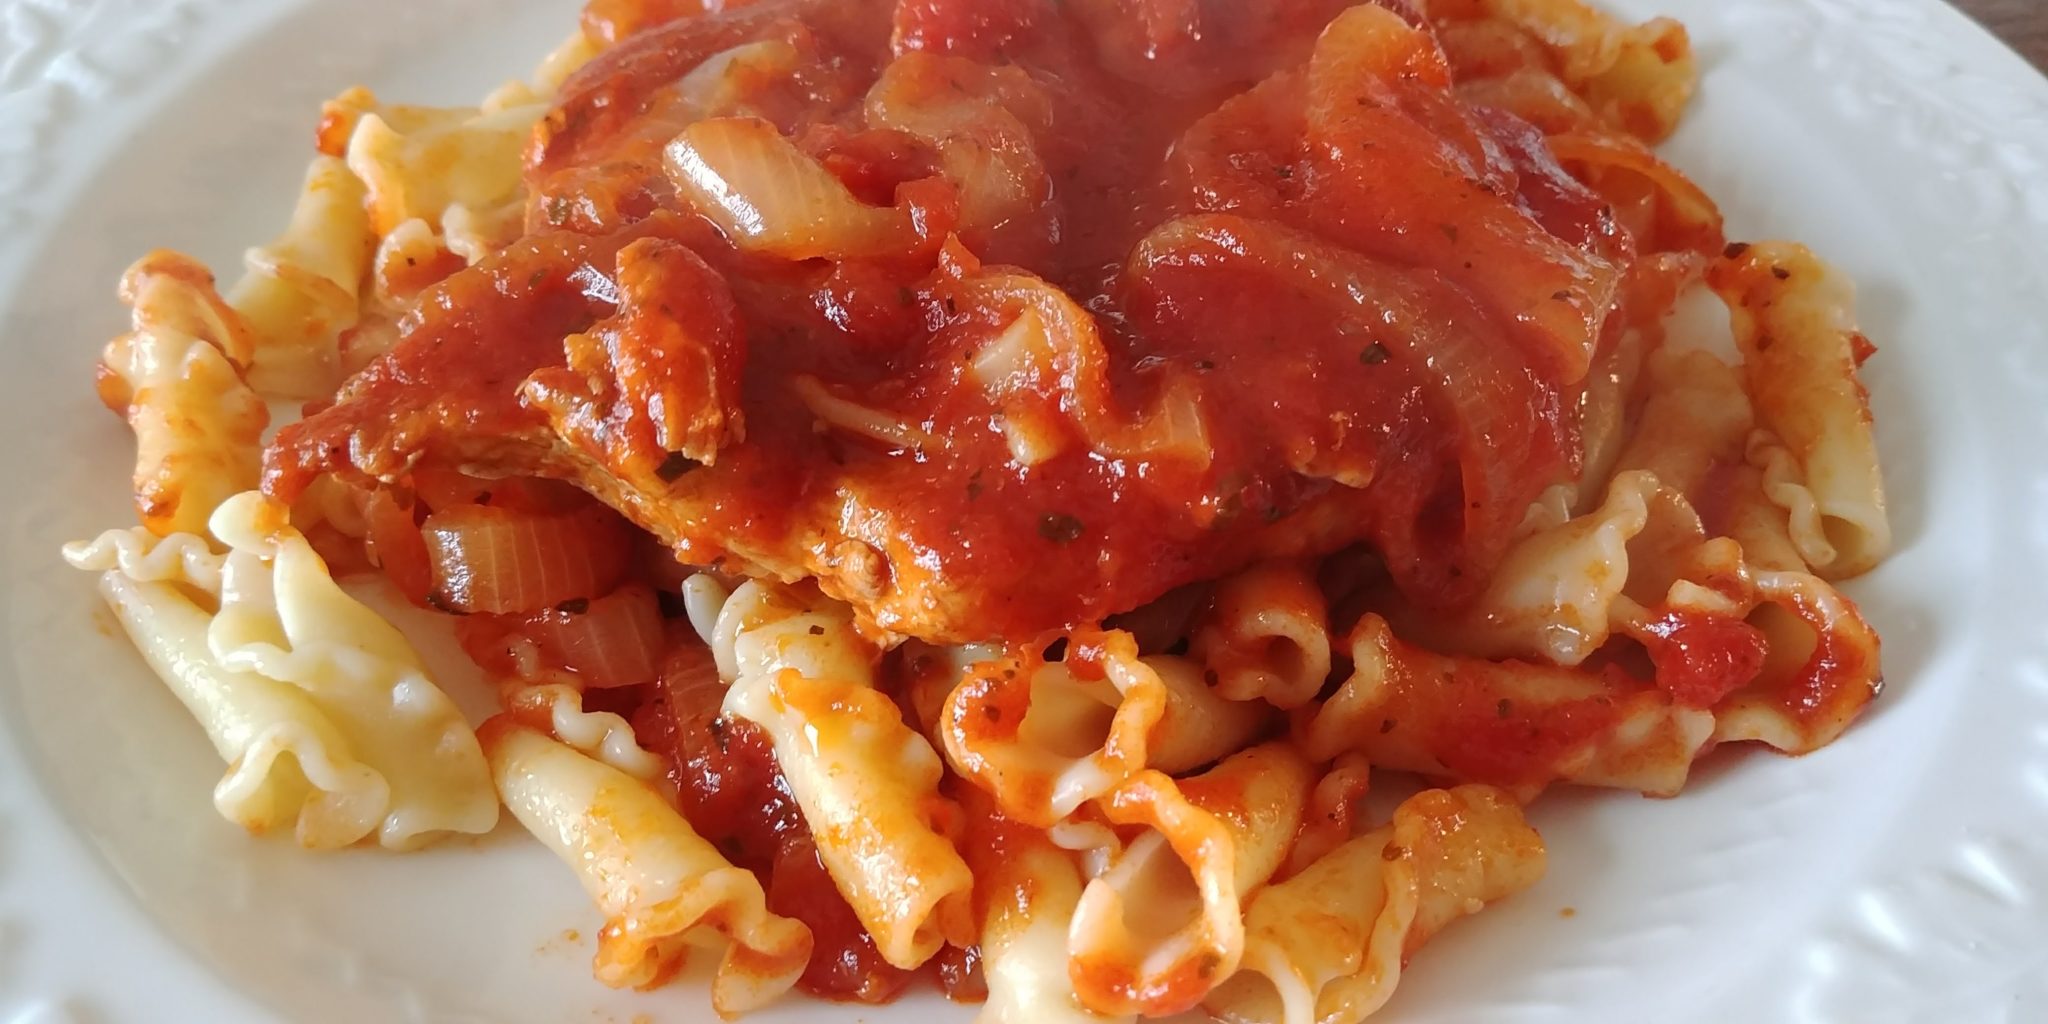
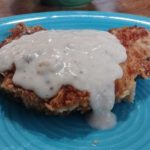
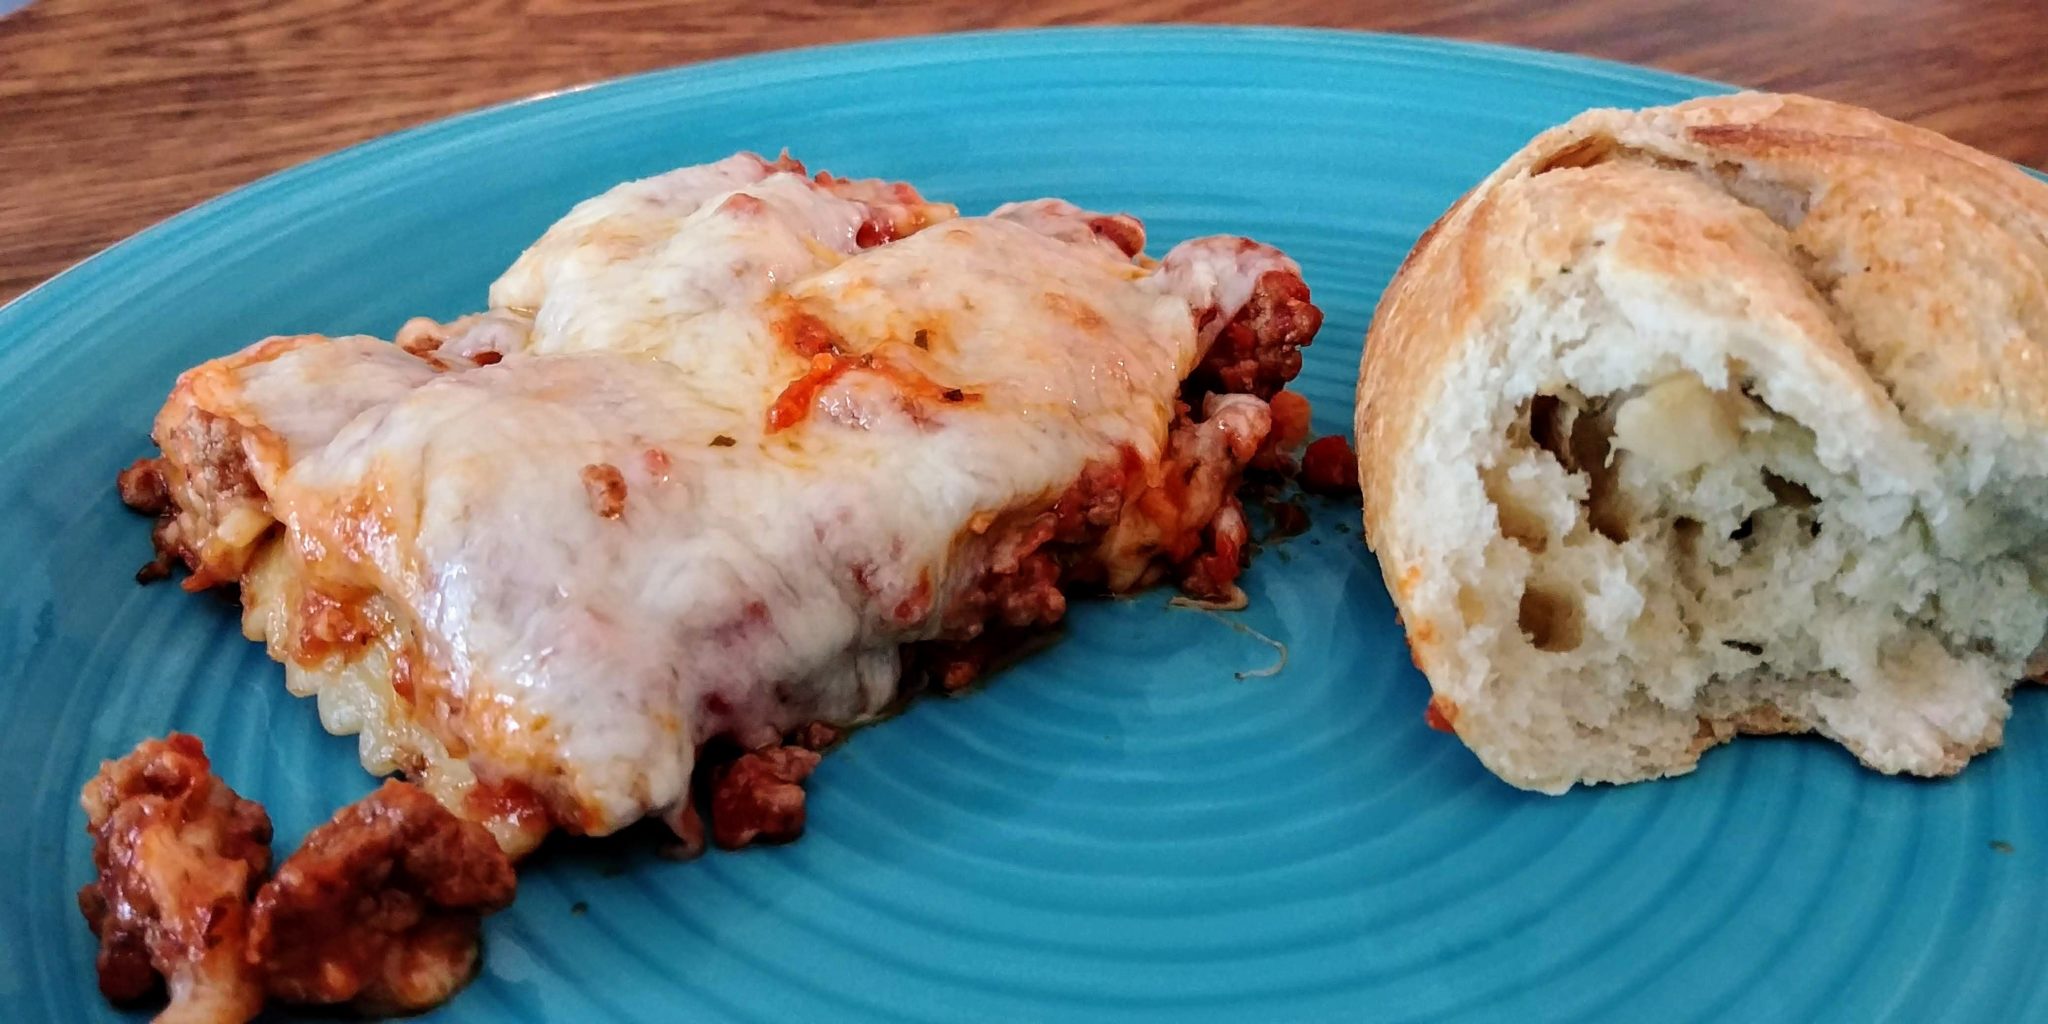
Enchanted to serve…dinner, cookies, cakes….

Category: Main Yummies

Ravioli Lasagna

Ravioli Lasagna

I’m so sorry that I haven’t posted in a while.  Life has been crazy busy for me. We have had graduations and parties and birthdays.  Work has been super hectic and to top it all off,  I am attending a conference this week in Nashville, TN.  My head is spinning.


When I was a kid, I watched Bewitched and I so wanted to be able to twitch my nose and make magic happen.  I used to practice nose twitching all the time just in case I acquired that magical ability.  It never happened…sigh. If I could do that now I would twitch and make the world around me stand still for a few hours (or weeks) just so that I could catch up.  

Since I can’t do that I have selected a recipe to share that you (and me) can use on a super busy day.  My family loves Italian food but tire of plain old pasta with sauce. Occasionally we want lasagna. Now, my older son, Cody, makes fantastic lasagna.  However, it is a real time commitment because it is totally from scratch. On days when I just don’t have the time or energy for that I make ravioli lasagna.  Rather than lasagna noodles you use frozen ravioli. You don’t even have to boil it! I hate waiting for water to boil. What a time sucker! Just me? Oh well.  I like to use one layer of meat ravioli and one layer of cheese ravioli. The cheese ravioli is a good substitute for the ricotta layer in a from-scratch recipe. I do also use jarred sauce, but you can totally use a homemade sauce if you have the time.  Perhaps you even have some in your freezer. Lucky you if that is the case! Someday I will find the time to make up a bunch of sauce and freeze it for future use. Some day. But not today. Or this week. Or this month.

Ravioli Lasagna ingredients

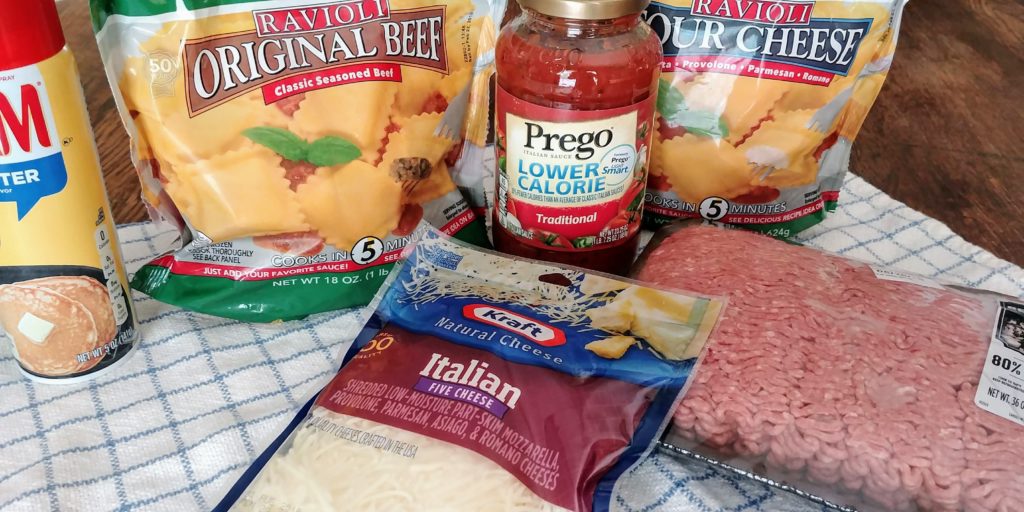
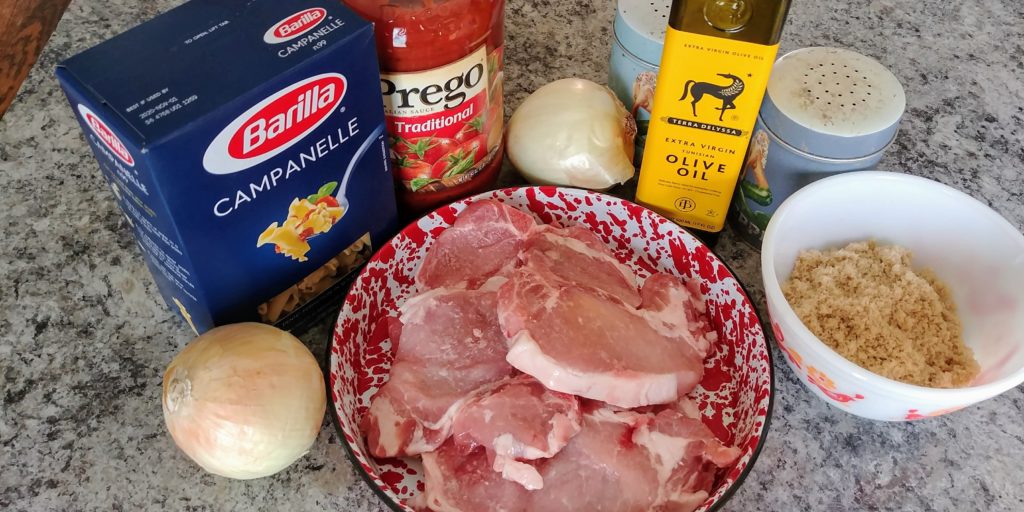
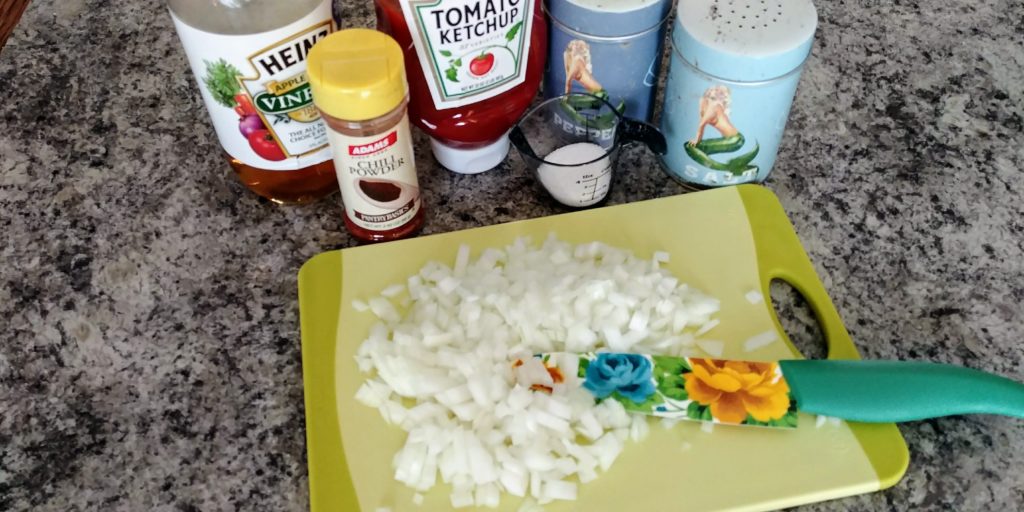
For this recipe you will need frozen ravioli.  One bag each of meat and cheese filled. There will be leftover raviolis unless you add more than 2 layers.  You can do that, but you will also need to increase the amounts of sauce and ground beef and cheese, so plan accordingly.  I only used one regular sized jar (23.25 oz.) of sauce and it worked out perfectly. If you like more sauce, then get the bigger jar and use most of it.  I used bagged shredded cheese (2 cup bag) which works out perfectly fine. If you feel the need to shred your own, then shred away. Use any type of mozzarella or Italian blend that you like or that you have in the frig already.  I used ground beef/pork blend. You can use plain ground beef, ground sausage or even ground turkey. All are delicious.

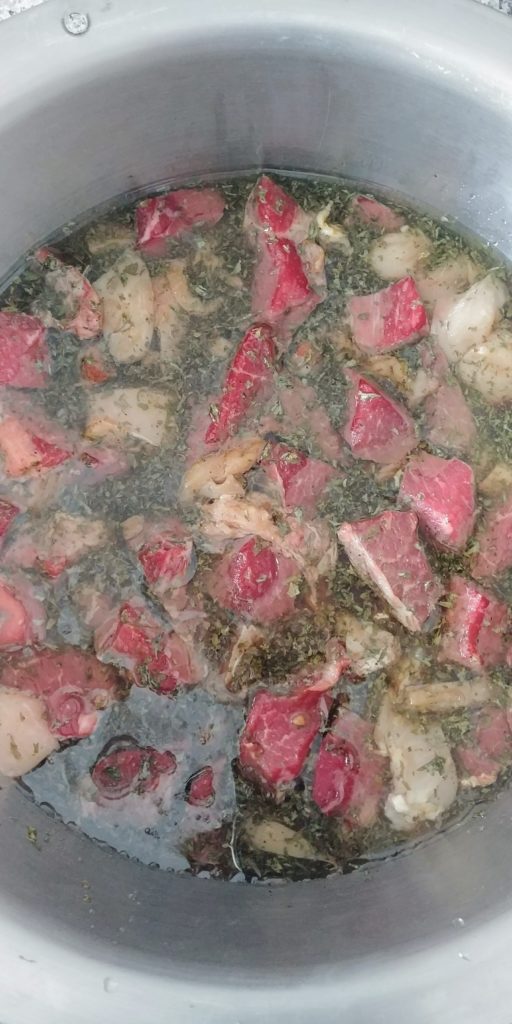
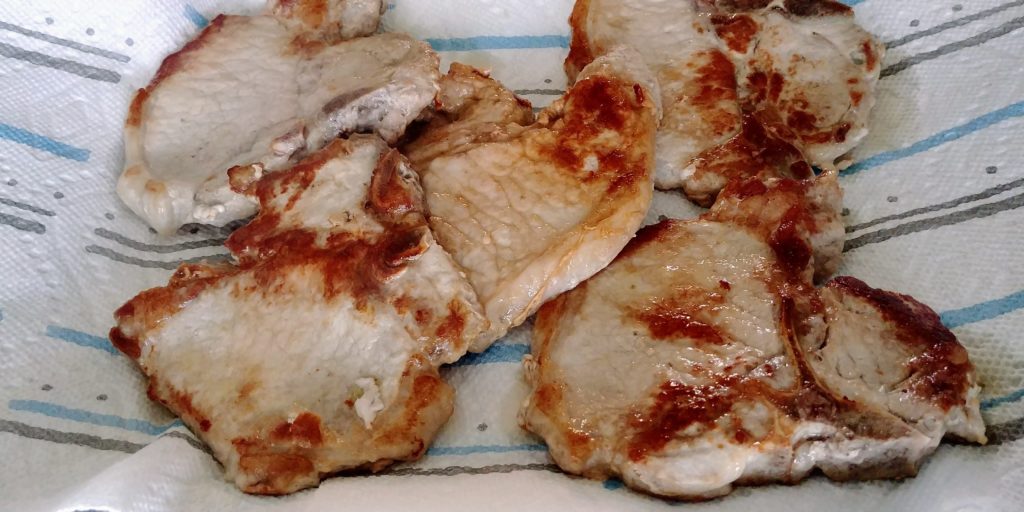
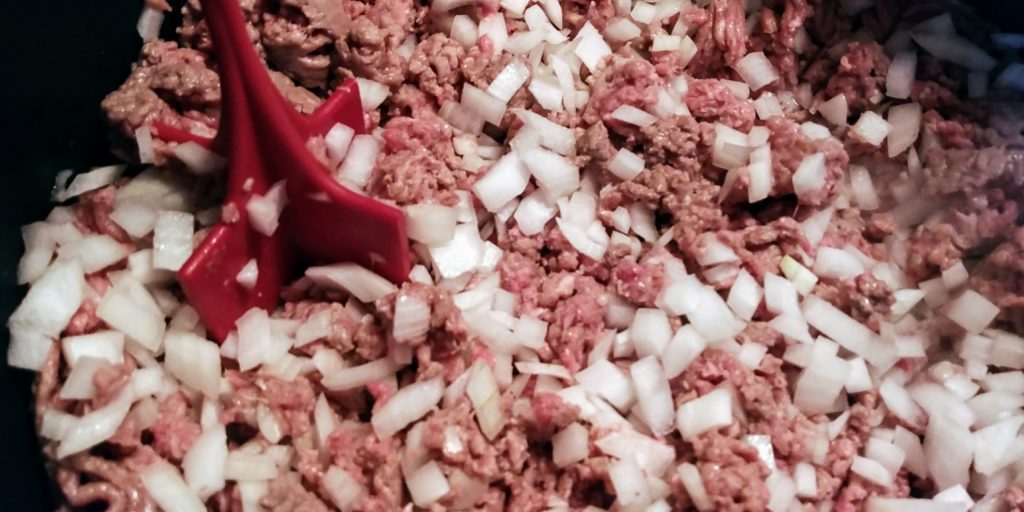
Preheat the oven to 425 degrees and spray your casserole dish or baking pan (9 X 13) with cooking spray.  Brown the ground meat and then drain.

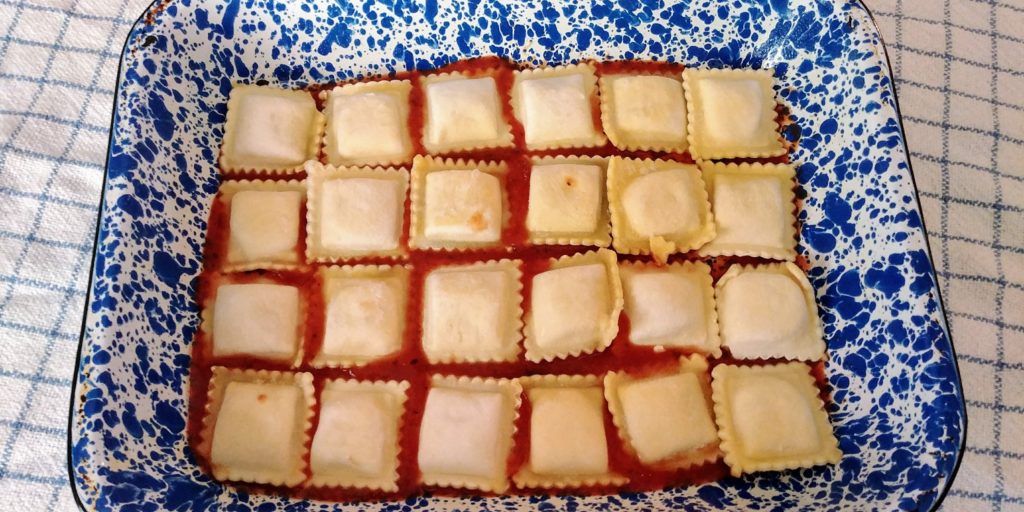
Spoon 1 cup of sauce into the bottom of the sprayed pan and spread as well as you can to the edges.

Ravioli Lasagna sauce in pan

Layer the frozen cheese ravioli on top of the sauce covering as much of the surface as possible.

Ravioli Lasagna 1st level of ravioli

(more…)

Celebration Beef and Chicken Kabobs

Celebration Beef and Chicken Kabobs


Hey Everyone!  Today I have a few things to tell you.  First of all, a little housekeeping. If you have signed up for my newsletters and have not received them in your inbox, please check your SPAM folder.  This tends to happen when you use a service connected to a hosting site like I am using. Anyway, just mark it as “NOT SPAM” please and you should be good to go.  I certainly do not want to lose contact with anyone. The more the merrier!

Secondly, I am so excited to say that my younger son, Alex, graduated from St. Louis University Law School this week!!!!!!!!  Yay! We attended a ceremony on Thursday where he received a “hood” that signifies his Juris Doctorate. It is actually more like a very large satin and velvet collar that hangs down the back of his graduation gown than a real hood but that is the name, so we went to a hooding ceremony.  

Alex graduation hood

Alex has worked so hard for this and I know that the 3 years spent in law school seemed like an eternity to him but to me, it went by in a flash. The past 25 years have gone by in a flash. He can’t be all grown up yet. I still see that same tiny boy with the huge brown eyes and hair standing on end when I look at Alex.  But, as you can see in the pictures he is now a very tall and handsome young man with big brown eyes. I am so proud of him! He will now spend the summer studying for the Missouri Bar Exam. Yikes! I plan to make lots of cookies to help him through the next few months. I feel that cookies can make most things better, don’t you?

Alex graduation cropped

So, the recipe that I am sharing today relates to Alex in a big way.  It is a recipe that he developed and allowed me to share with all of you.  You see, every year after his last final exam for the summer we make kabobs for a celebratory meal.  It kind of kicks off summer for him. He made up the marinade recipe for the beef and chicken a few years ago.  It is so easy and adds just the right amount of flavor to the meat. I find that some marinades can be overwhelming and salty.  This one is perfect!

You will need to purchase a nice beef roast.  I usually use a chuck roast that has some fat marbled through it.  Lean pieces of meat can be a bit tough when prepared this way because they do not cook very long at all.  You will also need 1 ½ – 2 pounds of chicken breasts and a package of smoked sausage of your choice. I always use the Butterball turkey smoked sausage.  I really like the mild flavor and it is slightly healthier. Although, who are we kidding? I am not into health food as a rule. Ha! The Pina Colada song just popped into my head.  “Yes, I like Pina Coladas, and getting caught in the rain.  I´m not much into health food, I am into champagne.” I wonder how long that will replay in there?

You will also need some peppers, 2 green, 1 yellow, 1 orange and 1 red.  Now, obviously, you do not have to follow that recommendation. Just make sure that you have 5 peppers total.  You will need 2 medium onions. Alex normally uses red, but I would probably choose a sweet onion, myself. You should also have 1 package of cherry tomatoes and 1 pineapple.  Some years we also add whole mushrooms. Just add whatever tickles your fancy and can withstand being skewered and grilled.

If you are using wooden skewers you will need to soak them in water for a couple of hours so that they don’t catch on fire.  This recipe makes a lot of kabobs so make sure to soak plenty.

Celebration Beef and Chicken Kabobs soaking skewers

Cube the beef and chicken anywhere from 1 – 4 hours ahead of time and place in a large bowl.  Mix all the marinade ingredients together in a large mixing cup or medium bowl and pour over the meats in the large bowl.  Cover with plastic wrap and refrigerate until you are ready to grill. You can also do this in a large Ziploc bag.

Celebration Beef and Chicken Kabobs marinating meat

About an hour before you want to eat your kabobs. Begin chopping your onions, peppers, sausage and pineapple into large chunks.  If you go too small they will fall apart when the skewer goes through.

Celebration Beef and Chicken Kabobs chopped ingredients

Heat your grill at this time too.  You can use either gas or charcoal.  We actually used both this year. Our grill happens to have both side-by-side.  We can cook all the kabobs at one time if we use charcoal and gas. Gather all your chopped ingredients, the tomatoes, the marinated meats and whatever else you wish to skewer.  Begin assembling your kabobs by skewering all your meats and veggies and fruit in varying order so that you don’t have 2 of the same item next to one another.

Celebration Beef and Chicken Kabobs Alex skewering

This is a messy business.  You can drain the marinated meats to cut down on some drips but reserve the liquid for basting.  Once you have all your kabobs assembled brush them with the reserved liquid.

Celebration Beef and Chicken Kabobs assembled uncooked

Place the kabobs on your heated grill and cook, turning once, for 10 to 15 minutes or until the veggies are tender and the chicken is no longer pink in the middle.

Celebration Beef and Chicken Kabobs on grill

Remove from the grill and serve.  The kabobs have such a wonderful mixture of flavors and textures.  Everyone is sure to enjoy this dish and it is such a fun meal. Break out the patio furniture and eat outside for a real treat.

Celebration Beef and Chicken Kabobs

May 20, 2018
: Easy

These kabobs have such a wonderful mixture of flavors and textures. Everyone is sure to enjoy this dish and it is such a fun meal. Break out the patio furniture and eat outside for a real treat.

By:

Ingredients
  • For the kabobs:
  • 3 lbs. beef roast
  • 1 1/2 lbs. chicken breasts
  • 5 bell peppers, a mixture of green, yellow, orange and red
  • 2 red onions
  • 1 lb. smoked sausage
  • 1 whole pineapple
  • 1 package of cherry or grape tomatoes
  • For the marinade:
  • 1 1/2 cup canola oil (or vegetable oil)
  • 3/4 cup soy sauce (low sodium is preferable)
  • 1/4 cup Worcestershire sauce
  • 2 Tbs. parsley flakes
  • 1 tsp. black pepper
  • 1/2 cup red or white wine vinegar
  • 1 - 2 Tbs. minced garlic (depending how garlicky you like things)
  • 1/3 cup teriyaki sauce
  • 1/2 cup honey
Directions
  • Step 1 Cube the beef and chicken 1 – 4 hours ahead of time and place in a large bowl.
  • Step 2 Mix all the marinade ingredients together in a large mixing cup or medium bowl and pour over the meats in the large bowl. Cover with plastic wrap and refrigerate until you are ready to grill. You can also do this in a large Ziploc bag.
  • Step 3 About an hour before you want to eat your kabobs preheat your grill.
  • Step 4 Then, begin chopping your onions, peppers, sausage and pineapple into large chunks.
  • Step 5 Gather all your chopped ingredients, the tomatoes, the marinated meats and whatever else you wish to skewer. Begin assembling your kabobs by skewering all your meats and veggies and fruit in varying order so that you don’t have 2 of the same items next to one another.
  • Step 6 Once you have all your kabobs assembled, brush them with the reserved liquid.
  • Step 7 Place the kabobs on your heated grill and cook, turning once, for 10 to 15 minutes or until the veggies are tender and the chicken is no longer pink in the middle.
  • Step 8 Remove from the grill and serve.


Saucy Pork Chops

Saucy Pork Chops

I mentioned once before that when I decided to start this blog I made a list of recipes that I wanted to share with everyone.  These recipes are personal or family favorites. Some have been handed down from family and friends. Others will be new recipes that I stumble upon and want to pass along because they are soooo good.  I might also become confident enough to share the recipes that I develop myself. Who knows?!

The dish that I want to share today is a favorite of my sons. I found the basic recipe in a cookbook years ago and have made a few revisions to suit our tastes and the appetites of growing boys.  I have also developed a few tricks for the cooking method that I will share.

I am going to call these Saucy Pork Chops.  Whenever I ask my boys if they want this particular dish I say something like, “You know, those pork chops with the tomato sauce and onions?”.  They know exactly what I am talking about and immediately agree. This is an almost one pot meal. Technically it is 2 pots because you must cook the pasta separately.  Well, then you have the bowl to mix the sauce and a measuring cup and a cutting board and knife. That is my experience with one pot meals. They are never really one pot.  That would be impossible for me. I tend to make a lot of messes when I cook. Oh well, that is what dishrags are for. So, besides the very few dirty dishes I think that you will really enjoy this hearty and comforting meal.  The pork chops turn out tender and flavorful and the sweet onions pair very well with the tomato sauce. The dish is tangy and sweet with loads of flavor and texture.

Saucy Pork Chop Dinner Ingredients

I usually use a thicker pork chop for this dish.  I have used bone-in and boneless. Either way they will be really good as long as you are careful not to overcook them.  Add 2 Tablespoons of the olive oil to a large skillet that has a lid. You are going to use this skillet for the entire dish except for the pasta, so it needs to be large enough and deep enough and have a lid for simmering.  Anyway, heat the olive oil over medium heat for a minute or two and then add your pork chops. Cook until just browned, flip and then do the same on the other side. The chops are going to simmer in the sauce for awhile and so will continue to cook.  It is ok if they are not completely done at this point. Remove them from the pan to drain. Pour off most of the leftover oil and discard.

Saucy Pork Chop Dinner Browned Chops

While the chops are cooking slice the onions into ¼ inch thick rings.  Separate all the rings and set aside.

Saucy Pork Chop Dinner Sliced Onions

Add a few of the onion rings to the bottom of your skillet.  This adds a protective layer under the pork chops which reduces the chance of scorching.  Put the pork chops on top of those rings. Layer the remaining onion rings over the top of the chops.  Sprinkle with salt and pepper to taste.

(more…)

Steak-Seasoned Sliders

Steak-Seasoned Sliders

Hi Everyone!  Well, it is Sunday evening and still cold here.  Yep, in fact, it is snowing right now…again.  Great big, fat flakes are coming down. Old Man Winter just will not take a hike.  Everybody I know is aching to get outdoors and start gardening or longing to open the windows and let the fresh air inside.  I can’t wait for that. I love the smell of the spring flowers and grass and I love to hear the frogs chirping. But for now, we can only wait it out.  My dad always says, “We’ll take what they give us.”

This Sunday we decided to have a big noon meal rather than evening meal so that our sons could get on the road back to their own homes before the snow began.  The older one, Cody, did just that but the younger one, Alex, decided to hang out with some friends for a while. But, they were both gone from my house by mid-afternoon and because we had already eaten a big fried chicken meal at noon I thought that the husband and I would just have sandwiches for supper.  Since it is still so stinking cold I decided to have some baked sandwiches. I really like sandwiches of all kinds. I really, really like sliders of all kinds. I am absolutely sure that there are more slider recipes coming your way from me in the near future. These particular sliders are my variation on the baked version that begin with dinner rolls and have a butter sauce poured over the top.  I have always enjoyed seeing these types of sliders show up at potlucks. I took my favorite parts of all the types that I had eaten and added my own spice preference to make these ooey-gooey morsels.

Steak-Seasoned Sliders are super easy.  They come together in about 15 minutes and then bake for 25 to 30 minutes.  You can also make them up the night or several hours ahead of time and store them covered in the refrigerator.  Then just add the sauce and pop them in the oven when you need them.  The leftovers (if there are any) keep very well in an airtight container or wrapped in foil in the frig. I plan on taking a container to Cody tomorrow since he missed out tonight.  He can have them for a lunch this week.

To begin, preheat your oven to 375 degrees and spray a 9 X 13 pan with cooking spray.  If you have a slightly larger pan use it. I do not and use my normal casserole pan and consequently can only fit 20 of the rolls in my dish.  If you have a pan that will hold all of them, go for it. Cut your dinner rolls in half crossways as you can see in my picture.

I almost always use the savory butter flavor of the Hawaiian rolls because the sweet ones can overwhelm the flavor of the meat and cheese sometimes.  You can certainly use whichever you prefer. Place the bottoms of the rolls in your pan so that they are right next to one another. They may be pretty well squished up together.  That’s ok, it won’t hurt a thing.

Take your roast beef and add little piles (usually 1 slice) of beef on each bun bottom.  Use all the beef, distributing it as evenly as possible over the rolls.

Next, add the layer of turkey in the same manner.  The package of turkey that I had was 1 pound and I didn’t need quite all of it.

(more…)

Wally Burgers

Wally Burgers

Hi Everyone!  How is the “Spring” weather in your neck of the woods?  In central Illinois, it stinks. For crying out loud, we had measurable snow on Easter.  What…the…heck? Mother Nature needs to turn up the thermostat because I am so over this cold weather. I want warmth and sunlight asap! And everybody is so depressed and crabby…including me. So, to combat these cold weather doldrums I have been trying to think about summer sensations and memories of warmer days.  One of those memories brought to mind the recipe that I am going to share with you today. It is for Wally Burgers. These are very similar to sloppy joes and I have seen them referred to as California burgers. This is a super easy recipe that you can have on the table in about 45 minutes.  It keeps in the frig for about a week and freezes well. The meat is sweet with a little bit of tang and delicious.

Why do these remind me of summer, you ask?  Well, I will tell you. The next small town over from the small town that I claim as my own is also the county seat.  The county courthouse is situated on the town square there and my dad worked as the County Treasurer in that courthouse for many, many, many years.  The town square is surrounded by lots of small businesses and one of these was a window-service-only dairy bar run by a man named Wallace (nicknamed Wally).  He served Wally Burgers and Dad loved them. Dad would frequently make the trip across the street during the warmer weather to get a sandwich for his lunch. Now, this eatery was only open during the warm months back in the day and I remember going there sometimes after swimming or music lessons to get an ice cream cone.  Since there was no seating indoors we would sit on the sun-warmed concrete of the curb to eat or get back in the car with the windows down for the ride home. When this memory came to mind so did the idea to share this recipe. My sister, Brenda, also works in the courthouse and many years ago she was somehow able to get the recipe from someone.  I thought that she said it was from the Wallace family but she can’t remember now.  Brenda shared it with me and I will occasionally whip up Wally Burgers and take some over to Dad to enjoy.  I’m not sure if it is authentic but it is close enough.  As long as it tastes great I don’t mind.  

I much prefer to make these instead of using the canned sloppy joe sauce because you can adjust the sweetness and tartness to your liking.  It is a forgiving recipe in that you can use lower quality ground beef and it will still turn out great.

Wally Burgers Ingredients

To start with, as always, I prefer to use budget burger, but you can use high-quality ground beef as well.  There will just be a bit of a change in the method. More on that shortly. Finely dice up your onion and add it and the burger to a large stockpot or large, deep skillet.  Yep, there is that mashy tool again. I promise that I will figure out where to get those and let you know.

Wall Burgers Beef and Onions Uncooked

(more…)

Mom’s Meatloaf

Mom’s Meatloaf

I have mentioned before that I come from a fairly large family.  I have 4 siblings. 3 sisters and 1 brother. All older than me. Ha!  I love rubbing that in. I have still have my mom and dad. However, my mom is in a nursing home now.  You will hear me refer to Mom and how she used to do this is that or what she used to cook. I don’t want anyone to get the impression that she is no longer with us.  She just doesn’t cook anymore. But, believe me, she is always in the kitchen with us in spirit. Food and cooking was a big part of her life. She had a lot of mouths to feed at home.

My Mom
My Mom

Besides that, she was a cook our local elementary school for years and years.  She took the job over from her own mom when Grandma fell ill.

Grandma Cannedy
Grandma Cannedy

She was there behind that lunch counter for me from my kindergarten year until I left the elementary for junior high and then she was there for her grandkids as they came through that very same school.  The other lunch ladies were her close friends and she enjoyed her job so much. Those ladies shared recipes with one another and from time to time I will refer to a recipe that has that origin. Now, I do have to admit that Mom didn’t teach me much in the kitchen.  At least not formal teaching. I did watch and I caught on to techniques and hints. I guess that after cooking all day she just wanted to get dinner on the table and didn’t have it in her to run a cooking school too. I don’t blame her. I learned anyway and I use many of her recipes today.  I don’t even attempt to improve upon them. They are just too good as they are. So, today I want to give you Mom’s recipe for meatloaf. Big deal, you say? Well, it is. Everyone should know how to make a good meatloaf. It will save your sanity to have this kind of go-to meal in your recipe box.  I think that meatloaf gets a bad rap too. It is sometimes considered a crappy diner meal. My son’s friends could not understand why the prospect of meatloaf for supper was cause for excitement. Ok, so maybe not excitement. Maybe, pleasant anticipation. I mean, I would have been seriously concerned if two young boys got excited about meatloaf.  This dish makes a nice, comforting meal. You can make the loaves up ahead of time and pop them in the oven when you get home and you probably have the ingredients in your kitchen.

(more…)

Corned Beef and Onion Grilled Cheese

Corned Beef and Onion Grilled Cheese

Hey everyone!  Happy St. Patrick’s day (belated)!  Are you one of those people who likes to celebrate every holiday with themed food?  I am! I used to say that I was doing it for my kids but let’s be honest here; it’s me….all me.  You see, my dream job is to be a party planner. I love, love, love to come up with party themes and create the perfect atmosphere…right down the food.  So, holidays are a natural outlet for that kind of behavior. You see recipes that are designed around the holidays and the stores are full of the corresponding paraphanalia like table decorations and napkins and plates.  St. Patrick’s day has always been a kind of fail for me. My husband usually does the cooking of corned beef and cabbage from a recipe that he found long ago and I do make the traditional Irish Soda Bread. Some years I will make green cake with green icing to take to work.  But I feel that I don’t put enough effort into that holiday which is really crazy because I am supposedly from Irish heritage. This year I decided to add a lunch dish that was St. Patty’s-centric. A week or so ago I purchased a nice corned beef and let it cook along in the crockpot with a bit of water and the included spices all night long on low.  Then the following day for lunch I sliced that bad boy into about 1 inch slices and used it as a filling in a grilled cheese sandwich. I also caramelized some sweet onions in beer (Guinness, of course) and used a couple of kinds of creamy, white cheese. I layered all of these ingredients on some beautiful marbled rye bread and grilled it up in melted butter.  My, Oh, My! These were delicious. My boys said so and I believe everything they say…ok, maybe not but I believe them about food. They can be tough critics.

Now to start with, you have to have a nice cooked corned beef.  I bought this one this one at my local Walmart and cooked it with a little water and the included spice packet all night in my slow cooker but you can bake it if you prefer.  Once it was cooked I set the crockpot on warm and set it aside while I prepared the rest of the ingredients.

Corned Beef and Onion Grilled Cheese Sandwich – Corned Beef Cooked

Shred the Jarlsberg or Fontina cheese and set aside.  I purchased my Havarti pre-sliced but if you don’t then now would be the time to slice it up.  

Thinly slice up 2 medium sweet or yellow onions .  Melt 4 tablespoons (½ cup of butter) in a large skillet or pot.  Add the onion slices and sprinkle 1 Tablespoon of sugar over the onions.  Season with ½ teaspoon of salt and ¼ teaspoon of pepper.

Corned Beef and Onion Grilled Cheese Sandwich – Onions in Butter

(more…)

Hamburger Horseshoe

Hamburger Horseshoe


I agonized over what my first every posts would be for this blog.  I mean I waited for so long to get this going and everything had to be perfect.  I was quite frankly scared to death. I work all day every day with computers and technology and yet the thought of building a website was terrifying (enter my constant self-doubt).  I put every excuse that I could think of in my own way. Finally, finally, finally I whipped my big girl panties out of the courage drawer and pulled them clean up to my neck. And now, here we are.  New friends and old friends hanging out in my kitchen, eating, drinking and laughing.

So, now on to the food!  I live in central Illinois and around my neck of the woods we have a concoction called a Horseshoe.  A Horseshoe is one of my all-time favorite dishes. I frequently ask for this as my birthday dinner. My guys will willingly make these for me.  My younger son, Alex, (he’s 25 but still referred to as the younger) loves to cook too. Actually, both of my boys can cook but Alex is usually the one who helps out with the Horseshoe.  I admit that this dish is difficult with only one person but if you have a little help it is a cinch. This cheesy pile of heaven was invented in Springfield, Illinois and the recipe evolved through the years.  There are soooooo many variations on this dish. The basic recipe is toast, burger patties and french fries smothered in cheese sauce. I have seen (and eaten) versions with fish and pork tenderloins as substitutes for the burger patties…mmmmm.  The biggest difference in the versions of Horseshoes is the cheese sauce. The original version had a homemade cheese sauce that was more of a cheese white sauce if the recipes that I have seen are accurate. Some people like a basic yellow cheese sauce like you would use on nachos.  I happen to prefer the lighter sauce with several kinds of cheese and does not resemble anything that comes from a giant can at the basketball game concession stand. Today, Alex, and I want to make the traditional hamburger Horseshoe with you. And, just so you know, this is technically a ponyshoe because it only has one burger.  Horseshoes normally have two pieces of toast each topped with a burger or whatever type of meat that you are using.

Horseshoe Closeup
Horseshoe Closeup


This dish has a lot of components so it is best to get all of your ingredients together and do any prep work ahead of time.  Shred and cube your cheeses and set aside. You can use any types of cheese that you prefer but I recommend that you use velveeta mixed with other types.  This gives you a nice melty base to mix with the harder cheeses. Make your ground beef patties and set those aside. Start heating your cooking oil for the fries.  It takes a bit of time to get up to the right temperature for frying. Start with a hamburger patty fried in a skillet or on a griddle. I prefer to use a beef and pork mixture for my burgers.  I get this brand at Walmart.  It is less expensive and I believe produces a much juicier burger.  Alternatively, I might buy the budget burger at my local grocery store.  Make your burger patties about ¼ pound or a bit smaller if you prefer. For Horseshoes I think that it is best to make your burgers a bit flatter than maybe you would for a regular burger served on a bun.  Fry your burgers until they are no longer pink in the middle turning once or twice.

(more…)